11
Revision date: 12.23.15
5
Install Heat Tubing for the Float Bed
Install Float Bed Heat Tubing
In order to maintain a constant water temperature, in many climates it is necessary to heat water. Your float bed includes tubing; however, additional purchase
is required for the remainder of components needed.
Contact your sales representative for additional details.
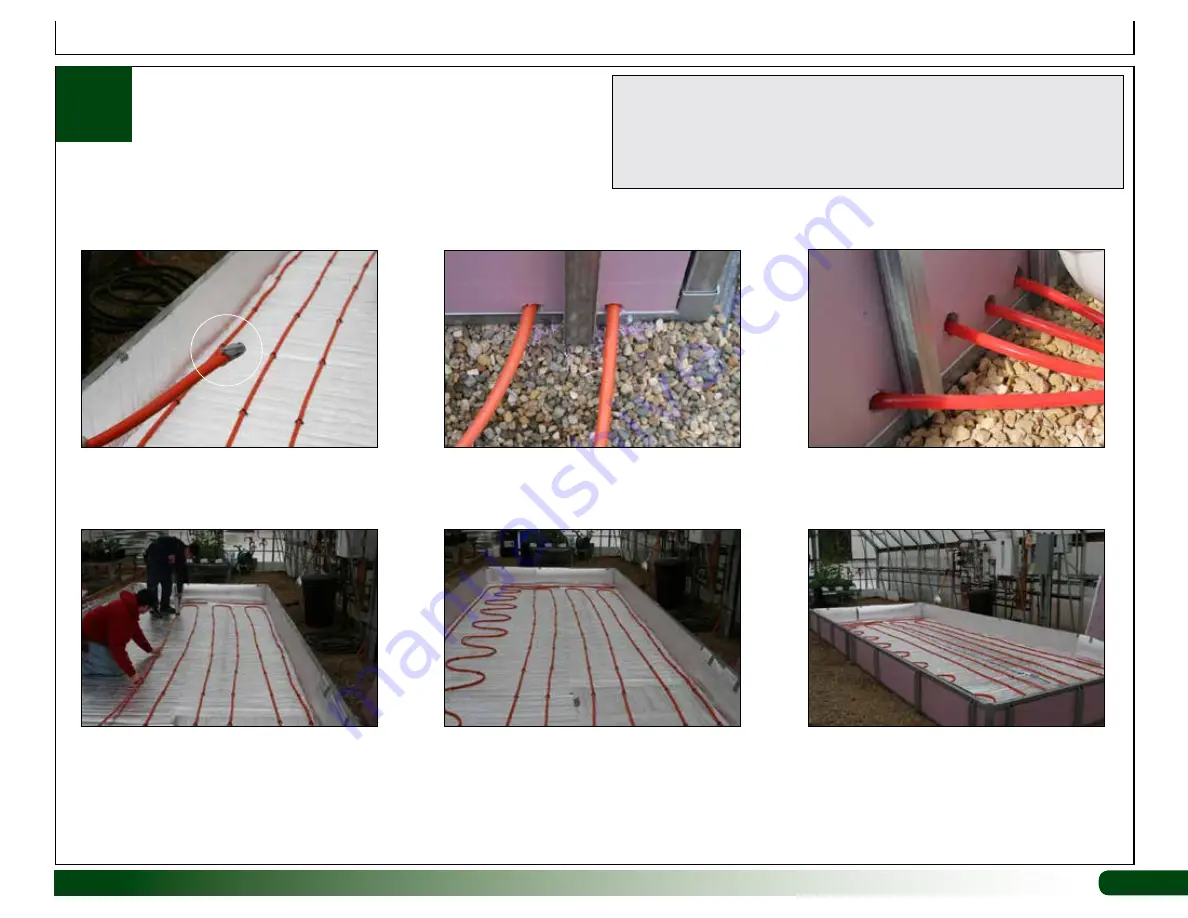
Use photos that follow to install tubing.
1. Tape both ends of tubes to prevent
dirt and debris from entering during
installation.
3. Determine a pattern and install tubing
in evenly spaced rows throughout
float bed. Install outside runs close to
frame edge.
Allow approximately 10"
between the individual runs of tubing.
2. Determine where you want tubes to
enter and exit float bed and create holes
in rigid board and foil.
ATTENTION:
Photos show using
special clips to hold tubing. These are
not supplied. Use the supplied duct tape
and tape tubing to the foil. Once liner is
installed and filled with water, tubing will
not move.
Do not use metal wire or
staples to secure tube.
NOTE:
Allow a few feet of tube to extend
beyond frame to connect to heating unit.
(Additional purchase required for heating
unit and parts.)
4. After installing tube loops, inspect area
and remove any dirt and debris that
could damage liner material.
5. Continue with the installation of the float
bed liner.
ATTENTION:
Regardless of float bed size, follow these general guidelines:
• Maximum length of any tube loop should not exceed 300';
• There should be at least two (2) loops per float bed;
• Loops must be of equal length.
If needed, consult the services of a qualified contractor familiar with
the installation of similar heating systems.


