21
CHICK-INN
Revision date: 12.19.07
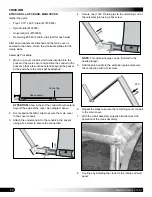
9. Beginning at one end of the main cover, determine the
height of the roll-up side and remove the hem area.
For example, if you want a 48" sidewall opening when
the sidewall is rolled up, remove 48" of the main cover
hem.
Maximum height of roll-up side is 48"-54".
MAIN COVER INSTALLATION (CONTINUED)
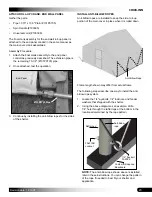
ATTENTION:
Do not cut the strap contained within the
main cover. When properly cut, the hem is removed to
just above the installed ratchet.
DO NOT pull the strap from the bonnet pocket.
10. Repeat the steps to remove the hem from the
remaining corners of the main cover as previously
described.
11. With additional help, snug the cover into position by
simultaneously pulling on the bonnet straps to seat the
cover on the frame and over the end rafters.
12. Remove the excess strap. See the note that follows
before you cut the strap.
ATTENTION:
The length of strap depends on where
you attached the ratchets. Verify that the cover is in
position before you cut the strap to length. Use the
ratchets as guides when cutting the strap to length.
13. Thread the straps through the center slots in the
ratchets and slightly tighten the ratchets to remove
slack.
14. Verify that the cover is positioned as desired and
tighten the ratchets.
NOTE:
If the strap length is too long and binds in the
ratchet, loosen the ratchet, shorten the strap, and
retighten the ratchet as needed.
15. After tightening the ends of the main cover, take half
of the CC6213 fabric clips that remain from the earlier
procedure and Tek screws and move to the inside of
the shelter. (See chart on Page 14, Step 1, if needed.)
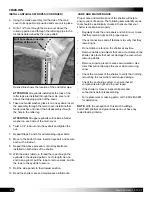
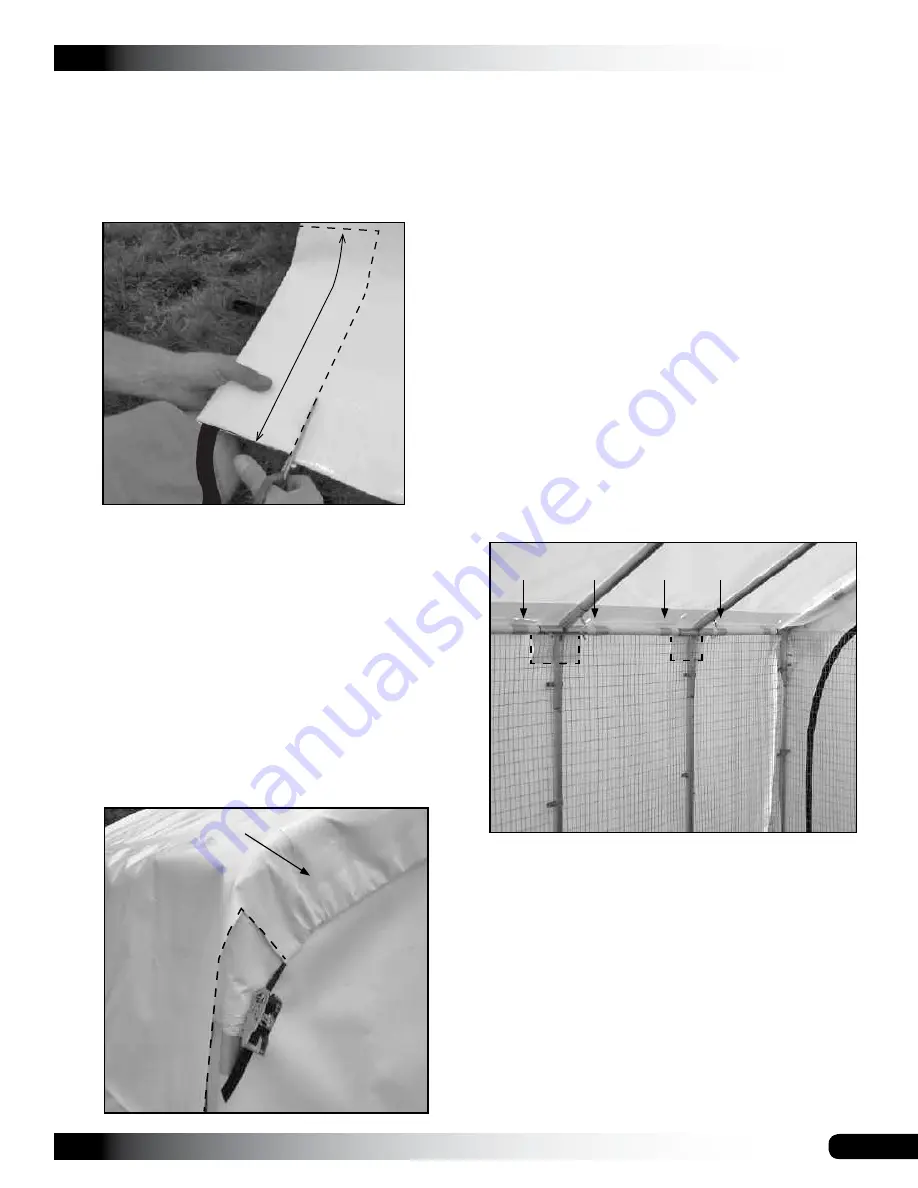
16. Using scissors or a utility knife,
trim the main cover flap
around the 4-way connectors along each side of the
frame.
Dashed lines below show the flap and where the cuts
were made around the 4-way couplers.
Photo shows the inside of the shelter. Frame shown
may differ in length. Positions of clips will vary.
NOTE:
Do not to cut through the main cover when
cutting the flap.
17.
Fold the flap, which runs between each of the rafters,
over the purlin pipe and secure the flap to the pipe
using fabric clips and Tek screws. See the arrows in the
previous photo. Evenly space the clips as needed.
18.
Repeat the steps to secure the remaining side flap of
the main cover to the side purlin pipes.
19. With the main cover secured at the ends and along the
sides, install the crank assemblies for the roll-up sides
of the main cover and for the end panel.
Fabric Clips
Fabric Clips
Main Cover Bonnet
Main Cover
End Panel
Dashed line
shows where
the cut was
made to remove
the cover hem.
Side Roll-up
panel of the
Main Cover


