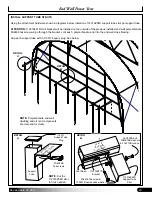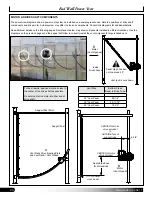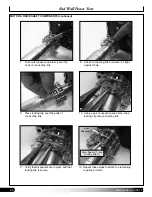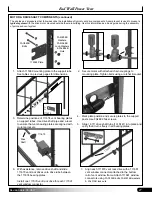
15
Revision date: 03.08.17
PREPARE AND INSTALL VENT PANELS
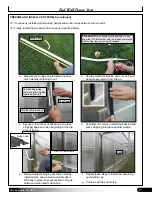
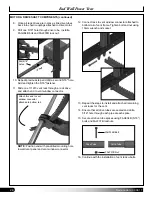
1. Read information on protective
film. Measure and cut panel to
size.
4. Wrap tape over sides. Repeat at
other end of the panel to cover
open cells.
2. Mark the UV-protected side with
tape. Remove all film from the
cut panel.
"No Drip" side of the
polycarbonate to be installed to the
inside of greenhouse.
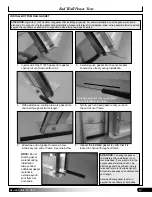
5. Beginning at one end, center
panel between mullions.
3. Install vent tape over open cells.
6. Slide upper end of panel into top
rail channel.
7. Push into top rail until bottom of
panel clears bottom rail.
8. Work panel down and center over
drain channel in bottom rail.
9. Check panel position. Adjust as
needed to center panel between
mullions.
Tape to mark
UV-protected
surface.
DE8002
Foil Tape
(TOP)
or
104774
Polycarbonate Tape
(BOTTOM)
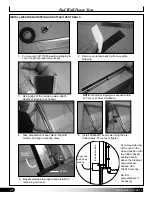
PANEL PREPARATION:
Panels for the vent are cut from the panels used for the end wall cladding. Measure the opening of the vent frame and cut a panel
to cover the opening. Cut the panel approximately 1/4"
smaller
than the actual size of the frame opening to allow for expansion.
REMEMBER:
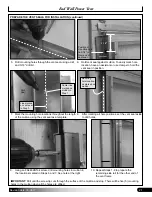
Panel slides into the top rail channel and sits tight to the top of the bottom rail when properly cut and installed.
ATTENTION:
Install panels after attaching vent frame to the building.
Install panels with cells
running vertically.
End Wall Power Vent


