103
Revision date: 12.02.16
Black-out System Installation
%/$&.2873$1(/,167$//$7,21
1. Verify that the leading edges are still in the "closed" position, with
the rubber gasket against the keder sealing edges of the header
SUR¿OHV
2. Prepare a blackout panel roll (QSH115338Z47) to be pulled into
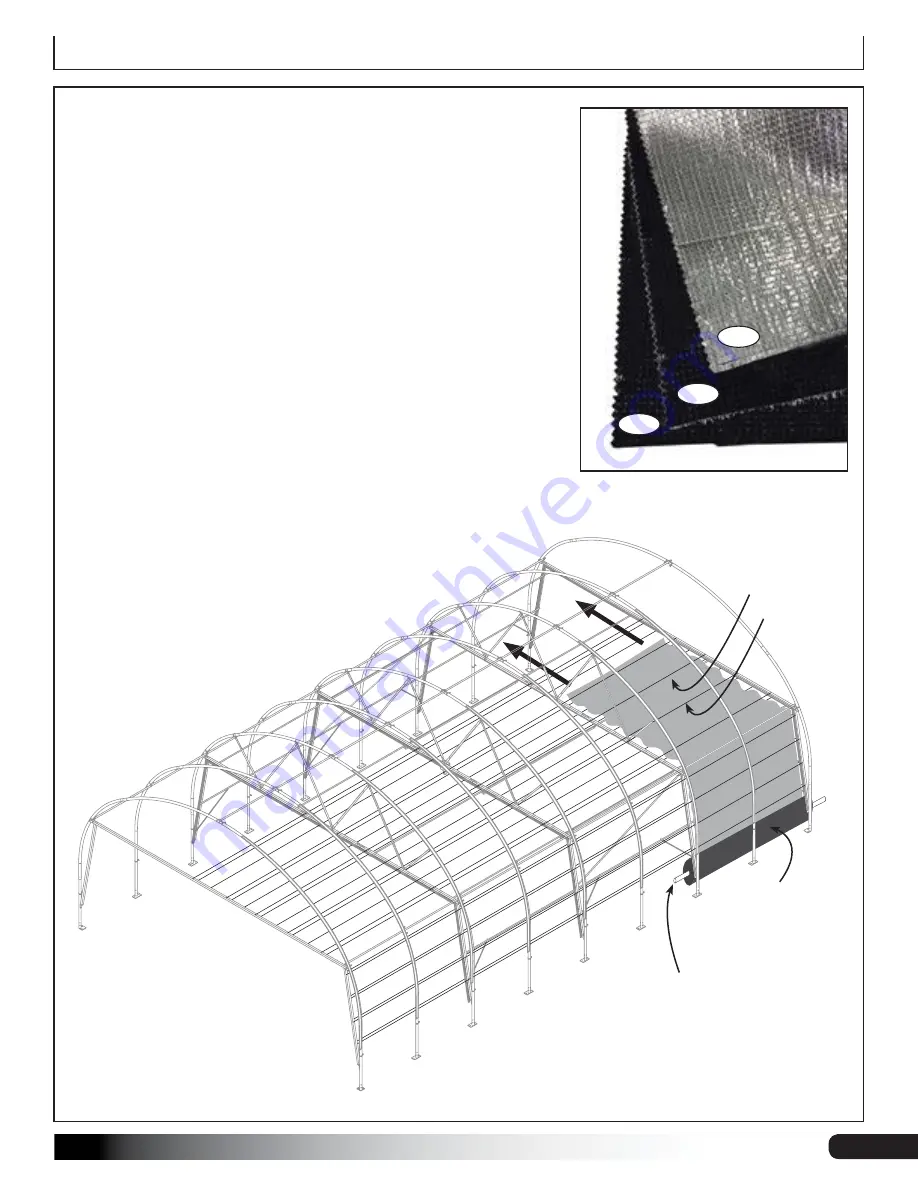
place. See diagram below. Note that the material consists of three
individual layers--two black and one silver--that are independent
from one another. Take care to keep all three panels together as one
entity.
IMPORTANT:
When preparing to pull into place, verify that
the BLACK side of the material will be TO THE INSIDE of the
greenhouse when installed, and that the silver side will face towards
the outside.
3. With assitance, and/or a lift machine, guide the 13' side edge of
WKHEODFNRXWSDQHOXS%(7:((1WKHWRSDQGERWWRPPRQR¿ODPHQW
wires. Panel will go up one side wall, over top corner cable, across
the horizontal header, over top the other corner cable, and down the
other side wall.
4. Verify that the panel is centered, draping evenly on either side.
QSH115338Z47
Black-Out Panel
HELPFUL HINT:
Insert section of round
tubing through the core of the roll-up
panel, and secure the ends of the tube
up to allow panel to roll off the core and
feed up into position.
*some components removed
from diagram for clarity
IMPORTANT:
Black-out panel must
be installed BETWEEN the top and
bottom monofilament wires
ATTENTION:
Black side of material
is to be facing inward, and the
silver side is to be facing outward.
TOP
monofilament
wires
Black
Black
Silver


