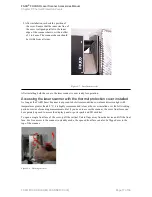
a. The cover is removed by pressing down on one side of the cover (indicated by
!
), which causes the
other side to pop up.
b. Grasp the side that is now elevated from both sides and pull the cover completely out of the bay.
c. Retain the protective cover.
Figure 2-2 : Accessory bay for the status indicator with covers
4. Insert the status indicator into the accessory bay. The correct bay is colored red.
Figure 2-3 : Accessory bay for the status indicator with covers removed
NOTICE:
Do not insert the status indicator into the accessory bay on the left side of the scanner. Forcing
the status indicator into the black bay may damage either the status indicator, the scanner, or
both.
The status indicator is now ready for use. Switch on the scanner and use it as you normally would. The
color and blink codes are identical to the scanner’s LED power on/off button. Remember to remove the
status indicator before placing the scanner in its carrying case.
LED state
Scanner state
Off
Scanner off
Blue
Scanner ready to scan
Blue flashing
Scan operation with laser off
Blue flashing quickly
Scanner booting or shutting down
FARO
®
FOCUS® Laser Scanner Accessories Manual
Chapter 2: Status Indicator
FARO FOCUS® LASER SCANNER (00.00)
Page 10 of 36


