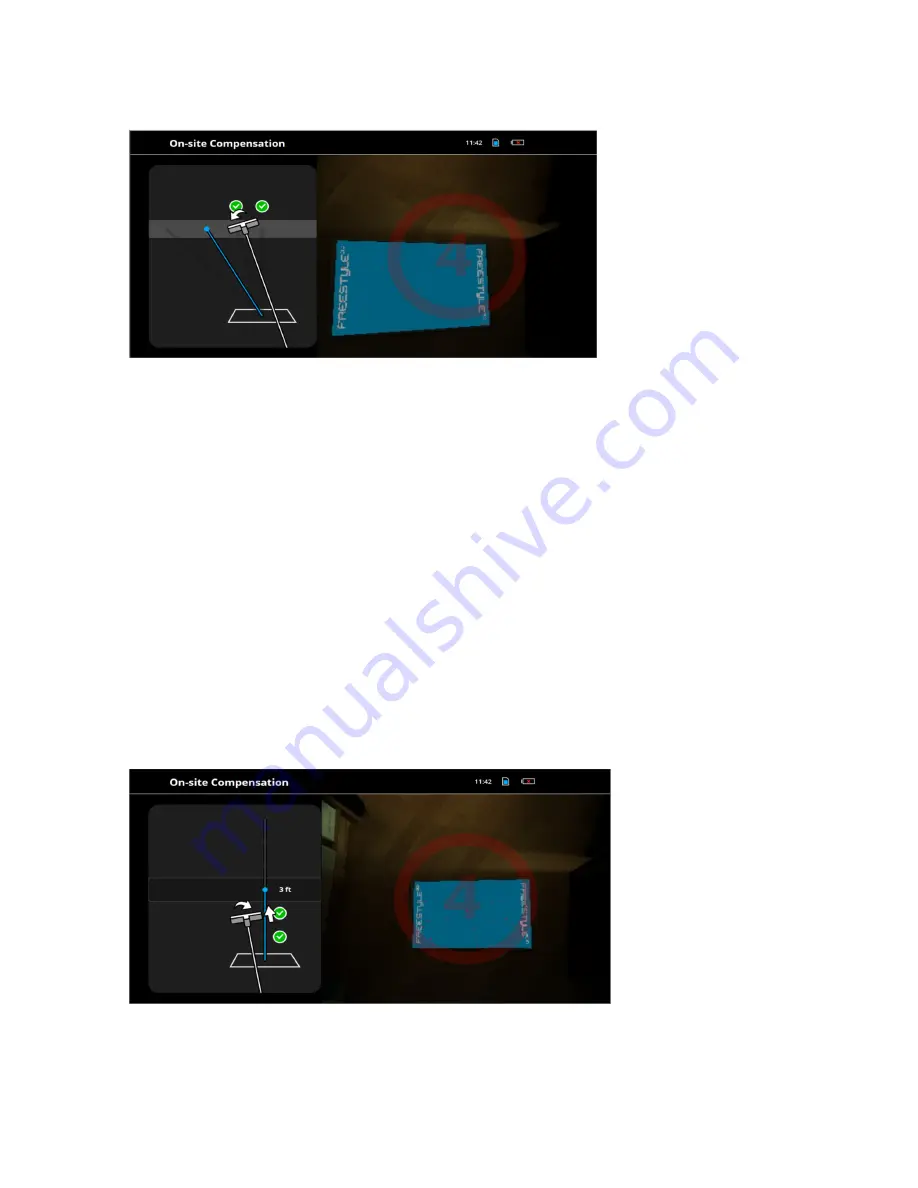
Figure 10-3 Rotational compensation Video View
10. Hold the handset above the reference plate. When the handset starts scanning the plate, an animation
on screen will show you the appropriate position of the handset in relation to the reference plate.
11. Move the handset so that it is scanning at the angle shown by the blue line, and from the height
represented by the blue dot. A black band across the background of the animation will turn gray
when you have the proper height. Note that the white line illustrating the scanning angle does not
have to match up with the blue line--it only needs to be parallel to it as long as the scanner is still
scanning the reference plate. A white arrow may appear to tell you the direction that you need to
rotate the handset to get the correct angle. When the position of the handset is correct, the red
4
on
the right side of the screen will turn green and quickly count down to 0. If the handset remains in the
correct position during the countdown, then green a circle with a check mark will appear at the first
compensation position, and the second position will appear.
12. Repeat the step above for all compensation positions.
13. When the rotational compensation is complete, the vertical compensation begins.
Vertical Compensation
14. A vertical bar with a drawing of the handset is shown at the left, together with a vertical line and a
measurement showing an approximate height from the reference plate.
Figure 10-4 Video View with cone and Freestyle 2 icon bar
15. Hold the handset directly and horizontally over the reference plate. A black band across the
background of the animation will turn gray when you have the proper height. Note that the white line
FARO Freestyle 2 User Manual
Chapter 10: Maintenance
FARO Freestyle 2 (August 2020)
Page 44 of 58


