En
FARO Photon Laser Scanner – User’s Manual
15/68
Revised: April 10, 2008
© 2008 FARO Scanner Production GmbH
•
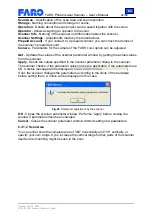
When the PC is ready, the PC LED will remain green, while the
Motor LED will be flashing in green till the initial parameter transfer
is finished.
•
When the base unit and the mirror unit are ready, the Motor LED will stop
flashing and remain green.
4.2 Installing and using the software
4.2.1 Step 6 – Software installation
If FARO Record is not already installed on your PC, insert the CD supplied with the
scanner and follow the installation instructions on the screen.
4.2.2 Step 7 – Establishing an Ethernet connection to the scanner
Run FARO Record and click on the symbol to select your scanner by a left-click on
the scanner’s name. Open the context menu with a right-click to connect to the scanner.
The status icon will change to “Connected” after the connection has been established
and the “start scan”-symbol ( ) will become activated ( ).
Fig.14
FARO Record – scanner selection
4.2.2.1 Connection problems
A connection can only established if the scanner and the operating PC have compatible
IP addresses and compatible subnet masks. If they don't, this is indicated by the Net
incompatibility icon . You can check the parameters on the operating PC using the
command
ipconfig
in the windows command prompt.
Fig.15
Checking IP address with ipconfig
If the operating PC has no valid IP address (like in Fig.15) you might have to assign a
static IP address to the PC. If the operating PC is part of a LAN, ask your system
administration to do this. Else you can configure the operating PC's IP address in
Windows'
Control Panel
→
Network Connections
→
Local Network Connection (LAN)


