28
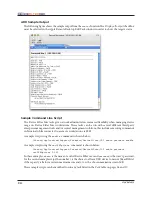
Examples:
1.
status
task -
/Library/Application\ Support/Faronics/DeviceFilter/CLI “admin”
“password” status
Where
/Library/Application\ Support/Faronics/DeviceFilter/CLI
is the installation
location of the program,
admin
is the configured user name,
password
is the configured
password, and
status
is the desired command.
2.
setUSBOptions
task -
/Library/Application\ Support/Faronics/DeviceFilter/CLI
“admin” “password” setUSBOptions 0-3 size
Where
/Library/Application\ Support/Faronics/DeviceFilter/CLI
is the installation
location of the program,
admin
is the configured user name,
password
is the configured
password,
setUSBOptions
is the desired command,
0-3
(corresponding to the desired option
found on the
USB
tab of the preference pane -
0
=Disallow Mounting,
1
=Allow Mounting
Read Only,
2
=Allow Mounting Read/Write,
3
=Allow Mounting Read/Write if capacity less
than) is the first parameter and
size
(corresponding to the desired maximum size of USB
device in MB, if
3
is chosen as the first parameter) is the second parameter.
The
uninstall
task must run as root on the target computer. Otherwise, it will not have
the sufficient permissions to uninstall all components of Device Filter Mac. If Device Filter
is installed on a machine that is also running Deep Freeze, the Mac must be in a Thawed
state for the uninstall to be successful. If Deep Freeze is in a Frozen state, Device Filter will
refuse the uninstall command and prompt the user with the reason.
Adding Targeted Computers to the Task List
This section has been written as a basic overview of how to use the Device Filter-specific tasks in ARD.
For a more in-depth description of how to best utilize ARD and ARD tasks, please refer to your ARD
user manual or to the Help Files found within ARD itself.
In order to run a task, there must be computers targeted to run the task. To add one or more computers
to be targeted to run the task, complete the following steps:
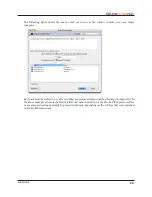
1. In the left column, double-click the task to be targeted to the specified computers.
The Task Edit window appears. At the bottom of the window is a dialog listing the
designated computers assigned to the task. Before a computer is added to the list, it reads
No
Computers
.
2. Drag and drop the preferred workstations or group of workstations into the dialog from the
computers in the
All Computers
list. The number of computers assigned to a specific task
appears at the bottom of the window.
3. Click
Save
.


