III. ENGINE REPAIR
69
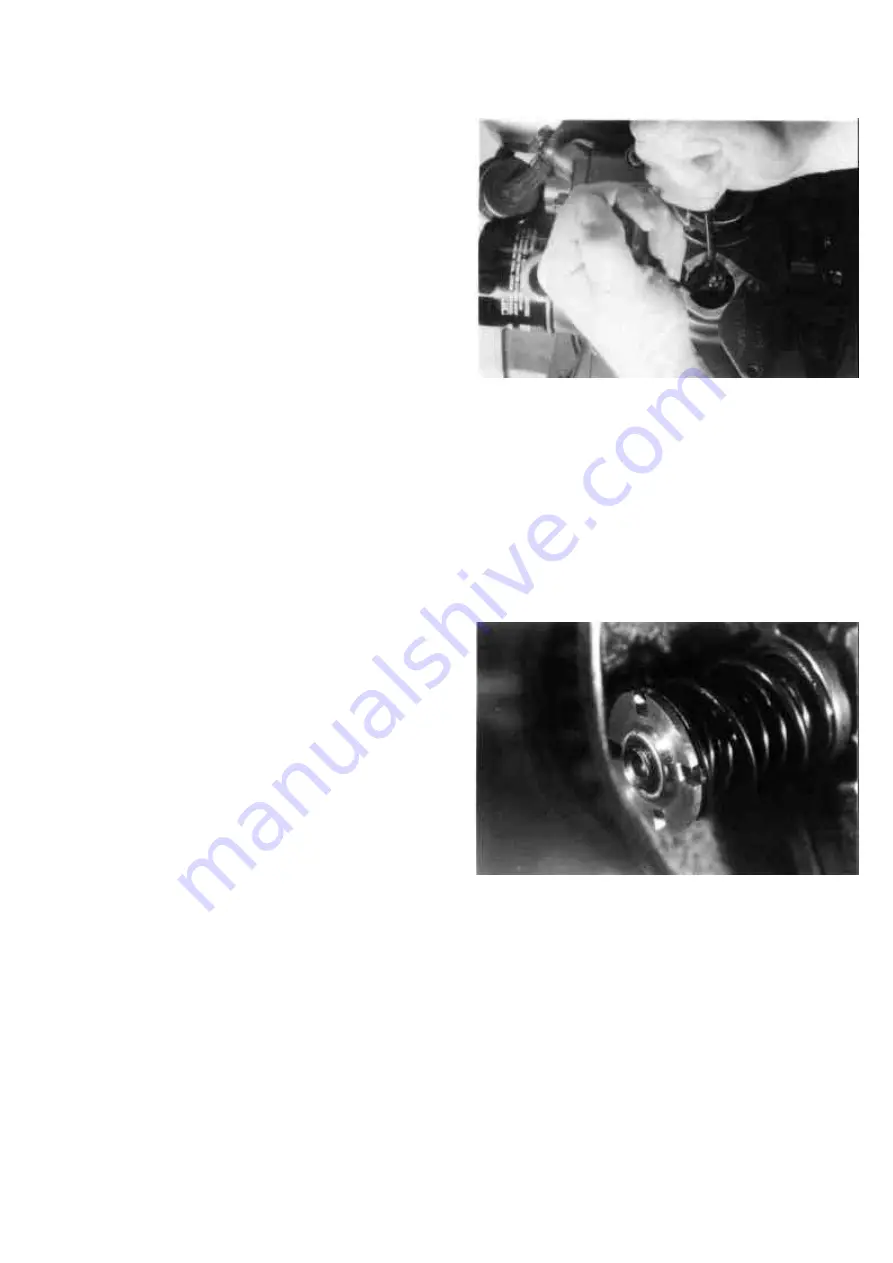
Crank the engine until the governor
flyweights stand in a vertical position. Put
the acceleration lever in full load position.
Open the lock plate and loosen the castle
nut. Screw in tappelt bolt completely till
tappet rests on control lever. Insert a
screwdriver between the flyweights and
force them apart to maximum opening.
(Figure 18)
Now screw in the tappet bolt until it just
comes in contact with the governor pin (no
play to be felt when pushing onto the lever
with your fingers.) Release the flyweights
and screw in the tappet bolt half a turn
further.
Maintain the screw in this position and
tighten the castle nut, bend the lock plate
and reassemble the cover plate. The correct
setting of the clearance between tappet bolt
and governor pin is essential for the proper
function of the engine. If the clearance is
too wide the engine can overspeed, is it too
small the engine will not reach its full speed.
Speed adjustments in the range of
±
50 rpm
are possible by altering the position of the
cross slotted nuts.
(Figure 19)
To increase speed - tighten the cross
slotted nut.
To reduce speed - loosen the cross slotted
nut.
Attention: The cross slotted nut must be
at least flat with the end of the stud bold.
Otherwise the self securing effect of the
nut is not working. Normally the stud
bold should protude out of the cross
slotted nut.
For larger speed variations the governor
springs must be replaced. Replace the
cross slottered nuts whenever a nut has
been unscrewed. Every change in speed
setting should be controlled on a test bench,
or at least with a revolution counter.
Summary of Contents for 15D Series
Page 8: ...III 1 DISASSEMBLY 10...
Page 9: ...II TECHNICAL DATA 11...
Page 15: ......
Page 27: ...III ENGINE REPAIR 28 III 2 DIMENSION TABLE WEARING PARTS...
Page 28: ...III ENGINE REPAIR 29...
Page 29: ...III ENGINE REPAIR 30...
Page 30: ...III ENGINE REPAIR 31...
Page 31: ...III ENGINE REPAIR 32...
Page 32: ...III ENGINE REPAIR 33...
Page 33: ...III ENGINE REPAIR 34...
Page 34: ...III ENGINE REPAIR 35...
Page 35: ...III ENGINE REPAIR 36...
Page 36: ...III ENGINE REPAIR 37...
Page 37: ...III ENGINE REPAIR 38...
Page 38: ...III ENGINE REPAIR 39...
Page 39: ...III ENGINE REPAIR 40...
Page 40: ...III ENGINE REPAIR 41...
Page 41: ...III ENGINE REPAIR 42 III 3 ENGINE REASSEMBLY...
Page 73: ...74...
Page 74: ...75...
Page 75: ...76...
Page 76: ...77...


