INSTRUCTION, USE
AND MAINTENANCE MANUAL
GB
Page 35 of 168
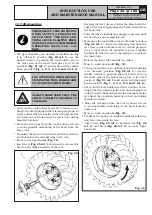
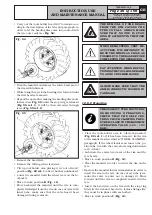
• Keeping the lever pressed, lower the wheel until the
edge of the rim is approximately 5 mm distant from
the hook tool then turn the mandrel counterclockwi-
se keeping the lever (
Fig. 46 ref. 1
) pressed until
the tyre has been completely dislodged from the rim.
THE REMOVAL OF THE BEADS
FROM THE RIM CAUSES THE
TYRE TO FALL. ALWAYS MAKE
SURE THAT NO ONE IS STAN-
DING BY ACCIDENT IN THE WORK
AREA.
WHEN DEMOUNTING VERY HE-
AVY TYRES, IT IS IMPORTANT TO
MOVE THE WHEEL AS CLOSE AS
POSSIBLE TO THE BASE BEFORE
COMPLETING THE OPERATION.
12.7.3 Mounting
THROUGHOUT TYRE MOUNTING/
DEMOUNTING OPERATIONS,
CHECK THAT THE SELF-CEN-
TRING CHUCK CLAMPING PRES-
SURE IS CLOSE TO THE MAXIMUM
OPERATING VALUE (160 - 180
BAR).
• Secure the rim to the mandrel according to the proce-
dure described in paragraph “WHEEL CLAMPING”.
• Adequately lubricate the tyre beads and the rim bead
seat with a suitable lubricant using the provided
brush.
USE ONLY TYRE LUBRICANTS.
SUITABLE LUBRICANTS CON-
TAIN NO WATER, HYDROCAR-
BONS, OR SILICONE.
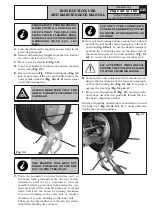
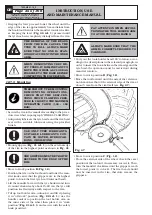
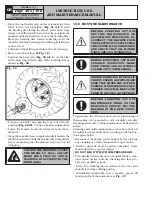
• Mount grippers (
Fig. 41 ref. 1
) on the external edge
of the rim in the highest point as shown in
Fig. 41
.
THE GRIPPERS MUST BE TIGHTLY
SECURED TO THE EDGE OF THE
RIM.
• Move to work position
B
(
Fig. 12
).
• Position the tyre on the footboard and lower the man-
drel (make sure that the grippers are in the highest
point) to hook the first tyre bead (internal bead).
• Lift the mandrel arm with the tyre hooked and turn
it counterclockwise by about 15-20 cm; the tyre will
position itself sideways with respect to the rim.
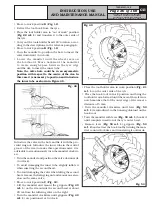
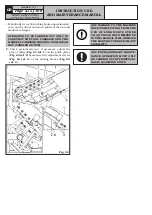
• Tilt up tool holder arm, unhook it and lift it placing
it in “off-work” position (
Fig. 22 ref. 1
); use the
handle control to position the tool holder arm on
the inner side of the wheel then place it in “work
position” (
Fig. 21 ref. 1
) and secure with the safety
hook provided.
PAY ATTENTION WHEN REPOSI-
TIONING THE TOOL HOLDER ARM
TO AVOID CRUSHING HANDS.
ALWAYS MAKE SURE THAT THE
ARM IS CORRECTLY HOOKED TO
CARRIAGE.
• Carry out the tools holder head 180° rotation, accor-
ding to the descriptions in the relevant paragraph, in
order to insert the hook between the rim edge and the
tyre bead; the operation must be carried out during
mandrel rotation.
• Move to work position
D
(
Fig. 12
).
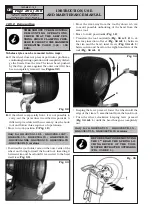
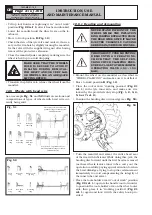
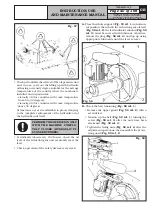
• Move the tool forward until the axis of the reference
notch matches that of the external edge of the rim at
about 5 mm from the rim itself (see
Fig. 47
).
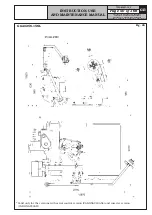
Fig. 47
• Move to work position
C
(
Fig. 12
).
• From the external side of the wheel, check the exact
position of the tool and, if necessary, correct it. Then,
turn the mandrel clockwise until the grippers reach
the lowest point (6 o’clock). The first bead should
now be inserted in the rim, therefore remove the
grippers.
7522-M001-14_P
GG40256.11SL - GG40256.11ST - GG40256.15
GG40256T.15 - GG40256A.15 - GG40256D.15
GG40256TD.15 - GG40256.15SL - GG60360.15
GG60360T.15 - GG60360A.15 - GG60360D.15 - GG60360TD.15


