PLEASE KEEP THIS MANUAL IN A SAFE PLACE FOR FUTURE REFERENCE
Fast Mover Tools Limited
T: 01582 661993 F: 01582 667100 E: sales@fastmovertoolsuk.com
W: www.fastmovertoolsuk.com
9
Disconnect air line. Unplug air line from the tool when not in use. Only use compressed
air.
10
Avoid unintentional starting. Be sure the inlet valve is in the position when not in use and
before plugging air line in. Do not carry any tool with your finger on the trigger, whether it
is plugged in or not.
11
Stay alert. Watch what you are doing, use common sense. Do not operate any tool when
you are tired.
12
Check for damaged parts. Before using any tool, any part that appears to be
damaged should be carefully checked to determine that it will operate properly and
perform its intended function. Check for alignment and binding of moving parts; any
broken parts or mounting fixtures; and any other condition that may affect proper
operation. Any part that is damaged should be properly repaired or replaced by a
qualified technician.
13
Do not use the tool if any switch does not turn On and Off properly.
14
Replacement parts and accessories. When servicing, use only identical replacement
parts. Use of any other parts will void the warranty. Only use accessories intended for
use with this tool.
15
Do not operate tool if under the influence of alcohol or drugs. Read warning labels if
taking prescription medicine to determine if your judgment or reflexes are impaired while
taking drugs. If there is any doubt, do not operate the tool.
16
Make sure the place where you use this product is properly ventilated.
17
Verify paint containers are securely closed before shaking.
18
For your safety, service and maintenance should be performed regularly by a qualified
technician.
19
Avoid shaking working with paints containing lead - if in doubt, consult the Material
Safety Data Sheet (MSDS) which should be supplied with your paint. If it isn’t, your paint
supplier should supply it to you upon request. Fast Mover Tools does not and cannot
supply MSDS.
20
Verify the air pressure from compressor is between 40 and 90 PSI .
21
Follow the warnings and precautions in the manual for the air compressor being used.
22
The warnings, cautions, and instructions discussed in this instruction manual cannot
cover all possible conditions and situations that may occur. It must be understood by the
operator that common sense and caution are factors which cannot be built into this
product, but must be supplied by the operator.
Installation Guide
Unit Mounting
1
Choose a workbench to mount the Paint Shaker on that is able to withstand the weight of
the tool, full paint can, and steady vibration of the mixing.
2
Locate the Paint Shaker on the workbench and mark drilling holes using the Housing
(40) mounting holes as a template. Caution: Before drilling, verify that there are no
obstructions or live wires beneath the table.
3
Move the Paint Shaker aside, and drill holes using a drill matching the size of the
Housing (40) mounting holes.
4
Mount Paint Shaker to the workbench using appropriate fixings
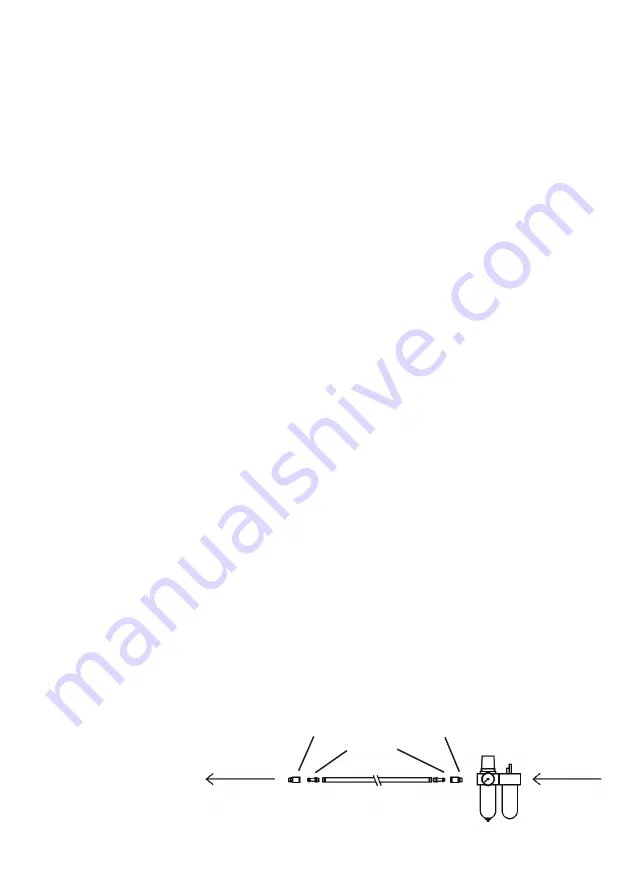
Air Connection
1
See diagram
for recommended
air supply setup.
Air Filter/Regulator
/Lubricator
Airline
Air Fitting
Quick Release Air Coupling
Paint
Shaker
Air
Source


