Hydrometer Readings Continued
Taking Hydrometer Readings
Step 1:
Begin by pouring some wort or must into a hydrometer test jar leaving 2” (5.08cm)
of space from the top for when inserting the hydrometer.
Step 2:
Insert your hydrometer into the test jar, giving it a little swirl to remove any bubbles
from sticking to the sides. When recording your reading, ensure that you are at eye
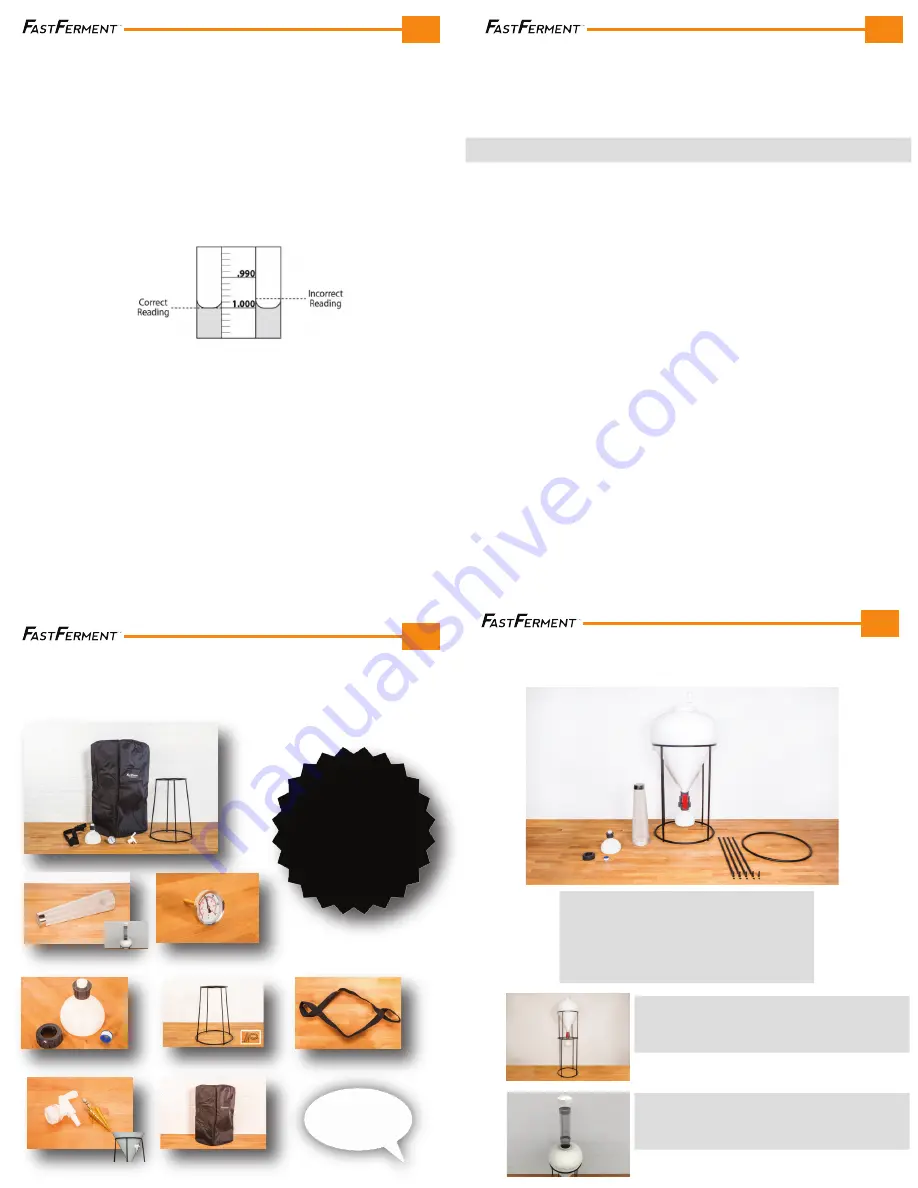
level and recording the lower of the two levels (see picture below).
Step 3:
Take a second reading after primary fermentation
Step 4:
Take a third reading at the end of secondary fermentation
Finish Gravity (FG)
The FG Should be 0.990 (for dry wines) to 1.005 (for sweet wines). A typical beer will have a
FG at 1.012.
Calculating Alcohol Content
To calculate the alcohol content, subtract the original gravity (OG) by the finish gravity (FG) and
multiply that number by 131 (OG – FG * 131).
Homebrewing– Option 2: Brew-in-a-Bag
Brew Day (Follow Instructions on Ingredient Kit):
Step 1
: Clean and assemble
FastFerment
Step 2:
Perform a leak test (use water) and when successful, sanitize all equipment
Step 3:
Gather ingredients purchased from your favorite homebrew shop
Step 4:
Line boiling pot with a grain bag
Step 5:
Fill boiling pot with water (you will be mashing with the full volume of water)
Step 6:
Heat your water to 1° more than the target mash temperature of the recipe to allow
for cooling caused by the grain addition
EN
28
Homebrewing– Option 2: Brew-in-a-Bag Continued
Step 7:
Add grain to pot and stir the mash very gently until the grains are submerged and
wet (if the temperature has cooled significantly during the previous step, add more
heat to bring wort back to the desired temperature)
Step 8:
Put the lid on and leave it according to the mash schedule
Step 9:
After the waiting period, lift the bag from the wort slowly and allow it to drain
(hold it close to the beer’s surface to eliminate splashing and introducing air)
Step 10:
Bring wort to a boil
Step 11:
Keep on a rolling boil for 1 hour. Begin adding hops according to provided schedule
Step 12:
Once the hour is up, it is time to chill the wort. Attach chiller to a cold water source
and cool wort. Cool until wort has reached pitching temperature 65-90°F (18-32°C)
Step 13:
Take hydrometer reading and record
Step 14:
Re - hydrate yeast
Step 15:
Add wort into
FastFerment
and then add yeast
Fermentation
:
Step 16
: Seal the lid tight and place
FastFerment
on
Wall Mounts
or the optional
Stand
accessory. Leave undisturbed for duration of primary fermentation (time varies
depending on the type of beer)
Step 17:
Once primary fermentation is complete, close the
Union Valve
, remove and empty
the contents of the
Collection Ball
Step 18:
Sanitize and clean the
Collection Ball
before reattaching (at this point you should
also remove the mash bag if you are using one)
Harvesting Yeast
How to Harvest Yeast from FastFerment
Step 1:
Attach the
Collection Ball
, open the
Union Valve
, add the wort and pitch the yeast
Step 2:
Let fermentation start for 1 - 3 days
Step 3:
As the trub settles over the first few days of fermentation, it can be discarded by
cleaning out the
Collection Ball
. You should always wait 24 hours before switching
out the the
Collection Ball
again so everything can settle. Trub will be characterized
by a dark colour
Step 4:
You should only change out the collection ball if the trub/sediment line is above the
Union Valve
. Try not to waste any beer.
Step 5:
Once most of the trub has been discarded, wait 6-12 days for primary fermentation
to be over. The
Collection Ball
should be filled with flocculated and dormant yeast
ready to harvest
Step 6:
Close the
Union Valve
and disconnect the
Collection Ball
Step 7:
Take the
Collection Ball
contents and put the rubber bung on tight to seal and
store in fridge or cold dark area. You should use this live yeast within 2-4 weeks of
harvesting maximum
Step 8:
Sanitize the second the
Collection Ball
and reattach it to the
FastFerment
Step 9:
Open
Union Valve
to start secondary fermentation
Step 10:
Small amounts of yeast and trub will continue to collect in
Collection Ball
. This
can all be discarded at the end of complete fermentation
Step 11:
To reuse your harvested yeast, simply pitch into your next batch by pouring the
contents from the
Collection Ball
into the
Conical Fermenter Vessel
when it calls for
yeast
EN
*These are just our suggestions, please consult multiple sources*
29
Thermometer
7.9 FastFerment Accessories
Stand
Collection Ball
Carrying Strap
Sample Port
Insulated Jacket
Hop Filter
FastFerment accessories make it easier, and more enjoyable to make beer and wine.
Want Accessories?
“Find a Retailer” page at:
www.FastBrewing.com
EN
30
Tell Us
What you Want
to See!
14G FastFerment
EN
31
Stand Leg Extensions
Hop Filter
- Most affordable 14G conical fermenter available
- Built on the gold medal winning design of the
7.9G FastFerment
- Heavy Duty
+33% Thicker vessel & collection ball than the
7.9G FastFerment
+33% Thicker stand than the
7.9G FastFerment
+33% Larger valve than the
7.9G FastFerment
- Makes it easy to keg straight from the
14G FastFerment
- Assembles nto the stand included with the
14G FastFerment
- Works for both
7.9G & 14G FastFerments
- Works for dry hopping, oak chips, grapes skins & other flavor infusions


