OPERATING INSTRUCTIONS / MAIN SEAL REPLACEMENT
Page 2 of 3
www.fastestinc.com
Roseville, MN
Toll Free at 1-800-444-2373
Fax 651-645-7390
WP144 Rev B 6/25/2021
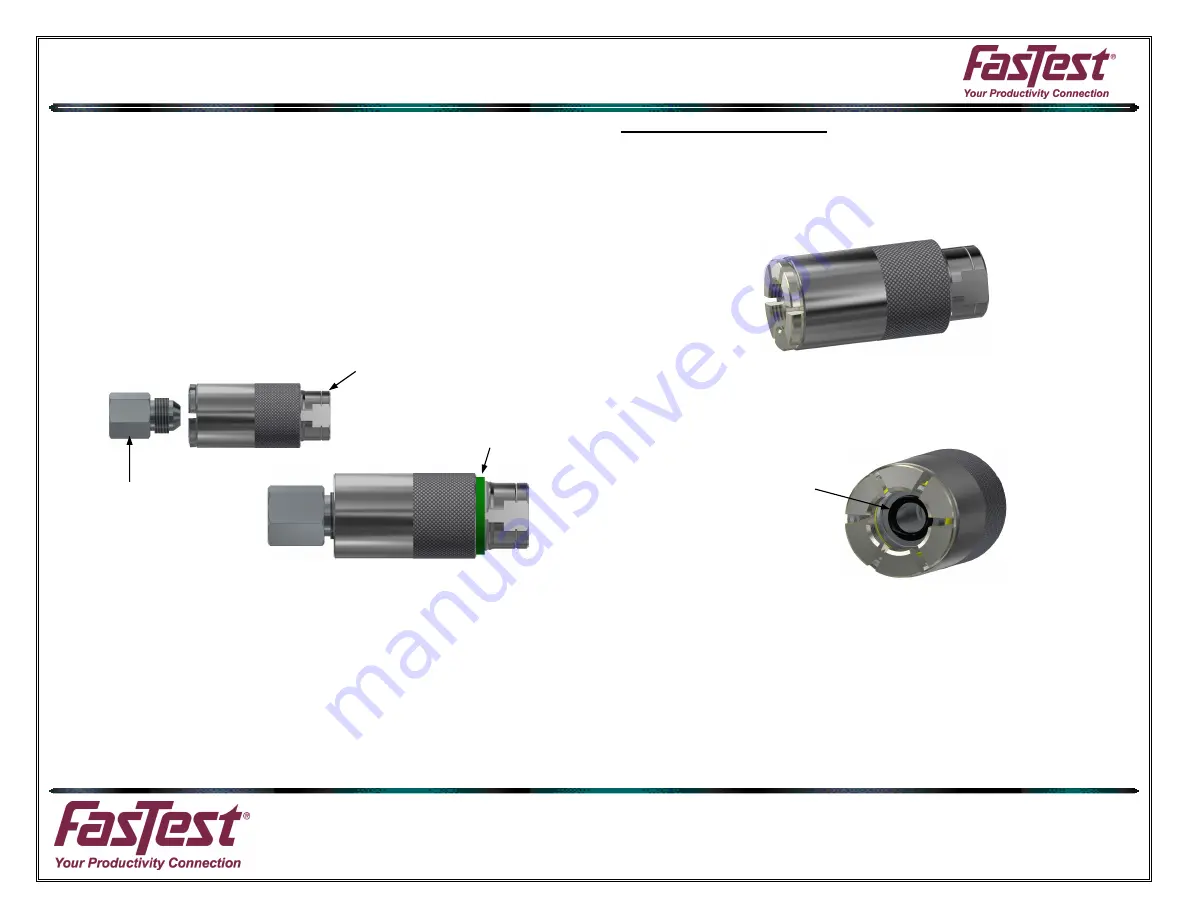
HOLD BODY
HERE
TEST PIECE
GREEN RING
SLEEVE BACK,
JAWS OPEN
MAIN SEAL
4. Attempting to connect while connector is still pressurized is doable but
not recommended.
NOTE: DO NOT FORCE CONNECTOR ONTO TEST PART WHEN
CONNECTING. THE COLLETS SHOULD EASILY MATE WITH TEST
PIECE. FORCING THE CONNECTOR WILL RESULT IN POOR SEALING
AND POSSIBLE LEAKAGE. DO NOT TURN OR ROTATE CONNECTOR
AFTER THE COLLETS HAVE GRIPPED TEST PART. DAMAGE TO TEST
PIECE AND THE CONNECTOR’S INTERNAL PARTS MAY RESULT.
5. When connector is properly connected the green indicator ring will be
visible.
a. Tug on the connector near the termination port to assure
proper engagement and gripping before introduction of
pressurized media.
6. Activate test media through connector termination port. Pressure will
enhance the seal.
7. To disconnect from test piece, deactivate test pressure. Slide knurled
sleeve away from test piece to expand collets. Remove connector from
test piece.
MAIN SEAL REPLACEMENT:
NOTE: IN MOST CASES THE MAIN SEAL CAN BE EXTRACTED AND
REPLACED IN THE STEPS THAT FOLLOW. IF CONNECTOR MUST BE
DIS-ASSEMBLED TO REPLACE MAIN SEAL, SEE INSTRUCTION WP143.
1. Slide sleeve back allowing collets/jaws to open. This will help expose
the end of the piston to extract the main seal.
2. Using a pick like tool or small flat blade screwdriver, remove the main
seal from piston and discard.
3. Use caution not to scratch the main seal groove surfaces in piston.
4. Install new main seal using your fingers or a non-marring tool. DO
NOT LUBRICATE NEW SEAL!
5. Make sure main seal is properly seated.


