Fat Shark
11
Battery: Current battery life as an icon and a %
Changing Bands and RX Channels:
The Band (CH+) and Channel (CH-) buttons are used to go through the different RX options to find
the wireless video channel that you want to view. A short press on CH+/CH- will cycle through the
8 channels of the current band that you are on. As you cycle through the channels, the OSD will
show the new channel. (Has removed the type of video signal)
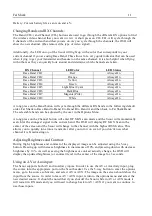
Additionally, the LED on top of the Scout will light up with a color that corresponds to your
current channel if you are using Race Band. This allows for a very quick indicator that can be used
when trying to get your transmitter and headset on the same channel. It is also helpful when flying
with others as they can quickly look around and determine which channels are taken.
RX Channel
LED Color
LED Status
Race Band CH1
Red
Always On
Race Band CH2
Orange
Always On
Race Band CH3
Yellow
Always On
Race Band CH4
Green
Always On
Race Band CH5
Light Blue (Cyan)
Always On
Race Band CH6
Dark Blue
Always On
Race Band CH7
Magenta (Pink)
Always On
Race Band CH8
White
Always On
A long press on the Band button will cycle through the different RX bands in the following default
order. Fat Shark to Race Band to Band E to Band B to Band A and then back to Fat Shark Band.
The selectable bands can be adjusted by the user in the Options Menu.
A long press on the Channel button will enter RF MAX scan mode and the Scout will automatically
search for the strongest signal in the current band. The OSD will display RF MAX Scan in the
center of the screen and the Scout will change to the channel with the highest RSSI value. This
allows you to quickly tune into a transmitter after you turn it on even if you don’t know what
channel it is broadcasting on.
Adjusting Brightness and Contrast:
During flight, brightness and contrast of the displayed image can be adjusted using the 5-way
button. Pressing up will increase brightness in increments of 10% and pressing down with decrease
brightness by 10%. As well as seeing the brightness or contrast actually change, the OSD will
display the updated brightness (or contrast) level in the center of the image for 3 seconds.
Using an AV or Aux input:
The Scout supports both AV and Auxiliary inputs. In order to use the AV or Auxiliary input, plug
the source into the appropriate port on the Scout headset. Use the 5-way button to enter the options
menu, go to the source sub-menu, and select AV or AUX. The image on the screen should show the
input from the source. In order to leave AV / AUX input, return to the options menu and select the
new desired source. It should be noted that if you shut off the Scout while in AV or AUX mode it
will restart in RX mode and you will need to change back to AV / AUX if you want to continue to
use those inputs.
Summary of Contents for Scout FSV1132
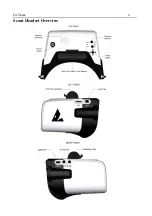
Page 4: ...Fat Shark 4 Scout Headset Overview ...
Page 14: ...Fat Shark 14 ...


