Please scan the QR Code below for the product
demonstration video. Or go to the URL shown here and find
the product video. www.FattoadPro.com/Videos
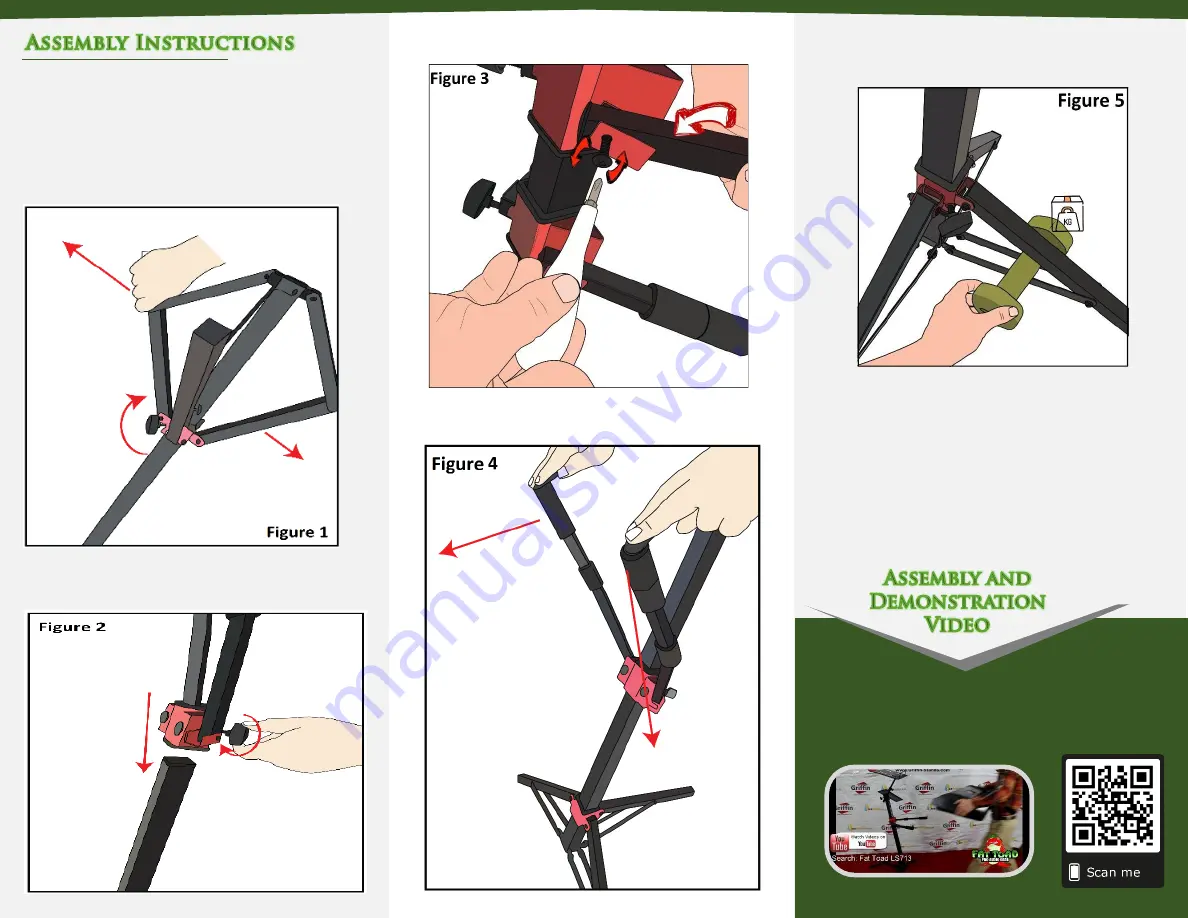
Step 3
–
Attach the arms to the bracket using a Philips
head screwdriver as seen in
FIGURE 3
.
Step 1 -
Take the tripod stand and open the legs wide,
push it down as this will be the base of the stand. Make
sure to tighten the knob where the tripod legs meet on
the stand. (See
FIGURE 1
).
It’s
very important that the legs
must be spread all the way out and down for maximum
stability. Spread the legs fully down so that the hub base
meets/stops at the 2 bolts at the bottom of the column.
Step 2
–
Lower the arms already attached to the stand
and slide the red arm mounting bracket onto the stand.
Tighten the knob to hold it in place. (See
FIGURE 2
).
Step 4 -
Push down the support folding arms (folding
mounting arms) as seen on
FIGURE 4
.
Step 5
–
Depending on how much weight is placed on this
stand you may need to add a counterbalance such as some
cables or a dumbbell as seen in
FIGURE 5
.
Step 6
–
For safety reasons, please always make sure
to test the stability and safety of the product before
use. Double check all nuts and bolts, knobs and
connectors, make sure that these are tight and
securely fastened before use of your product. Test the
product under light use confirming assembly and
structure of the product is correct.


