16
Minute Minder
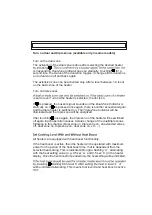
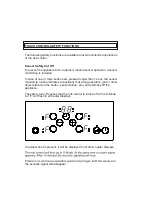
No matter whether a heater is activated or not, the minute minder can be
operated by touching
.
The appearing ´00` shows that timer is active and
the dot in the right
Timer Display
indicates that and are now linked
for setting the timer value.
The minute minder is selected when all
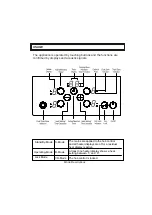
Cooking Zone Indicators
are statically
on or off (no
Cooking Zone Indicator
is flashing).
After successful setting of the minute minder time, the timer starts to
decrement the time.
The minute minder will not be stopped by switching off the appliance or
activating the key lock function, it will proceed increasing the minutes until
run out indication.
To stop the buzzer you have to confirm the ´run out` by touching any button.
Heater timer
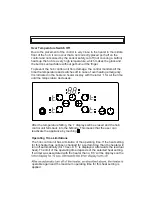
Heater timers can be set only for activated heaters (heater level must be
set between 1-9)
second time, the timer is assigned to the activated heater. The proposed
flashing.
the next active heater assigned to the timer in the clockwise direction. The
assignment recommendation is indicated by the flashing
Cooking Zone
Indicator
.
Touching and , the timer value for the heater can be set.
The running timer of the first set heater timer is indicated by the statically
lighting
Cooking Zone Indicator
.
Touching
once again further timers can be assigned to other activated
heaters.
Summary of Contents for 4-J INOX
Page 1: ...MK 4 J INOX ...
Page 2: ......
Page 3: ......
Page 7: ......
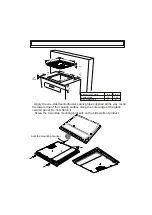
Page 8: ...520mm 590mm 41mm 560mm 490mm Min 60mm Min 150mm Min 130mm Min 25mm ...
Page 10: ......
Page 11: ......
Page 12: ......
Page 13: ......
Page 14: ......
Page 15: ......
Page 16: ......
Page 17: ......
Page 18: ......
Page 19: ......
Page 20: ......
Page 21: ...69 ...
Page 22: ......
Page 23: ......
Page 24: ......
Page 25: ...OPERATING AND INSTALLATION INSTRUCTIONS BUILT IN VITROCERAMIC HOB 4 J INOX EN ...
Page 49: ......
Page 50: ...UPUTSTVO ZA UPOTREBU I INSTALACIJU UGRADNE STAKLENO KERAMI KE PLO E BO 4 J INOX ...
Page 75: ...52208777 ...
Page 76: ...4 J INOX EN ...
Page 77: ......
Page 78: ......
Page 79: ......
Page 84: ......
Page 85: ...Figure 2 ...
Page 86: ...Figure 3 3 ...
Page 87: ...50 200 Max 250 100 150 50 200 Max 250 100 150 Figure 4 Figure 5 Figure 6 Figure 5 Figure 6 ...
Page 90: ......
Page 91: ......
Page 92: ......
Page 93: ......
Page 94: ......
Page 95: ......
Page 96: ......
Page 97: ...MK 4 J INOX ...
Page 98: ......
Page 99: ......
Page 100: ......
Page 101: ......
Page 102: ......
Page 103: ......
Page 104: ......
Page 105: ......
Page 107: ...3 3 ...
Page 108: ...50 200 Max 250 100 150 50 200 Max 250 100 150 4 5 6 5 6 ...
Page 109: ......
Page 111: ......
Page 112: ......
Page 113: ......
Page 114: ......
Page 115: ......
Page 117: ...SR 4 J INOX ...
Page 118: ......
Page 119: ......
Page 120: ......
Page 124: ...1 ...
Page 126: ...Slika 3 3 ...
Page 127: ...50 200 Max 250 100 150 50 200 Max 250 100 150 Slika 4 Slika 5 Slika 6 Slika 4 Slika 5 ...
Page 128: ...12 4 KORIŠÆENJE PROIZVODA Funkcije rerne ...
Page 130: ......
Page 131: ......
Page 132: ...Slika 7 ...
Page 133: ......
Page 134: ......
Page 135: ...52265653 ...

