background image

 Operation

BOMAG

29

BT 60 / BT 65

4.7

Loading/transport

!

Danger

Danger of accident!

Always shut the engine down to transport the
tamper or to lay it on its side.

Make sure that persons are not endangered by
the machine tipping or sliding off.

Lash the machine down, so that it is secured
against rolling, sliding and turning over.

For lifting the machine attach the lifting gear
only to the cross strut of the steering handle.

The machine should not swing about when be-
ing lifted.

Do not stand or step under loads being lifted.

Use only safe lifting gear of sufficient load
bearing capacity Minimum lifting capacity of
lifting gear: see operating weight in chapter
"Technical Data".

Check all lifting and lashing points for damage
before lifting or lashing down the machine.

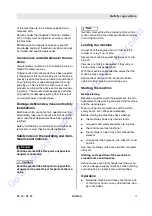
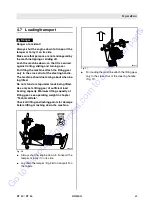
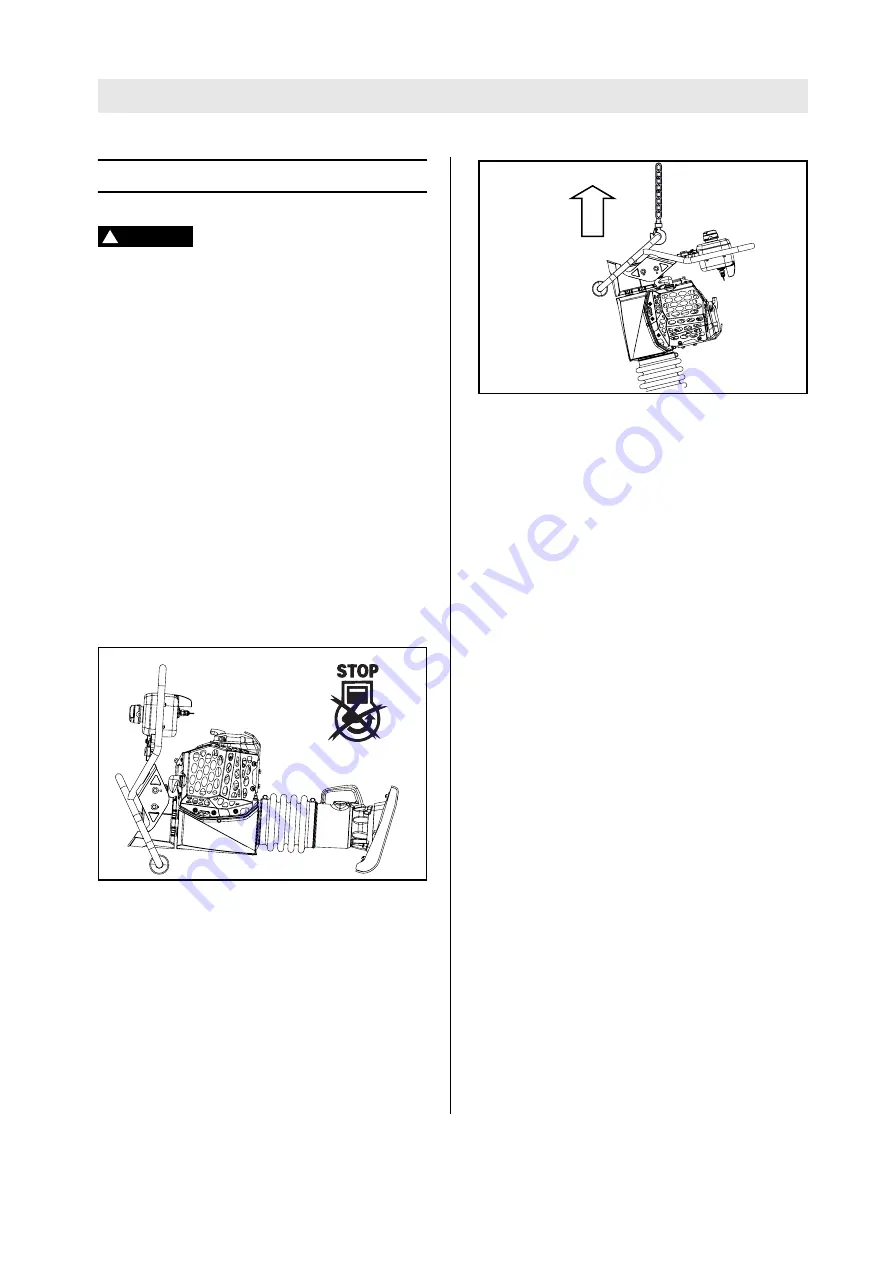
Fig. 26

l

Always shut the engine down to transport the
tamper or to lay it on its side.

l

Lay down the tamper (Fig. 26) to transport it on
the rollers.

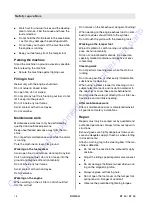
Fig. 27

l

For loading the machine attach the lifting gear
only to the cross strut of the steering handle
(Fig. 27).

541010

541011

Go 

to 

Discount-Equipment.com 

to 

order 

your 

parts

Summary of Contents for BOMAG BT 60

Page 1: ...ructions Original operating instructions Catalogue No 008 071 41 04 2011 BT 60 BT 65 S N 101 541 10 S N 101 541 30 Vibratory Tampers www discount equipment com G o t o D i s c o u n t E q u i p m e n...

Page 2: ...e needs We sell worldwide for the brands Genie Terex JLG MultiQuip Mikasa Essick Whiteman Mayco Toro Stone Diamond Products Generac Magnum Airman Haulotte Barreto Power Blanket Nifty Lift Atlas Copco...

Page 3: ...G o t o D i s c o u n t E q u i p m e n t c o m t o o r d e r y o u r p a r t s...

Page 4: ...fuels and lubricants Please note This manual was written for operators and mainte nance personnel on construction sites These operating and maintenance instructions are part of the machine You should...

Page 5: ...y regulations and all notes on risks and dangers Fig 1 Fig 2 Fig 3 541002 008 330 20 Made by FAYAT GROUP Hellerwald 56154 Boppard Made in Germany kW kg Patent Protection Type Serial Number Year of Con...

Page 6: ...5 2 Fuels and lubricants 33 5 3 Table of fuels and lubricants 34 5 4 Running in instructions 35 5 5 Maintenance table 36 5 6 Clean the machine 37 5 7 Check the engine oil level 37 5 8 Checking the fue...

Page 7: ...BOMAG 7 BT 60 BT 65 1 Technical Data G o t o D i s c o u n t E q u i p m e n t c o m t o o r d e r y o u r p a r t s...

Page 8: ...Travel characteristics Max working speed depending on soil m min 20 20 Max areal output depending on soil m2 h 336 336 Drive Engine manufacturer Honda Honda Type GX 100 GX 100 Cooling Air Air Number o...

Page 9: ...quency Hz 10 11 8 10 11 8 Impact force kN 13 5 16 2 Filling capacities Fuel tank l 3 0 3 0 Oil in tamper foot l 0 75 1 0 Engine oil l 0 3 0 3 The right for technical modifications remains reserved BT...

Page 10: ...LpA 93 dB A determined acc to ISO 11204 and EN 500 Guaranteed sound power level BT 60 LWA 108 dB A determined acc to ISO 3744 and EN 500 BT 65 LWA 108 dB A determined acc to ISO 3744 and EN 500 Dange...

Page 11: ...BOMAG 11 BT 60 BT 65 2 Safety regulations G o t o D i s c o u n t E q u i p m e n t c o m t o o r d e r y o u r p a r t s...

Page 12: ...is intended for Any danger caused by intended use is the sole re sponsibility of the customer or driver operator the manufacturer cannot be made liable Examples for unintended use are l Working in ho...

Page 13: ...int out possible dangers for the machine or for parts of the ma chine i Note Sections marked like this provide technical infor mation concerning the optimal economical utiliza tion of the machine Load...

Page 14: ...r of burning When working on the engine exhaust duct no com bustion residues should fall into the cylinder Do not touch the piston with the cleaning tools Working on the tamper foot Wipe off spilled o...

Page 15: ...ety stickers decals on the machine Keep safety stickers in good and legible condition see parts manual and comply with their meaning Replace damaged and illegible stickers decals G o t o D i s c o u n...

Page 16: ...BOMAG 17 BT 60 BT 65 3 Indicators and Controls G o t o D i s c o u n t E q u i p m e n t c o m t o o r d e r y o u r p a r t s...

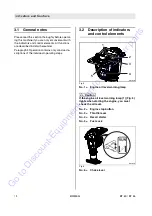
Page 17: ...ins only concise de scriptions of the individual operating steps 3 2 Description of indicators and control elements Fig 5 No 1 Engine oil level warning lamp Caution If the engine oil level warning lam...

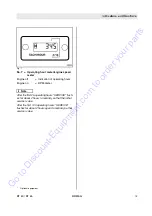
Page 18: ...on RPM meter i Note After the first 25 operating hours SERVICE flash es for about 2 hours to remind you that the initial service is due After the first 100 operating hours SERVICE flashes for about 2...

Page 19: ...BOMAG 21 BT 60 BT 65 4 Operation G o t o D i s c o u n t E q u i p m e n t c o m t o o r d e r y o u r p a r t s...

Page 20: ...rpm The running in time of the vibratory tamper is 10 operating hours The following inspections must be carried out be fore each working day or before a longer working period Danger Danger of accident...

Page 21: ...from the tamper plate be cause the vibration starts immediately Always keep an eye on a running machine Danger Loss of hearing Wear your personal noise protection means ear defenders before starting o...

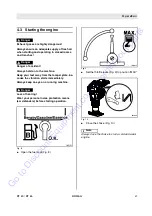
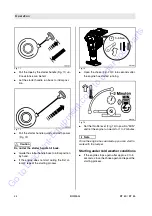
Page 22: ...start during the first at tempt repeat the starting process Fig 13 l Open the choke Fig 13 3 to 6 seconds after the engine has started running Fig 14 l Set the throttle lever Fig 14 to position MIN an...

Page 23: ...will probably not start Remedy l Close the fuel cock l Open the choke l Set the throttle lever to full speed position l Operate the recoil starter until the engine starts i Note If the engine does not...

Page 24: ...The forward moving speed can be influenced by applying weight on the steering bow Fig 18 No load slowly forward Fig 19 l The forward marching speed can also be var ied via the pressing force on the s...

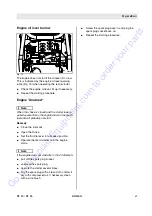
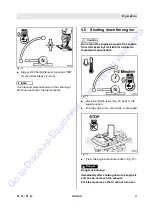
Page 25: ...the sudden from full speed but let it idle for a while for temperature equalization Fig 21 l Move the throttle lever Fig 21 back to idle speed position l Run the engine for a short while in idle speed...

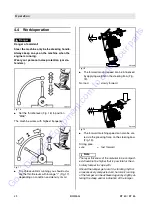
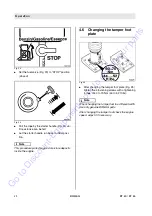
Page 26: ...ainst moisture deposits inside the engine 4 6 Changing the tamper foot plate Fig 25 l After changing the tamper foot plate Fig 25 tighten the 4 fastening screws with a tightening torque of 60 to 70 Nm...

Page 27: ...n be ing lifted Do not stand or step under loads being lifted Use only safe lifting gear of sufficient load bearing capacity Minimum lifting capacity of lifting gear see operating weight in chapter Te...

Page 28: ...ng work and have the machine disassembled by an approved specialist workshop Environment Catch all fuels and lubricants do not let them seep into the ground and dispose of in compli ance with legal re...

Page 29: ...BOMAG 31 BT 60 BT 65 5 Maintenance G o t o D i s c o u n t E q u i p m e n t c o m t o o r d e r y o u r p a r t s...

Page 30: ...nd fu els environmentally Notes on the fuel system The lifetime of the diesel engine mainly depends on the purity of the fuel l Keep fuel clean ofd any contamination and water l Keep used filters in a...

Page 31: ...ngest permissible time the lubrication oil should remain in an engine is 1 2 year or 100 op erating hours Fuel Quality The engine has been approved for operation with unleaded gasoline with a octane n...

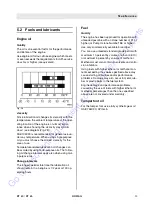
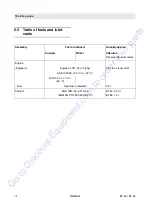
Page 32: ...tion Observe the level marks Engine Engine oil Engine oil API SJ or higher 0 3 l to oil level mark SAE 10W 30 20 C to 30 C SAE 30 10 C to 30 C Fuel Gasoline unleaded 3 0 l Padfoot SAE 75W 90 API GL 5...

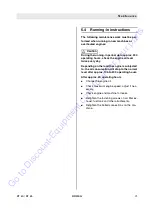
Page 33: ...the load the engine is subjected to the oil consumption will drop to the normal level after approx 100 to 200 operating hours After approx 20 operating hours l Change the engine oil l Check maximum en...

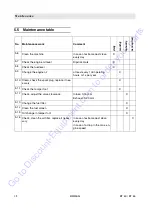
Page 34: ...operating hours or 1x per year X 5 10 Clean check the spark plug replace if nec essary X 5 11 Check the tamper foot X 5 12 Check adjust the valve clearance Intake 0 15 mm Exhaust 0 20 mm X 5 13 Chang...

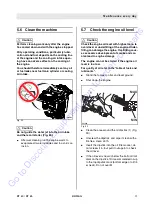
Page 35: ...k the engine oil level with highest care to avoid over or underfilling of the engine Under filling can damage the engine Overfilling caus es excessive development of smoke and can also lead to engine...

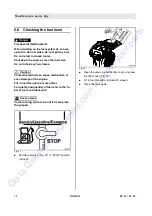
Page 36: ...ause malfunction or even damage of the engine Fill in fuel through the screen filter For quality and quantity of fuel refer to the ta ble of fuels and lubricants Environment Catch running out fuel do...

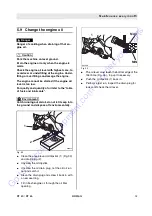
Page 37: ...bricants Environment Catch running out old oil do not let it seep into the ground and dispose off environmentally Fig 33 l Clean the area around oil dipstick 1 Fig 33 and drain plug 2 l Unscrew the oi...

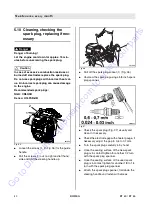
Page 38: ...old the steering handle up Fig 36 l Pull off the spark plug socket 1 Fig 36 l Unscrew the spark plug using a 5 8 inch spark plug spanner Fig 37 l Check the spark plug Fig 37 visually and clean it if n...

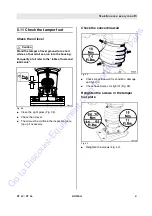
Page 39: ...lubricants Fig 38 l Clean the sight glass Fig 38 l Check the oil level l The oil must be visible in the inspection glass top up if necessary Check the concertina wall Fig 39 l Check concertina wall fo...

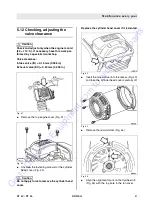
Page 40: ...ve the top engine cover Fig 41 Fig 42 l Unscrew the fastening screws for the cylinder head cover Fig 42 Caution Do not apply force to remove the cylinder head cover Replace the cylinder head cover if...

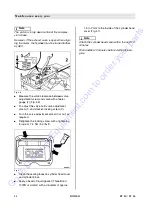
Page 41: ...nd slacken locking screw 3 l Turn the valve adjustment screw in or out as required l Retighten the locking screw with a tightening torque of 7 5 Nm 5 4 lbsft Fig 47 l Clean the sealing faces on cylind...

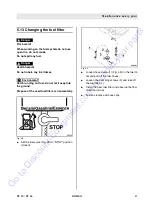
Page 42: ...do not let it seep into the ground Dispose of the used fuel filter environmentally Fig 48 l Set the fuel valve Fig 48 to STOP position closed Fig 49 l Loosen hose clamp 1 Fig 49 on the fuel fil ter an...

Page 43: ...er Health hazard Do not inhale any fuel fumes Environment Catch running out fuel and dispose of environ mentally Fig 50 l Disconnect fuel hose Fig 50 from fuel cock Open the fuel cock drain off fuel F...

Page 44: ...2 l Clean and unscrew the oil drain plug Fig 52 let the old oil run out and catch it l Install the oil drain plug with Omnifit FD 10 sealant Fig 53 l Stand the tamper on its foot and secure it against...

Page 45: ...filter Fig 54 l Remove cover 1 Fig 54 carefully take out filter cartridge 2 Caution Make sure that no dirt falls into the air intake channel Fig 55 l In case of dry fine dust blow out the filter car...

Page 46: ...housing l Pull the air filter 5 out of the housing Fig 58 l If soiled with dry fine dust blow the air filter out from the clean air side Fig 58 l Clean the air filter housing Caution Make sure that no...

Page 47: ...BOMAG 51 BT 60 BT 65 6 Trouble shooting G o t o D i s c o u n t E q u i p m e n t c o m t o o r d e r y o u r p a r t s...

Page 48: ...ly operated or serv iced Therefore whenever a fault occurs read through these instructions on correct operation and maintenance If you cannot locate the cause of the fault or eliminate it yourself by...

Page 49: ...i tion Dirt Clean the starter Spring broken Replace starter Engine stops frequently in short intervals Fuel system clogged Clean the fuel screen in the tank Replace the fuel filter Clean the fuel scre...

Page 50: ...e needs We sell worldwide for the brands Genie Terex JLG MultiQuip Mikasa Essick Whiteman Mayco Toro Stone Diamond Products Generac Magnum Airman Haulotte Barreto Power Blanket Nifty Lift Atlas Copco...

Reviews: