background image

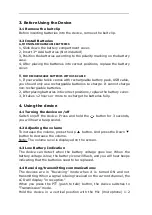
3. Before Using the Device

3.1 Remove the belt clip

Before inserting batteries into the device, remove the belt clip.

3.2 Install Batteries

A, FOR NON-RECHARGEABLE BATTERIES:

1, Slide down the battery compartment cover.

2, Insert 3* AAA batteries (Not included)

3, Position the batteries according to the polarity marking on the battery

case.

4, After placing the batteries into correct positions, replace the battery

cover.

B,

FOR RECHARGEABLE BATTERIES WITH USB CABLE:

1, If your walkie talkie comes with rechargeable battery pack, USB cable,

you should only use rechargeable batteries to charge. It cannot charge

non-rechargeable batteries.

2, After placing batteries into correct positions, replace the battery cover.

3, It takes 12 hours or more to recharge the batteries fully.

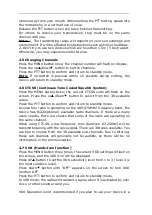
4. Using the device

4.1 Turning the device on/off

Switch on/off the device: Press and hold the

button for 3 seconds,

you will hear a beep sound.

4.2 Adjusting the volume

To increase the volume, press the Up

button. And press the Down

button to decrease the volume.

Note: The volume level is displayed on the screen.

4.3 Low Battery Indication

The device can detect when the battery voltage goes low. When the

battery voltage is low, the battery icon will flash, and you will hear beeps

indicating that the batteries need to be replaced.

4.4 Receiving/transmitting communications:

The devices are in “Receiving” mode when it is turned ON and not

transmitting. When a signal is being received on the current channel, the

LCD will display “in reception.”

When you press the PTT (push to talk) button, the device switches to

“Transmission” mode.

Hold the device in a vertical position with the Mic (microphone) 1-2

Summary of Contents for TWIN SET

Page 1: ...User Manual 0 5 Watts Walkie Talkies TWIN SET ...

Page 2: ...damage in any way Do not use the device in a potentially explosive environment e g Around pumps on the lower deck of a boat or around a fuel storage installation or chemical products Turn the device off on planes and flights or in a hospital Never use the device close to a radio to avoid interference Remove the batteries if the device is not used for an extended battery life Never mix used and new...

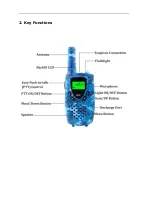
Page 3: ...2 Key Functions ...

Page 4: ... more to recharge the batteries fully 4 Using the device 4 1 Turning the device on off Switch on off the device Press and hold the button for 3 seconds you will hear a beep sound 4 2 Adjusting the volume To increase the volume press the Up button And press the Down button to decrease the volume Note The volume level is displayed on the screen 4 3 Low Battery Indication The device can detect when t...

Page 5: ...38 available codes Press the PTT button to confirm and return to standby mode License free radio is operating on the 400 470MHZ frequency band the device has 8 22 optional available radio channels If there are many users nearby there is a chance that some of the users are operating on the same channel When using CTCSS a low frequency tone between 67 250Hz will be transmitted along with the voice s...

Page 6: ... current call tone will be displayed Press the UP Down button to switch between call tones Press the PTT button to confirm and return to stand by mode 4 11 Sending a call tone Press the PTT button once quickly the call tone will be transmitted to the current channel 4 12 Roger Beep On Off After the PTT button is released the device will send out a roger beep to confirm that you have stopped talkin...

Page 7: ...ce 4 18 Reset the device Power off the device first then press hold on the Power button and PTT button together 3 seconds the device will be reset in Channel NO 1 5 Technical Specifications Frequency 462 467MHZ customized Channel number 8 22 channels Optional Sub code CTCSS 38 Transmission Power 0 5Watts Range Up to 4 miles in open field Modulation type FM F3E Channel spacing 12 5 KHZ Narrow band ...

Page 8: ...1 446 00625 2 446 01875 3 446 03125 4 446 04375 5 446 05625 6 446 06875 7 446 08125 8 446 09375 ...

Reviews: