Basic Drum Module Settings
Basic
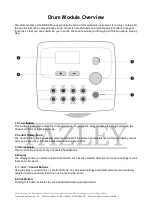
The drum module is the brain of this electronic drum kit and offers a number of options and functions.
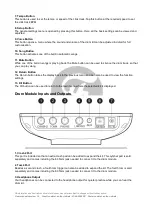
The control panel of the drum module has a central control knob, and various buttons for fast menu
navigation, selection, and parameter adjustments.
The most-used and easy to access controls are the display, headphone volume control, plus and minus
buttons, and the large rotary control knob.
Using these controls, you can browse through all the menu options, scroll through and choose
one of the
different preset drum kits, and so on.
Further to these controls, a number of buttons are provided to offer short-cuts to specific menus with
functions for making adjustments in more detail.
The difference between the Central rotary control and the Plus and Minus buttons:
Please note that the endless rotary encoder (Central control knob) is intended for quick adjustments made in
larger steps. This means that when adjusting a parameter that offers a setting between 0 and 100, the
Central control knob will make the adjustment in larger steps rather than one by one.
To make more accurate, one by one adjustments, use the Plus and Minus buttons.
Return Button
The Return button is used to save any changes that have been made to a parameter before returning to the
previous or main menu.
Power Button (Switching On)
Before using the power button to switch on the drum module, make sure to turn all volume levels down to a
minimum to avoid any shock for anyone who strikes one of the drums if the volume has been left at too high
a level. This may not only damage any connected headphones, but may also damage the hearing of the
person wearing them. Always counter
this by beginning at a lower volume and slowly adjusting as needed
while gently striking one of the triggers.
Power Button (Switching Off)
When switching off the drum module, it’s a good idea to reduce all the volume levels once more. By pressing
and holding the power button down for at least 2 seconds, the drum module shall be powered off.
If the drum kit will not be used for a long period of time, it is advised to unplug it entirely from the mains
power socket.
Drum Kit Selection
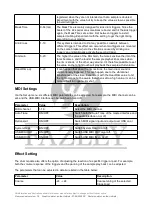
Selecting a drum kit (preset kit) is an easy process. Once the module has been switched on, press the Kit
button and use the Central control knob to browse through the various listed drum kits. Each built-in preset
kit has been numbered between 1 and 20 and slots 21 to 25 have been provided for saving custom user kits.
The display will show a number of details about the kit, including the kit number, the kit type, the last trigger
that was hit, and the kit name.
User Drum Kits
It’s possible to put together your own kits and save them to the module. An existing preset can be copied and
then edited or an entirely new kit can be put together.
To create a kit, simply follow these steps:
All information and illustrations shown in this user manual are subject to change without further notice.
User manual version: 1.0
Creation date + author initials: 07-05-2020 RV Revision date + author initials:


