FS10 Series
OPERATION
Fluid Components International LLC
29
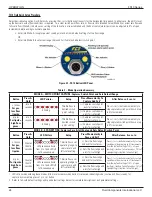
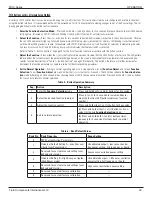
FS10 Button Controls, Alternate Setup Method
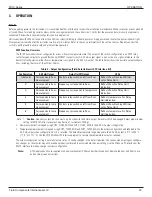
A variety of FS10 control functions can be accessed using the (–) and (+) buttons. This section describes how to configure and use the instrument
using the button interface. It is recommended the unit be powered-up for 10-15 minutes before making changes to any of the flow settings. The fol-
lowing paragraphs explain the button control sequence.
1.
Enter the Function Selection Mode
– Press and hold both (–) and (+) buttons for 3 seconds and release. Observe that all LEDs momen-
tarily light up, followed by LED #1 (leftmost) blinking slowly by itself (Function #1 automatically selected).
2.
Select the Function
– Press the (–) or (+) button for two seconds to decrement/increment, respectively, the current selection. Observe
that all LEDs momentarily light up, followed by one more LED blinking slowly (increment), or one less LED blinking slowly (decrement),
with the other LEDs previously shown. For example, with LED #1 blinking slowly by itself (function #1 selected), incrementing the selec-
tion results in two LEDs, #1 and #2, blinking slowly, which indicates that the function #2 is selected.
3.
Adjust the Function
– Press either the (–) or (+) button for three seconds. Observe that the LEDs flash at a faster rate. The LED pattern
reflects either the current value of the parameter being adjusted, or the
ready to capture
pattern for parameters to be captured (see
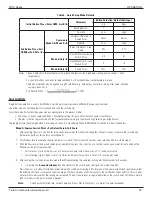
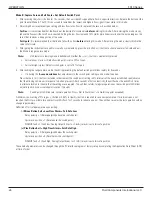
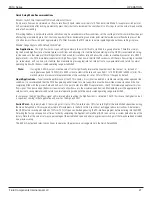
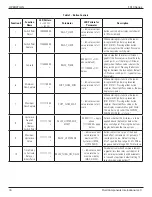
specific function descriptions in “Table 7 – Button Controls” on page 30 for details). The buttons, therefore, will either increment or
decrement the function parameter, or capture a value for the corresponding parameter.
4.
Exit to Normal Operation
– Exiting to normal operating mode is a 2-step operation, (a) exit
Function Adjust
, and (b) exit
Function
Selection
. To exit
Function Adjust
, press and hold either (–) or (+) button for 3 seconds. The LEDs then indicate the
Function Selec-
tion
mode by flashing all LEDs once and then showing the next LED in the sequence (slow blink). Press and hold both (–) and (+) buttons
for 3 seconds to return to normal operation.
Table 5 – Button Operation Summary
Seq.
Action
Description
1
Enter the
Function Selection
mode.
Press and hold both (–) and (+) buttons for 3 seconds.
2
Select the desired function to adjust.
Press (+) or (–) for 2 seconds to increment/decre-
ment the function (LED pattern indicates function
number.)
3
Adjust the function control.
Press and hold either (–) or (+) button for 3 seconds.
4
Exit to normal operation.
(a) Press and hold either (–) or (+) button for 3 sec-
onds. Unit now in
Function Selection
mode.
(b) Press and hold both (–) and (+) buttons simul-
taneously for 3 seconds. Unit now back in normal
operation.
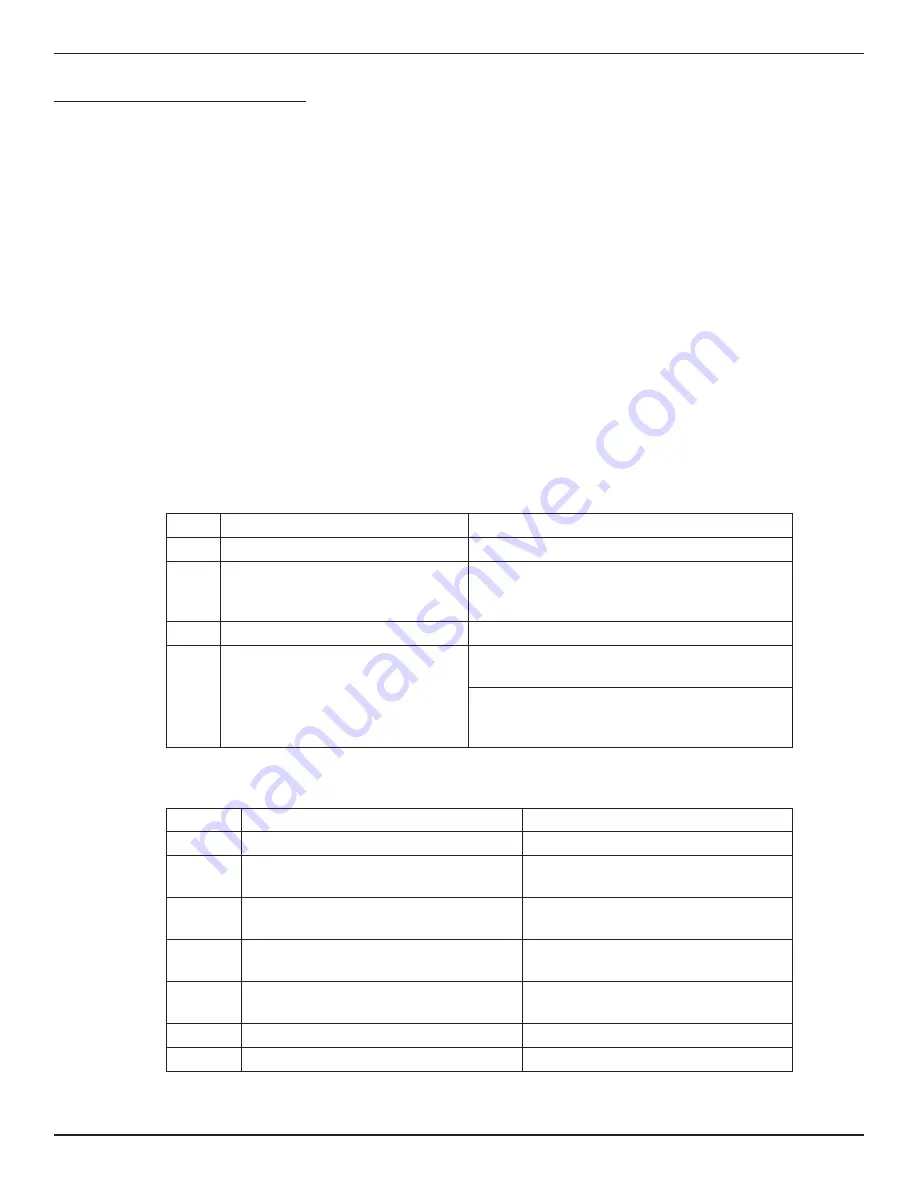
Table 6 – Bank Default Values
Bank No. Bank Properties
Range Setting
0
FS10 Current Active Parameters.
—
1
Universal Default Setting A – Low flow sen-
sitivity (Low Power mode).
Uncalibrated output – low sensor excita-
tion power setting. Full range gas or liquid.
2
Reserved for customer saved setting (user
defined and stored).
Low sensor excitation power setting
3
Universal Setting B – High flow gas, liquids
(High Power mode).
Uncalibrated output – 1.5X sensor excitation
power setting. Full range gas or liquid.
4
Reserved for customer saved settings (user
defined and stored).
High sensor excitation power setting.
5
Reserved for custom factory calibration.
—
6
Reserved for custom factory calibration.
—

