background image

14

INSTALL #3 CROSSRIB.

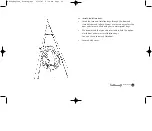
Place Crossrib directly above the keel and chine bars 
(forward of the seat sling) and push down.

Tilt the Crossrib back towards the Stern and engage the two
Gunwale bars. 

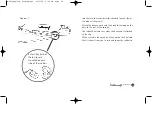
Straighten the crossrib and slide forward until it is near the
spring buttons that protrude from the keel and chine 
extension bars. 

Rotate the keel and chine extension bars until the screws
that protrude from the crossrib align with the holes in the
black plastic blocks. 

Note: (The lever bar can be used to help rotate tubes.
Insert pin into hole used when you extended the frame.
Rotate to align.)

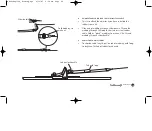
Rotate the two gunwale extension bars until the black blocks
attached to them face towards the middle of the cockpit.

Depress one of the gunwale spring buttons and slide the
crossrib over it. Do the same with the chine and keel bars
and then the other gunwale and chine bars.

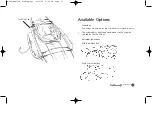
CALF PLATES

Install the plastic plate supports by wrapping Velcro
around Crossrib #3. 

Feathercraft

Khatsalano

13

Calf Plates

KhatsEnglish_Coaming.xpr  9/11/07  2:24 PM  Page 13

Summary of Contents for Khatsalano

Page 1: ...4 1244 Cartwright Street on Granville Island Vancouver British Columbia Canada V6H 3R8 Telephone 604 681 8437 Toll Free 1 888 681 8437 Fax 604 681 7282 www Feathercraft com info feathercraft com Khat...

Page 2: ...olding Kayak Page 2 Specifications Page 3 Khatsalano Frame Page 4 Care and Maintenance Page 5 Khatsalano Assembly Instructions Page 7 Disassembly Page 29 Feathercraft Khatsalano 1 KhatsEnglish_Coaming...

Page 3: ...Khatsalano Single Folding Kayak Feathercraft Khatsalano 2 KhatsEnglish_Coaming xpr 9 11 07 2 24 PM Page 2...

Page 4: ...Seamless Drawn Round Tubing Crossribs 1 2 High Density Polyethylene Rivets Spacers Aluminum or Stainless Steel Screws Bolts Stainless Steel Protective Coating Clear Anodized Aluminum Frame Deck Polyte...

Page 5: ...hylene Welded Aluminum keel both bow and stern Stern deck bar vertical lever Total of five extension bars keel chines gunwales Secure bracing on diagonal truss bars Reinforcement bars Adjustable foot...

Page 6: ...gel form This product is also available from bike shops Apply the Bo Shield lubricant to frame tube inserts spring but tons and sliding pieces prior to assembly If you should leave your boat assemble...

Page 7: ...f the chamber where sponson hose is attached To reinstall pull the cord attached to the new sponson back through the chamber Ensure sponson is not twisted in the chamber Urethane glue and patches are...

Page 8: ...izontal lever with foot track Stern End Keel Section Note Keel bar is bent Feathercraft Khatsalano 7 1 SET OUT FRAME PARTS AS ILLUSTRATED Skin Calf Plates Cockpit Rim Inserts Stern Deck Bar Vertical L...

Page 9: ...lded plate and two tubes attached one black tape Attach keel bar with black plastic block and hole for spring button 3 ATTACH SMALL 1 CROSSRIB TO BOW SECTION There are six high density polyethylene Cr...

Page 10: ...h to Chines Check that chines are properly aligned with 1 Rib 5 ATTACH LEFT AND RIGHT BOW END REINFORCEMENT BARS bent with spring buttons the right one with green tape is shockcorded to section with f...

Page 11: ...einforcement Bars is always oriented towards the bow of the kayak frame Repeat Steps 2 3 4 and 5 7 ROLL OUT SKIN Slide Bow and Stern sections into skin Feathercraft label is on the bow end Ensure that...

Page 12: ...eed to be separated further to insert the keel bar push against this block using the lever bars 10 INSTALL RIGHT BLUE AND LEFT YELLOW CHINE EXTENSION BARS Expand Chine Extension Bars to first hole 11...

Page 13: ...unwale Extension Bars through loops in sling Attach Gunwale Extension Bars to frame and expand to first hole Slide lower flaps of seat sling under Chine Bars Do not attach velcro until 3 and 4 Crossri...

Page 14: ...gn with the holes in the black plastic blocks Note The lever bar can be used to help rotate tubes Insert pin into hole used when you extended the frame Rotate to align Rotate the two gunwale extension...

Page 15: ...mplete like 3 Complete seat sling by securing velcro sandwich around chine bars 16 INSTALL BOW REINFORCEMENT BAR HORIZONTAL LEVER Attach to Left Bow End Reinforcement Bar Slide footbraces onto track F...

Page 16: ...oles in the 3 Crossrib Attach to the bow reinforcement bars 18 INSTALL STERN COCKPIT REINFORCEMENT BARS Slide the two bars from the cockpit through the large holes in the 4 crossrib Attach to stern en...

Page 17: ...uttons pop up in the first holes The technique shown works best 20 INSTALL RIM INSERTS Webbing strap wraps around gunwale and thigh brace Feathercraft Khatsalano 16 Stern Rim Insert Slide into pocket...

Page 18: ...CK BAR VERTICAL LEVER Put the stern deck bar through the center of the large 4 crossrib end with black block pointing toward the stern Bring deck bar back through hole in top of 4 Crossrib Line up bar...

Page 19: ...rim over the opening on the bow deck with the small end towards the bow Roll the fabric over the rim Repeat with the larger stern hatch Note Remove hatch rim when rolling up skin Feathercraft Khatsala...

Page 20: ...op webbing at front of seat around the side of 3 cross rib and connect to ladderlock buckle Note webbing goes above chine bar Note this seat has special side straps that enable it to be used as a beac...

Page 21: ...nson tubes and valves out of the cockpit area Avoid stepping on the hose and valve and try to keep the valve free of sand FOR KHATSALANO REGULAR Smaller diameter sponsons have been installed in the sk...

Page 22: ...ys use these bags unless the bow and stern are filled with gear in water proof bags We recommend that you also insert and inflate the option al mid bow and main stern flotation bags You can t have too...

Page 23: ...will only enter the sock and not the whole boat It s also great for keeping the inside of your kayak clean Tips on Usage and Installation The shiny side of the fabric faces in towards the kayak frame...

Page 24: ...xtending from the base of the rudder is inserted through the key hole of the stern end cap rudder mount Rotate rudder head until fin is facing towards the bow The stainless steel rudder cables coming...

Page 25: ...f the cockpit The rudder haul cord runs along the deck and is attached to the clip When seated in the kayak pull the knot on the haul cord that is farthest from you to raise and lower the rudder fin F...

Page 26: ...r fold webbing over to second grommet Re attach knob to foot brace Slide brace on to track Ensure brace can slide easily on track If not check knob that you re attached If additional leg extension is...

Page 27: ...the loop in the stainless steel rudder cable Fold or pinch webbing to make a V Re thread webbing through slider buckle C CABLE LENGTH ADJUSTMENT To shorten cable length pull on tab of webbing with lo...

Page 28: ...used for self rescue re entry The red webbing deck loop corresponds to the clip with red tab on the Sea Wings OPTIONAL FLOAT BAGS Mid Bow Float Bag Main Stern Float Bag Feathercraft Khatsalano 27 Sea...

Page 29: ...NO KAYAK Feathercraft Khatsalano 28 To prevent the skeg sliding backwards loop the webbing strap underneath the stern deck strap Skeg placement on stern Tapered end towards bow KhatsEnglish_Coaming xp...

Page 30: ...point where the sponson hoses are located This will ensure that air in the spon sons is forced out Close the valves on the sponson hoses and tie the skin Roll up tight and snug Packing the kayak in t...

Page 31: ...Feathercraft Products Limited 1998 Printed in Canada 9 2007 Recycled paper KhatsEnglish_Coaming xpr 9 11 07 2 24 PM Page 30...

Reviews: