background image

PAGE 4 OF 17

INSERT OPERATING INSTRUCTIONS

3.

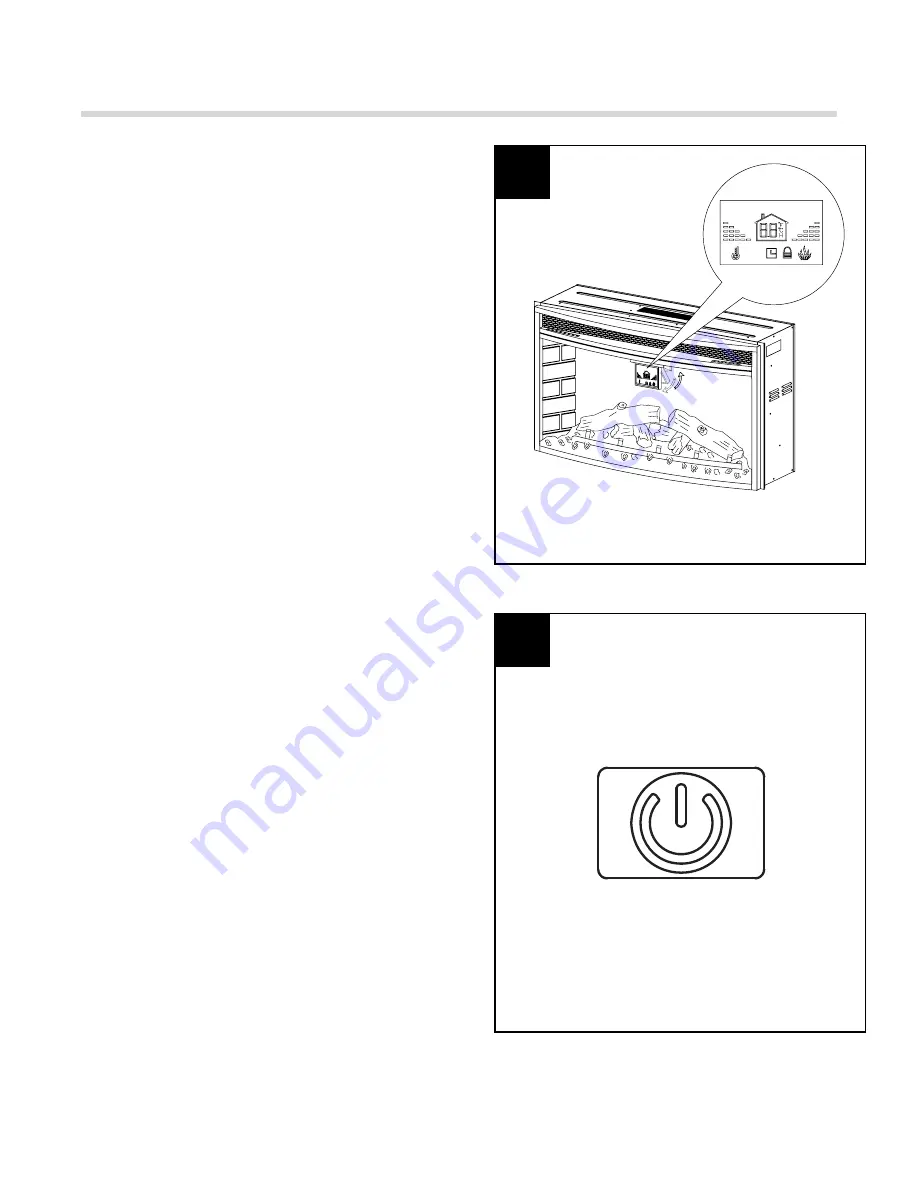
 If you press any button (except POWER) on the 

control panel or on the remote control, the display 
screen will flip down and display all the functions of 
the electric insert within 3 seconds.  Without further 
operation, the display screen will automatically flip 
back up after 20 seconds.

Figure 3

Figure 4

3

4

4. Power: 

Push button to turn on or turn off.  If 

OFF, Heather will be restored at the next power 
ON.


Note: Unplugging the unit will reset all 
functions.

Summary of Contents for 16IN-32-E

Page 1: ...4801 TOLL FREE 1 866 949 3838 EMAIL support easytop com cn PLEASE READ THIS MANUAL CAREFULLY FOR ELECTRIC FIREPLACE INSERT BEFORE INSTALL AND USE PLEASE DO NOT RETURN ANY PRODUCT TO STORE FOR ANY MISSING PARTS HARDWARE OR ASSEMBLY PROBLEMS PLEASE CONTACT WITH OUR CUSTOMER SERVICE CENTER ELECTRIC FIREPLACE INSERT USER MANUAL ...

Page 2: ...here it will not be tripped over 9 To disconnect the appliance turn all controls OFF then remove the plug from the electrical outlet 10 Connect to properly grounded outlets only 11 Do not insert or allow foreign objects to enter any ventilation or exhaust openings as this may cause an electric shock or fire or damage the appliance 12 To prevent a possible fire do not block air intakes or exhausts ...

Page 3: ...h as a properly grounded outlet box The adapter should only be used if a proper 3 slot receptacle is not available NOTE Adapters are not allowed for use in Canada Figure 1 2 A 15 AMP circuit is required to operate this appliance If the breaker trips when the appliance is running you may need to move the appliance to another location or unplug other appliances that are on the same circuit The firep...

Page 4: ... will flip down and display all the functions of the electric insert within 3 seconds Without further operation the display screen will automatically flip back up after 20 seconds Figure 3 Figure 4 3 4 4 Power Push button to turn on or turn off If OFF Heather will be restored at the next power ON Note Unplugging the unit will reset all functions ...

Page 5: ... icon is on also Figure 5 Figure 6 5 6 6 Heater Press to activate the heater function The system will start the temperature setting at 95F There are 7adjustable heat levels ranging from 65F to 95F Press the DOWM or UP button to adjust the levels noting each level increases or decreases the temperature by 5F When this feature is on display screen HEATHER icon also And when this feature is off the i...

Page 6: ...tween 0 5H to 8H interval Once the timer is on an the desired setting is reached the system will shut down Figure 7 Figure 8 7 8 8 Child Lock Press and hold the button for 6 seconds to activate the function When the CHILD LOCK is on all the other features are disabled Press and hold the button again for 6 seconds to unlock the functions ...

Page 7: ...rn down the heat brightness of flame or timer When FLAME HEATER TIMER is not activated this button will not work Figure 9 Figure 10 9 8 10 Up Use to turn up the heat brightness of flame or timer When FLAME HEATER TIMER is not activated this button will not work ...

Page 8: ... 17 SOUND SYSTEM OPERATING INSTRUCTIONS 11 Connect the electric insert to the sound system amplifier module with connection cable 1 Figure 11 11 12 12 Connect the cable 2 and plug into the wall outlet Figure 12 ...

Page 9: ...TING INSTRUCTIONS 13 Turn the sound system amplifier moduleʼs switch on Figure 13 13 14 14 The sound system amplifier module has a RCA line in for TV to connect to The RCA cable is not included and this is an optional setup Figure 14 ...

Page 10: ...button control panel located in the upper left hand corner of the fireplace Using the multifunction remote control The sound system control panel is located at the top left corner on the front see Figure 16 Plug the electric insert to the outlet before operating the sound system Figure 15 Figure 16 15 16 16 Power Press button to turn on or turn off When the sound system is first turned on the embe...

Page 11: ... for 3 seconds to switch between Bluetooth and RCA functions Without any connection for 5 minutes the sound system will automatically go into standby mode press any button to re activate Figure 17 17 18 18 Previous track Press this button to go back to previous track Figure 18 ...

Page 12: ...PAGE 12 OF 17 SOUND SYSTEM OPERATING INSTRUCTIONS 19 Next track Press this button to go to next track Figure 19 19 20 20 Pause Press this button to pause or restart music playing Figure 20 ...

Page 13: ...PAGE 13 OF 17 SOUND SYSTEM OPERATING INSTRUCTIONS 21 Volume Up Press to turn up the volume of the sound system Figure 22 21 22 22 Volume Down Press to turn down the volume of the sound system Figure 21 ...

Page 14: ...control Different from the same button on the Control Panel while operate with the Remote control you just need to press the red POWER button for 3 seconds to cycle through the CHILD LOCK setting 2 Mode function for sound system on remote control Different from same button on the Control Panel while operate with the Remote control you just need to press the AMP POWER button for 3 seconds to switch...

Page 15: ...nce to radio or television reception which can be determined by turning the equipment off and on the user is encouraged to try to correct the interference by one or more of the following measures Reorient or relocate the receiving antenna Increase the separation between the equipment and receiver Connect the equipment into an outlet on a circuit different from that to which the receiver is connect...

Page 16: ... center at toll free no 1 866 949 3838 3 Remove screws holding back panel in place and remove back panel Secure end of Flame wand back into the support bracket 4 Contact customer service center at toll free no 1 866 949 3838 The appliance turns off and will not turn back on 1 The overheat protection device in the appliance has been triggered 2 House circuit breaker has been tripped 1 Turn all cont...

Page 17: ...oof of purchase model number of your EASY TOP product part number and defective part Register your product within ten days to ensure your warranty You must pay all expenses incurred in obtaining performance of any obligation under this limited warranty including transportation postage and other incidental service costs If defective part or parts are requested by Customer Service Center you must ma...

Reviews: