5
Installation
Physical installation
Remember to select a location that is
readily accessible for periodic inspection
and cleaning of your humidifier.
1. Read the instructions carefully prior to
installing this product to ensure safe
operation. Failure to follow these
instructions could damage the humidifier or
cause a hazardous condition.
2. Check the ratings given on the product to
make sure it is suitable for your application.
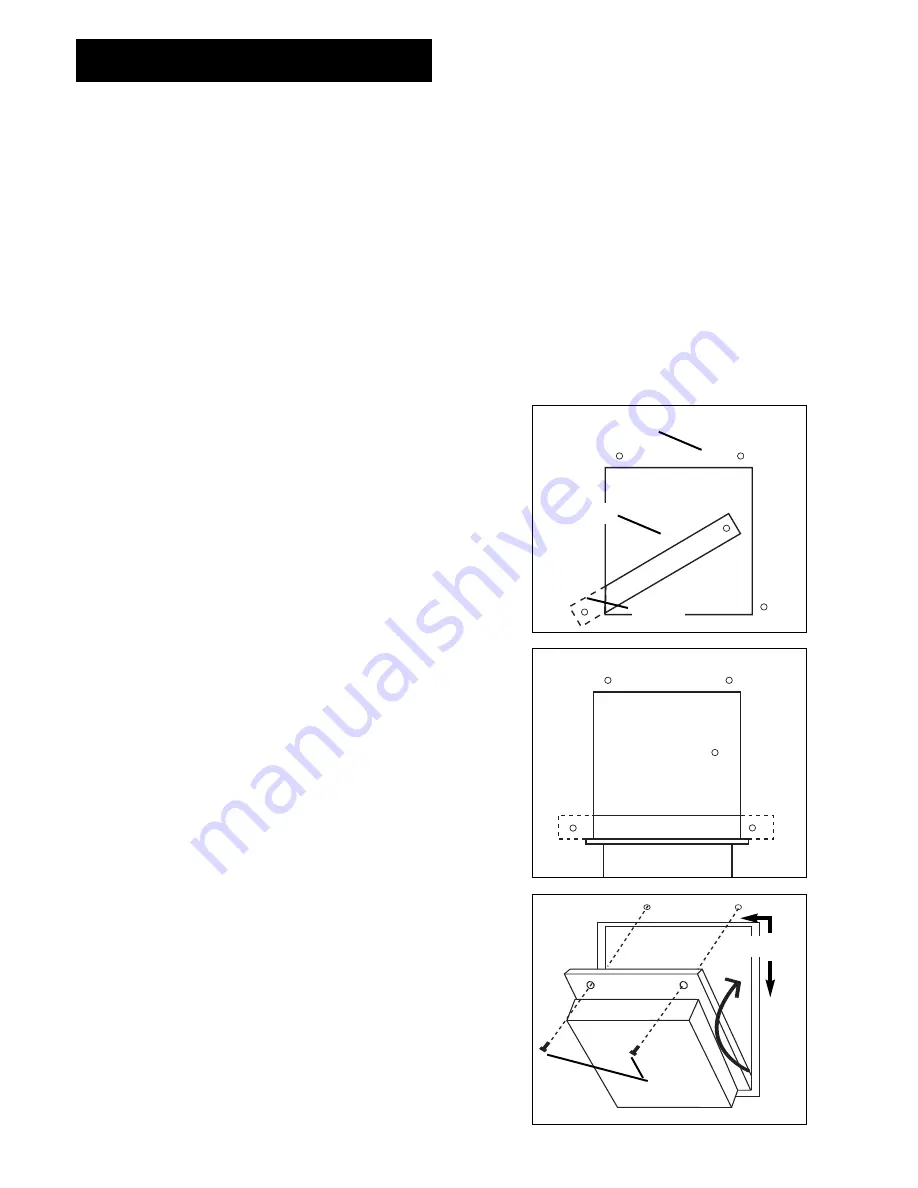
3. Tape the template (found in the parts bag)
in place on the duct and punch the (4) holes
as marked. Also punch holes at the (4)
corners of the cut out to use as reference
points.
4. Drill the (2) 1/8” diameter holes at the top of
the template.
5. Drill the (2) 7/32” diameter holes at the side
(bottom).
6. Neatly cut out the duct as shown on the
template.
7. Remove all sharp edges and burrs to prevent
damage to the unit or injury to yourself.
8. Remove the Retainer and (4) sheet metal
screws from the parts bag.
9. Carefully place the Retainer inside the duct
and fasten loosely with (1) screw.
10. Place the bottom lip of the humidifier on the
bottom edge of the cut out.
11. Slide the Retainer over the lip and secure
with (1) sheet metal screw at the other side.
12. Tighten both screws securely to fasten the
unit into place.
13. The unit should now hinge up easily and
align with the holes drilled at the top.
14. Remove the foam seal from the parts bag,
remove the paper backing and place on the
sheet metal around the cut out opening to
seal the humidifier.
15. Tilt the humidifier into position and fasten
with (2) sheet metal screws.
CAUTION:
Only a trained service person
should install this humidifier. Do
not connect the unit to power
source until installation is
complete. A thorough checkout
of the unit installation should be
completed before operation.
Failure to follow these directions
may void the manufacturer's
original warranty.
Duct Cut-Out
Retainer
Screw
Humidifier
Foam Seal
Screws


