background image

Valor

®

 Light Bar Hook-On Mounting Kit Manual

4


Valor Hook-On Mounting Kit 

Federal Signal

 www.fedsig.com

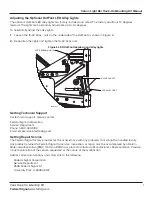
Installing the Adjustable Foot Brackets

ENSURE PROPER INSTALLATION OF MOUNTING FEET: Note that the LH Mounting Foot is for the left 

side of the light bar and the RH Mounting Foot is for the right side. Failure to follow this precaution 

may damage the light bar.

The adjustable foot brackets enable you mount the Valor at the maximum height and to level the light bar.
To install the adjustable foot brackets:

1. 

To avoid marring the plastic domes, invert the light bar on soft rags or cardboard.

2. 

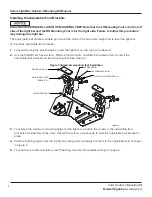
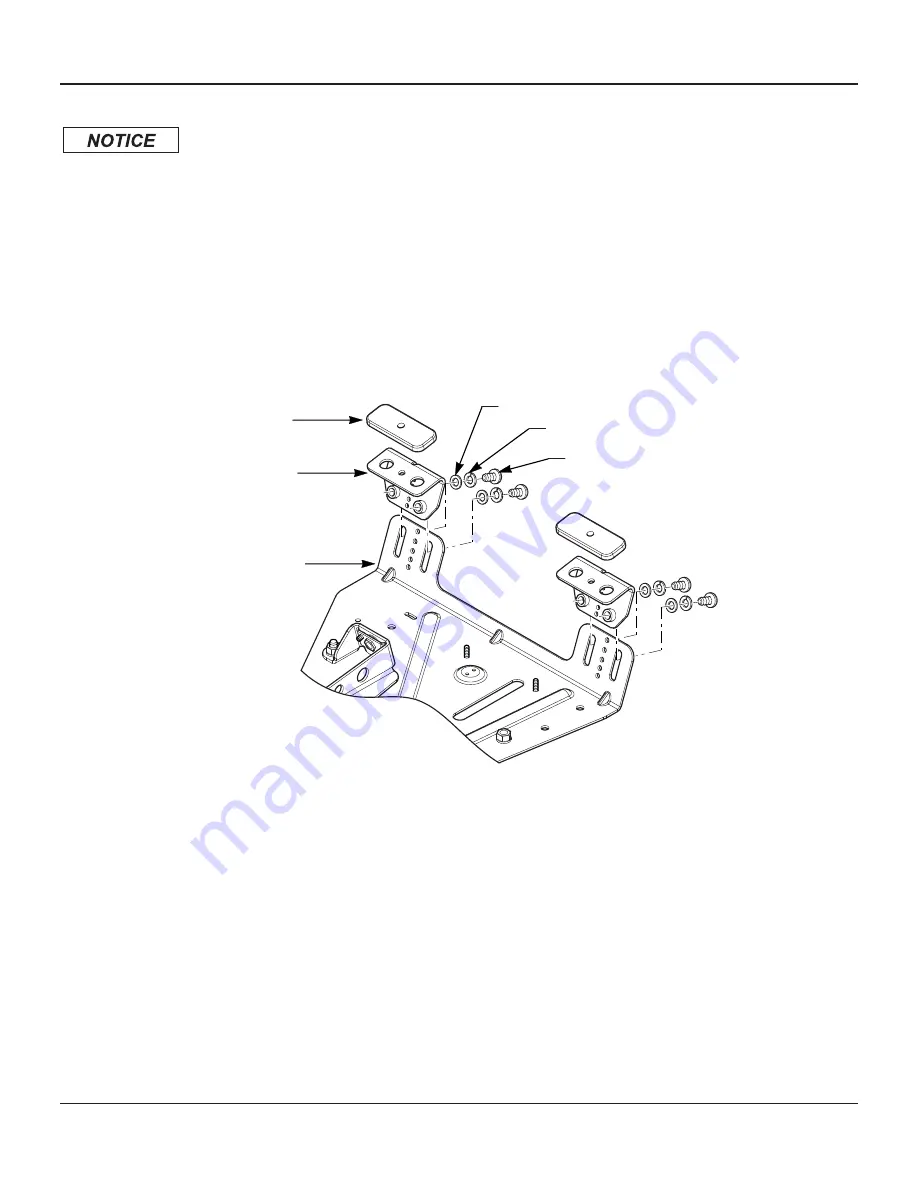
Use the 5/16-18 Torx head screws, 5/16-inch flat washers, and 5/16-inch lockwashers to install the 

adjustable foot brackets on the mounting feet. See Figure 3.

Figure 3 Adjustable mounting feet installation

5/16-18 PAN TORX SCREW (8) 

5/16 LOCKWASHER (8) 

5/16 WASHER (8) 

MOUNTING PAD (4) 

ADJUSTABLE FOOT 

BRACKET (4) 

LH MOUNTING FOOT

290A6444

3. 

To achieve the maximum mounting height of the light bar, position the screws in the adjustable foot 

brackets at the bottom of the slots. Tighten the screws only enough to hold the adjustable foot bracket in 

place.

4. 

Peel the backing paper from the rubber mounting pads and apply the them to the adjustable feet as shown 

in Figure 3.

5. 

To continue with the installation, see "Preparing the Valor for Hook-Mounting" on page 5.

Summary of Contents for Valor Hook-On

Page 1: ...effectiveness of the airbag or potentially dislodge the equipment causing serious injury to you or others To avoid damage to the light bar do not overtighten screws and nuts This product contains high intensity LED devices To prevent permanent eye damage DO NOT stare into the light beam at close range For additional precautions and information refer to the instructions packed with related products...

Page 2: ...t Failure to heed this warning may cause personal injury Installing the Service Kit Mounting Feet ENSURE PROPER INSTALLATION OF MOUNTING FEET Before installing the mounting feet and hook attach bracket note that the LH foot and bracket is for the left side of the light bar and the RH foot and bracket for the right side Failure to follow this precaution may damage the light bar The Service Kit requ...

Page 3: ...290A6440 3 Use a nut retainer and two 10 Type B pan Torx screws to trap the 5 16 18 flange nut on the backside of the hook attach bracket See Figure 2 Figure 2 Hook attach bracket installation 10 PAN TORX SCREW 4 290A6441 LH HOOK ATTACH BRACKET LH MOUNTING FOOT 5 16 18 FLANGE NUT 2 NUT RETAINER 2 LIGHTBAR BASE 4 Repeat steps 2 and 3 with the other mounting foot assembly 5 To continue with the inst...

Page 4: ...soft rags or cardboard 2 Use the 5 16 18 Torx head screws 5 16 inch flat washers and 5 16 inch lockwashers to install the adjustable foot brackets on the mounting feet See Figure 3 Figure 3 Adjustable mounting feet installation 5 16 18 PAN TORX SCREW 8 5 16 LOCKWASHER 8 5 16 WASHER 8 MOUNTING PAD 4 ADJUSTABLE FOOT BRACKET 4 LH MOUNTING FOOT 290A6444 3 To achieve the maximum mounting height of the ...

Page 5: ...he assembly is installed so that the mounting hooks attach at or immediately behind the door center post 2 Adjust both mounting foot assemblies in or out until the mounting pads rest near the edge of the roof or gutter where the roof is the most rigid 3 Center the light bar assembly so that the end of the assembly and edge of the roof are equidistant on each side of the vehicle Ensure that the gut...

Page 6: ...e tight Figure 4 Light bar mounted on vehicle roof 5 16 18 PAN TORX SCREW 8 LED ALLEY LIGHT ADJUSTABLE FOOT BRACKETS 4 10 TYPE B PAN TORX SCREW 4 LH MOUNTING FOOT 290A6445 SLOTS FOR LEVELING LIGHTBAR AND ADJUSTING HEIGHT FOOTPAD 4 Aiming the Optional HotFoot LED Takedown Lights The optional HotFoot LED takedown lights are factory installed and wired The horizontal aim of the takedown light is adju...

Page 7: ... KEPS NUTS 290A6451 LED ALLEY LIGHT Getting Technical Support For technical support please contact Federal Signal Corporation Service Department Phone 1 800 433 9132 Email empserviceinfo fedsig com Getting Repair Service The Federal Signal factory provides technical assistance with any problems that cannot be handled locally Any product returned to Federal Signal for service inspection or repair m...

Page 8: ...ty This product is subject to and covered by a limited warranty a copy of which can be found at www fedsig com SSG Warranty A copy of this limited warranty can also be obtained by written request to Federal Signal Corporation 2645 Federal Signal Drive University Park IL 60484 email to info fedsig com or call 1 708 534 3400 This limited warranty is in lieu of all other warranties express or implied...

Reviews: