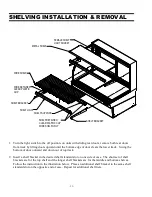


- 14 -
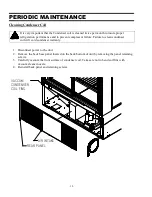
MAINTENANCE
Shelf Light Bulb Replacement
1.
All shelf light fixtures use a spring-loaded socket at one end. To remove the bulb push the bulb
towards the spring-loaded socket until the opposite ends drops out of the socket.
2.
The bulb is inside a clear shatter proof tube with a black plastic cap on each end. Be careful not
to allow bulb to slide out of shatter proof tube.
3.
Reinstall new bulb in to the existing shatter proof tube and reuse black plastic end caps. Reinstall
bulb assembly in the same manner as described in the Bulb Removal Procedure. Be sure bulb is
secure in bulb receptacles
Note: Be sure to use a direct equivalent to the original bulb.
Top Light Bulb Replacement
1.
On units with sliding rear doors, remove both rear doors from track by lifting doors upward until the
bottom edge of door clears the lower track. Swing the bottom of door outward and down out of top
track. On units with rear swing doors completely open doors to allow access to interior of case.
2.
Remove all shelves, shelf supports and Shelf lights from unit through rear door opening. (See
“Shelving Installation and Removal” section of this manual for instruction if needed)
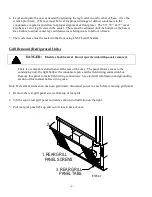
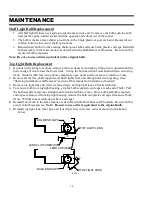
3.
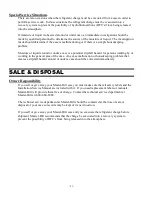
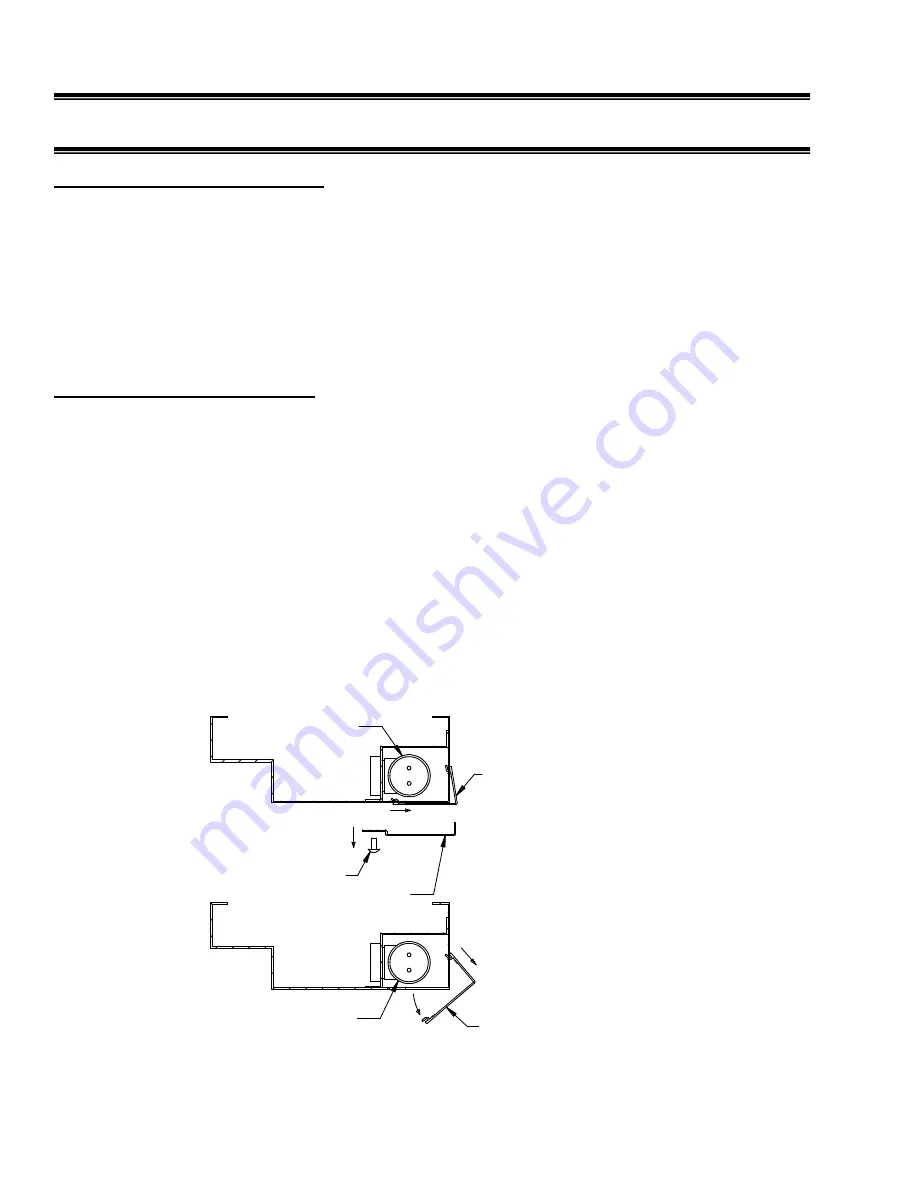
Remove top light lens clip screw(s), lens clip(s), and top light lens as illustrated below.
4.
To remove bulb from top light housing, grip the bulb receptacle end caps at each end of bulb. Pull
the bulb receptacle end caps straight outward toward front of case. Once bulb and bulb receptacle
end caps are removed from top light housing remove the bulb receptacle end caps from end of bulb.
(Note: 50”dual zone models do not have end caps.)
5.
Reinstall new bulb in the same manner as described in the Bulb Removal Procedure. Be sure bulb is
secure in bulb receptacles. Note: Be sure to use a direct equivalent to the original bulb.
6.
Reinstall top light lens, lens clips, and lens clip screws in reverse order as shown in illustration
below.
1
2
3
4
TOP LIGHT LENS
TOP LIGHT LENS
LENS CLIP(S)
LENS CLIP SCREW(S)
BULB END CAPS
BULB END CAPS
E1954-4
Summary of Contents for ECGR50
Page 29: ...29...