background image

F E I   B A O   F - 9 F   P A N T H E R  


57

57

57

57    

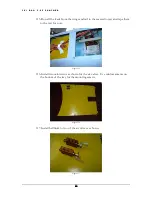
154. Connect the gear and gear door lines according to the diagram provided 

with the UP3 valve. 


Figure 154


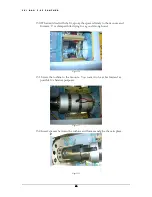
155. Connect the UAT to the main tank. 


Figure 155


156. Add a vent line to the tank. 


Figure 156 


Summary of Contents for F-9F Panther

Page 1: ...F E I B A O F 9 F P A N T H E R 1 1 1 1 FEI BAO JETS F 9F Panther Assembly Manual Written by Curtis Mattikow In collaboration with R C Jet Models...

Page 2: ...after assembly A second set of eyes may spot a problem you have missed If you have not flown a model like this before it is HIGHLY recommended that you get an experienced turbine pilot to do your mai...

Page 3: ...One bag of fuel plugs One bag of air disconnects 7 linkages 2 air tanks One bag of servo mounts with hardware One bag of screws and bolts One bag with steering cable and tubing for crimping Aircraft p...

Page 4: ...esive to use for all procedures is Loctite Hysol 9462 This is a very strong white epoxy that is thixotropic Thixotropic means it does not run at all but stays only where you put it It is infinitely su...

Page 5: ...or you will get uneven retraction or braking action It s worth taking the time to get everything pneumatic right the first time as having your landing gear fail to retract is not THAT bad but having i...

Page 6: ...ariations in the screw holes and they may not fit perfectly if you rotate the covers Figure 1 2 Fit the supplied aluminum mounts to the servo using the supplied screws Do not over tighten and strip th...

Page 7: ...ap hardwood or plywood blocks the same size as the servo mounts Figure 4 5 Epoxy the scrap blocks on the inside of the mounts to provide extra strength Figure 5 6 Attach a 36 heavy duty 22 gauge exten...

Page 8: ...Dril pilot holes in the wooden mounts Figure 7 8 Screw the servo with the kit provided screws Do not over tighten and strip the screw holes Figure 8 9 Fit the servo cover up against the model and mark...

Page 9: ...rap plywood on the back side before you drill it will give you a clean hole without marking up the finish that way Figure 10 11 Draw two lines between the holes with a straightedge and soft pencil Cut...

Page 10: ...F P A N T H E R 10 10 10 10 13 Fit the ruder pushrod to the servo horn Figure 13 14 Using the rod for reference mark the location of the rudder control horn Figure 14 15 Cut the slot for the control...

Page 11: ...drilling out the top hole to accomodate the bolt for the link and roughen the lower portion of the horn for better glue adhesion Figure 16 17 Box in the control horn with masking tape as shown Figure...

Page 12: ...y leaving a nice clean edge Figure 19 20 Painting the horns to match the airframe greatly enhances the appearance When dry hook up the link to the horn as shown Loctite the nut Figure 20 21 Remove one...

Page 13: ...13 13 22 Prepare an elevator servo with the provided mounts and a horn Figure 22 23 Test fit the servo in place and drill pilot holes Run the servo lead out through the hole shown Figure 23 24 Screw...

Page 14: ...ut a notch for the servo horn and screw the servo cover into place Figure 25 26 Find the titanium pushrods and prepare for linkage Figure 26 27 Fit the linkage to the servo horn Follow all the same pr...

Page 15: ...ds to mark the position for the control horns and cut the slots for the horns Figure 28 29 Hysol the horns into place Do both at the same time to establish symmetry Figure 29 30 Carefully check alignm...

Page 16: ...rns if you like and add the linkages to the horns as shown Figure 31 32 Add two 36 inch extensions to the elevator servos and secure the connections with tape Figure 32 33 Fit the upper fin into place...

Page 17: ...34 Fit the elevator and fin assembly to the rear fuselage Figure 34 35 Mark the outline of the fuse on the bottom of the stab with a pencil Figure 35 36 Roughen and remove the paint from the bottom of...

Page 18: ...will not stick to paint at all so do a good job here Figure 37 38 Do the same with the top mating surface of the fuse and the bottom of the upper fin Figure 38 39 Apply a nice even layer of hysol to t...

Page 19: ...res in and through the holes in the bulkheads Figure 40 41 Push the stab and rudder assembly into place and tighten up the two bolts in the side of the fuse Figure 41 42 Wipe up any excess hysol that...

Page 20: ...racts out without breaking the linkage to the gear doors Figure 43 44 Add up and down airlines to the retracts These should be about 18 inches long and color code them for easier plumbing Figure 44 45...

Page 21: ...18 inches long Secure the brake lines to the struts with tie wraps Figure 46 47 Route the three air lines through the hole in the former as shown Figure 47 48 Run the matching lines for the retracts f...

Page 22: ...hes long to the y connector and run it forward through the former and out of the way Figure 49 50 Repeat this procedure for the other two pairs of airlines Figure 50 51 Add a length of airline about 1...

Page 23: ...es long Route through the former as shown Figure 52 53 Secure the flap airlines to the bottom of the fuse as shown Metal tape or plastic airline clips work well for this Figure 53 54 Add an airline ap...

Page 24: ...4 55 Add a length of airline 24 inches long and y the two cylinders together Run the line forward as shown Figure 55 56 Link the bottom two nipples on the cylinders together the same way Figure 56 57...

Page 25: ...e with the other nipples for the speed brake cylinders The lengths of these lines are about 3 inches long with the line out about one foot long Figure 58 59 Flip the plane over and remove the nose gea...

Page 26: ...each air tank and silicone glue them into place as shown Figure 61 62 Route the lines from the air tanks backwards to the speed brake compartment and link together with a y connector as shown Figure...

Page 27: ...in two and crimp it to the inner holes on the steering arm Figure 64 65 Reinstall the nose gear with four screws Feed the steering lines through the white plastic tubes Figure 65 66 Route the airline...

Page 28: ...need to make up a tray for the nose gear steering servo Here is a top and side view of what is needed Figure 67 68 Add balsa blocks to the front to increase the gluing surface Figure 68 69 Add balsa...

Page 29: ...29 29 29 29 70 Add a servo to the tray Figure 70 71 Glue the servo mount as shown Figure 71 72 Link the steering cables to the servo They should be taut but not too tight or they will keep the nose g...

Page 30: ...e all the airlines Figure 72 74 Bundle all the airlines leading forward together Figure 74 75 Remove the fuel bung Blow out any debris inside the tank Observe which line is for fuel and which is the v...

Page 31: ...the tank The lines leading forward must go around the tank to one side Figure 76 77 Check each lines with your air pump to make sure it is not pinched or kinked then secure the tank into place with a...

Page 32: ...and gear door lines Add a length of tubing about 10 inches long to each y connector Figure 79 80 Paint the forward tray if you like and epoxy it back into place in the nose above the air tanks Figure...

Page 33: ...e to the leading edge Trim it very carefully leaving a slight overlap around the leading edge top Figure 82 83 The tape should overlap the top by perhaps one eighth of an inch Figure 83 84 Burnish the...

Page 34: ...of the leading edge the same way Figure 85 86 Again you want just a small overlap over the bottom covering Figure 86 87 Standard width tape may be too narrow to cover the root area Finish out the mis...

Page 35: ...he metal tape with a soft cloth to restore the rivets and other surface detail Figure 88 89 Add these strips the same way to the rudder and stabs Figure 89 90 Do the wing roots and intakes You will ne...

Page 36: ...18 inch extensions and tape for security Figure 91 92 Tape a wheel collar to a piece of string Tie the string to the aileron servo extension Figure 92 93 Drop the wheel collar and string through the w...

Page 37: ...get the correct throws Figure 94 95 Remove the clevises from both ends but leave the locknuts on Clip off the excess as shown on the bottom link Figure 95 96 Now bevel off the rough edge as shown in...

Page 38: ...38 97 Now mount the aileron linkage Figure 97 98 Install a hardwood beam in the upper rear fuselage which is shown here upside down Figure 98 99 Attach the tail servo leads to this beam to keep them f...

Page 39: ...100 Slide the rear centering ring over the tailpipe Figure 100 101 Insert the tailpipe into the fuse from the front and check for fit and centering Figure 101 102 You can also use scraps of wood to e...

Page 40: ...40 40 103 When satisfied glue and screw the centering ring into place Figure 103 104 Put the former up against the rear fuselage and mark off the areas as shown Figure 104 105 Remove the excess wood f...

Page 41: ...former into place Do not glue the former yet Figure 106 107 Install the six bolts and washers into the forward fuse section Figure 107 108 Bolt the rear fuselage section into place You may access the...

Page 42: ...ds from the tail and secure the leads to the side of the fuselage Figure 109 110 Install two hardwood rails as shown about an inch down from the top of the fuse Make sure the rails are level to each o...

Page 43: ...k plywood rear radio tray Paint it if you like Figure 112 113 Install the rear radio tray and secure with two screws to the front rail Figure 113 114 Install two extensions into each wing root Leave a...

Page 44: ...and tail to the rear radio tray and tape them to the tray for now Figure 115 116 Install two miniservos as shown for the air valves Use reinforcements on the bottom of the tray for the mounting screw...

Page 45: ...ke up a small hardwood block to mount the air valves to the tray Figure 118 119 Screw the air valves to the block then glue and screw the block to the forward radio tray Figure 119 120 Complete the li...

Page 46: ...F E I B A O F 9 F P A N T H E R 46 46 46 46 121 Add the third valve in the same fashion Figure 121 122 Install your UP3 valve using two bolt Figure 122 123 Install a servo for the UP3 Figure 123...

Page 47: ...F E I B A O F 9 F P A N T H E R 47 47 47 47 124 Link the valve to the servo Figure 124 125 Test fit your turbine on the mounts Figure 125 126 Cut the intake as shown Figure 126...

Page 48: ...sure to not cut into the fuel tank Figure 127 128 You will need to use the supplied spacers for anything but the largest engines Test fit them and your engine and adjust the width if need be Figure 1...

Page 49: ...rs firmly to the mounts and formers Use clamps while drying for a good strong bond Figure 130 131 Screw the turbine to the mounts You want it to be as far forward as possible for balance purposes Figu...

Page 50: ...hen dry push the tailpipe back into place bend the metal straps as shown trim if required and screw the straps to the former Figure 133 134 Install your UAT to the tray as shown using tie wraps Figure...

Page 51: ...F 9 F P A N T H E R 51 51 51 51 136 Connect the fuel pump to the UAT Figure 136 137 Install the fuel and gas solenoids next to the fuel pump Figure 137 138 Connect the fuel pump to the fuel solenoid...

Page 52: ...the bottom of the fuselage when the tray is installed Figure 139 140 Connect the propane tank to the solenoid and add all the other propane fittings Figure 140 141 Connect your fuel filter and secure...

Page 53: ...a fill line and plug to the appropriate port on the UAT Figure 142 143 Connect the two air in nipples on the two valves as shown using tubing and a y connector Figure 143 144 Connect the third valve...

Page 54: ...ubing and another y connector Figure 145 146 Add a short section of line to the y connector add another y connector then add a loop of tubing about a foot long to the y connector Figure 146 147 Flip t...

Page 55: ...O F 9 F P A N T H E R 55 55 55 55 148 Add extensions to the air and gas solenoids and bundle them together Figure 148 149 Connect the lines as shown Figure 149 150 Connect the airlines to the valves F...

Page 56: ...151 Connect the line from the pneumatic flaps to the first valve as shown Figure 151 152 Connect the line from the brakes to the second valve as shown Figure 152 153 Connect the lines from the dive br...

Page 57: ...A N T H E R 57 57 57 57 154 Connect the gear and gear door lines according to the diagram provided with the UP3 valve Figure 154 155 Connect the UAT to the main tank Figure 155 156 Add a vent line to...

Page 58: ...o tray Test fit the tray to make sure the ECU does not hit the rear of the cockpit opening Figure 157 158 Install the fuel shutoff valve on the radio tray Figure 158 159 Install the air filler valve t...

Page 59: ...59 160 Install your radio switches to the tray Figure 160 161 Install your receiver and cut a hole for the radio leads to come up through the bottom of the tray Figure 161 162 Attach the loose airline...

Page 60: ...0 60 60 60 163 Attach all the radio leads to the receiver Figure 163 164 Attach the line from the fuel filter to the shutoff valve and connect the valve to the turbine Figure 164 165 Attach the soleno...

Page 61: ...fuel pump battery and glow leads to the ECU Figure 166 167 Install the flap servo into place with four screws Figure 167 168 Drill a pilot hole through the wing skin to locate the flap servo horn then...

Page 62: ...ll the linkage and control horn for the flap Figure 169 170 Install the tip tanks using the provided bolts Figure 170 171 You may flip one flap servo over and shorten the linkage to reverse one flap s...

Page 63: ...H E R 63 63 63 63 172 Flap travel is measured as shown four inches at full flap Figure 172 173 Test fit the cockpit tub into the fuselage and trims as required Figure 173 174 Test fit the cockpit tub...

Page 64: ...hboard to glue it into the forward fuselage and tape the cockpit tub into place Figure 175 176 Put a rag or piece of foam over the rear portion of the cockpit tub to keep it level Figure 176 177 Put s...

Page 65: ...178 Apply silicone to the edges of the cockpit tub Figure 178 179 Latch the canopy into place and allow to dry Figure 179 Congratulations you have completed construction on your F 9F Panther See the...

Page 66: ...TRAVEL 4 at full travel measured as shown in the picture You may need a small amount of up elevator mixed in with full flap You can also add the pneumatic center flaps with a mix or on a separate swit...

Reviews: