background image

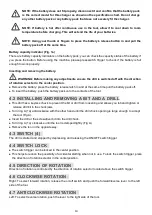
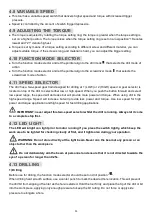
4.8 VARIABLE SPEED

This tool has a variable speed switch that delivers higher speed and torque with increased trigger

pressure.

Speed is controlled by the amount of switch trigger depression.

4.9 ADJUSTING THE TORQUE

The torque is adjusted by rotating the torque setting ring; the torque is greater when thetorque setting is

set on a higher position. The torque is less when the torque setting ring is set on a low position“1”denotes
lowest and “21” denote highest.

Torque is set by means of a torque setting according to different screw and different material, you can

adjust suitable torque, if the screw is long and material is hard, you can adjust the bigger setting.

4.10 FUNCTION MODE SELECTOR

Turn the function mode selector and let the pointer align to the drill mode

that selects the drill mode of

action.

Turn the function mode selector and let the pointer align to the screwdriver mode

that selects the

screwdriver mode of action.

4.11 SPEED SELECTOR

The drill has a two-speed gear train designed for drilling at 1 (LOW) or 2 (HIGH) speed. A gear selector is
located on top of the drill to select either low or high speed. When you push the button forward and select
low speed range, the speed will decrease but will provide more power and torque. When using drill in the
high-speed range. Speed will increase but will provide less power and torque. Use low speed for high
power and torque application and high speed for fast drilling applications.

IMPORTANT: never adjust this two-speed selector whilst the drill is running. Always let it come

to a complete stop first.

4.12 LED LIGHT

The LED work-light can light prior to motor running if you press the switch lightly, which keep the

work area to be lighted for checking clearly at first, and it lights also during your operation.

WARNING: Do not stare directly at the light beam. Never aim the beam at any person or an

object other than the work piece.

Do not deliberately aim the beam at personnel and ensure that it is not directed towards the

eye of a person for longer than 0.25s.

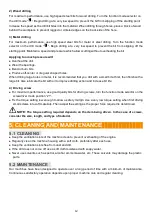
4.13 DRILLING

1) Drilling

Before use for drilling, the function mode selector should be set on drill position “ ”.
When drilling hard smooth surface, use a center punch to mark the desired hole location. This will prevent
the drill bit from slipping off center as the hole is started. Hold the tool firmly and place the tip of the drill or bit
into the work piece, applying only enough pressure to keep the bit cutting. Do not force or apply side
pressure to elongate a hole.

11

Summary of Contents for FPV20V2B2B-A

Page 1: ...ORIGINAL INSTRUCTIONS EN CORDLESS DRILL FPV20V2B2B A USER GUIDE CAUTION Read this manual before using this machine ...

Page 2: ...SE 3 2 SAFETY INSTRUCTIONS 3 3 YOUR PRODUCT 8 4 OPERATION 9 5 CLEANING AND MAINTENANCE 12 6 TECHNICAL DETAILS 13 7 DISPOSAL 13 8 DECLARATION OF CONFORMITY 14 9 WARRANTY 15 10 PRODUCT FAILURE 16 11 WARRANTY EXCLUSIONS 17 02 ...

Page 3: ...ools Unmodified plugs and matching outlets will reduce risk of electric shock b Avoid body contact with earthed or grounded surfaces such as pipes radiators ranges and refrigerators There is an increased risk of electric shock if your body is earthed or grounded c Do not expose power tools to rain or wet conditions Water entering a power tool will increase the risk of electric shock d Do not abuse...

Page 4: ...h of children and do not allow persons unfamiliar with the power tool or these instructions to operate the power tool Power tools are dangerous in the hands of untrained users e Maintain power tools and accessories Check for misalignment or binding of moving parts breakage of parts and any other condition that may affect the power tool s operation If damaged have the power tool repaired before use...

Page 5: ... speeds the bit is likely to bend if allowed to rotate freely without contacting the workpiece resulting in personal injury b Always start drilling at low speed and with the bit tip in contact with the workpiece At higher speeds the bit is likely to bend if allowed to rotate freely without contacting the workpiece resulting in personal injury c Apply pressure only in direct line with the bit and d...

Page 6: ...tool only to charge the battery Never attempt to charge non rechargeable batteries Have defective cords replaced immediately Do not expose to water Do not open the charger Do not probe the charger The charger is intended for indoor use only This charger can be used by children aged from 8 years and above and persons with reduced physical sensory or mental capabilities or lack of experience and kno...

Page 7: ...his product Wear ear protectors Exposure to noise can cause hearing loss Wear eye protection Class II double isolation only for charger Do not dispose of old appliances with domestic rubbish Do not expose the charger or the battery to water Do not incinerate the battery or charger Ambient temperature of 40 C max only for the battery Battery and charger to be used indoors only Recycling 07 ...

Page 8: ...pacity weight ratio more power for less heavy more compact battery No memory effect capacity loss after several charge discharge cycles like other type batteries Limited self discharge 2 Keyless chuck 1 Your drill has a keyless chuck that allows you to hand tighten or release drill bit in the chuck jaws 3 Torque adjustment ring 2 The drill has a torque adjustment ring It allows you to select the d...

Page 9: ...the batterypack 8 TPR soft grip Your cordless drill is equipped with TPR soft grip and protective parts TPR Thermoplastic rubber is elastic chock absorbing and environmental friendly recyclable 4 OPERATION 4 1 CHARGING THE BATTERY PACK IMPORTANT The battery pack is not fully charged at the factory Before attempting to charge them thoroughly read all of the safety instructions To assure that the ch...

Page 10: ...ack off To insert the battery push the battery pack onto the contacts of the tool 4 2 INSTALLING AND REMOVING A BIT AND A DRILL This drill has a keyless chuck to prevent the bit or drill from loosening and allows you tohand tighten or release drill bit in the chuck jaws Turn ring A 1a anticlockwise with the other hand until the drill chuck opening is large enough to accept the tool Fig A Insert th...

Page 11: ...forward and select low speed range the speed will decrease but will provide more power and torque When using drill in the high speed range Speed will increase but will provide less power and torque Use low speed for high power and torque application and high speed for fast drilling applications IMPORTANT never adjust this two speed selector whilst the drill is running Always let it come to a compl...

Page 12: ...cate the bit with oil to improve drilling action and increase bit life 4 Driving screw For maximum performance use good quality bits for driving screws turn the function mode selector on the screwdriver mode position 21 Fix the torque setting low enough to allow a safety margin Use a very low torque setting when first driving small screws into soft materials Then adjust the setting as the proper f...

Page 13: ...n which the tool is used especially what kind of workpiece is processed Need to identify safety measures to protect the operator that are based on an estimation of exposure in the actual conditions of use taking account of all parts of the operating cycle such as the times when the tool is switched off and when it is running idle in addition to the trigger time Wear hearing protection 7 DISPOSAL E...

Page 14: ...on European Directives including if applicable their amendments up to the date of signature Rohs directive 2011 65 EU EU 2015 863 Directive Machine 2006 42 EC Directive EMC 2014 30 UE LVD Directive 2014 35 UE European harmonized standards including if applicable their amendments up to the date of signature EN62841 1 2015 EN62841 2 1 2018 A11 2019 EN55014 1 2017 A11 2020 EN55014 2 2015 EN 62233 200...

Page 15: ...the user manual Due to our policy of continuous product improvement we reserve the right to alter or change specifcations without notice Consequently the product may be diferent from the information contained therein but a modifcation will be undertaken without notice if it is recognized as an improvement of the preceding characteristic READ THE MANUAL CAREFULLY BEFORE USING THE MACHINE When order...

Page 16: ...epairs will be done by approved engine manufacturers of these manufacturers see their site http www briggsandstratton com eu fr http www honda engines eu com fr service network page jsessionid 5EE8456CF39CD572AA2AEEDFD 290CDAE https www rato europe com it service network Please keep your original packaging to allow for after sales service returns or pack your machine with a similar cardboard box o...

Page 17: ...ssary for repairs and more generally the costs related to the immobilization of the product The costs of a second opinion established by a third party following an estimate by a SWAP Europe repair station The use of a product which would show a defect or a breakage which was not the subject of an immediate report and or repair with the services of SWAP Europe Deterioration linked to transport and ...

Page 18: ...BUILDER SAS 32 rue Aristide Bergès Z I du Casque 31270 Cugnaux France MADE IN PRC ...

Reviews: