Mounting Instructions
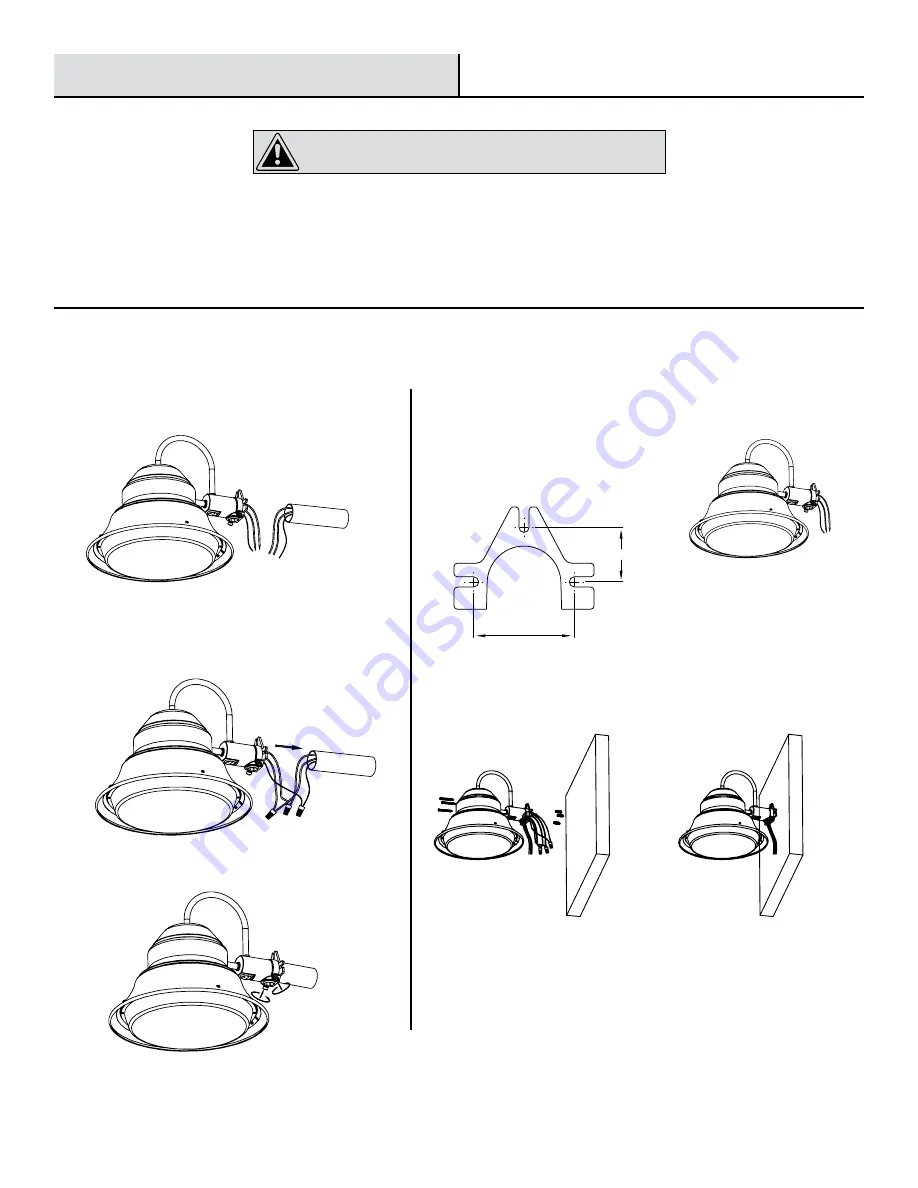
Check that black, white and ground wire are extending from the
fixture. Before wiring the fixture to the power supply, turn off
the electricity at the fuse or circuit breaker box. Fixture must be
grounded to avoid potential electric shock.
1. Mount arm assembly (sold by others) in desired location firmly.
Pole Mount:
2. Take off the grommet.
2. Feed supply wires up through mounting arm,
use wire nuts (CC) to connect neutral, line and
grounding wires (see step 4). Push the wires and
connectors into arm.
3. Install conduit fitting (not supplied) on the
fixture, feed the power supply wires into
the fixture / conduit fitting and connect with
fixture wires. Attach conduit into the fixture.
1. Place the fixture end (shown below) onto
the wall at the desired location and mark
the position for the mounting screws. Drill
three holes as required. Either pilot holes
for the screw or holes for anchors. Install
the anchors as appropriate.
4. Attach the fixture housing to the
wall as appropriate.
3. Tighten the 2 set screws on the fixture into the
mounting pole firmly.
Carefully unpack and
unwrap fixture
Installing the fixture
Mounting Options
(Refer to page 7 for the wiring diagram)
1
2
3
CAUTION: TURN OFF THE CIRCUIT BREAKER AT
THE ELECTRICAL PANEL BEFORE INSTALLING THE
FIXTURE IN ORDER TO PREVENT POSSIBLE SHOCK.
Wall Mount:
1.5” (38.1mm)
2.5” (63.5mm)


