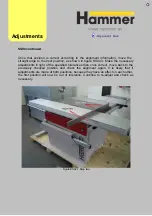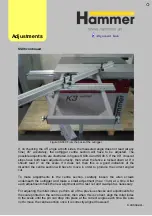
Once that position is correct according to the alignment information, move the
straight edge to the next position, as shown in figure SS02.3. Make the necessary
adjustments in light of the specified tolerances then once correct, move back to the
previously checked position and check the alignment again. It is likely that if
adjustments are made at both positions, because they have an effect on each other,
the first position will now be out of tolerance. Continue to re-adjust and check as
necessary.
Figure SS02.3 Step two
Adjust
ments
SS02
continued
Summary of Contents for Hammer
Page 1: ...Machine Setup Guide InstallVersion1 09...
Page 5: ...15 Completion You re Good To Go 16 FAQ s 17 Links Contact Details Contents 3...
Page 32: ...The rip fence side is complete 11 Assembly...
Page 74: ...Figure SS03 2 End position 2 Adjustments Alignme nt Link SS03 continued...
Page 79: ...Figure SS07 3 Crosscut stop and block adjustment Adjustments Alignme nt Link SS07 continued...


