background image

 
To adjust the angled cut from the outrigger, you can use a dial indicator and a large 
45°  angle.  However,  this  can  be  done  without  the  45°  Angle.  You  will  need  a 
workpiece (say, 3ft x 10”, with at least 1 straight edge), an angle gauge and a 5mm 
Allen key. 
 
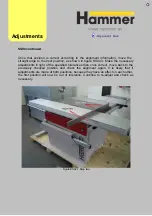
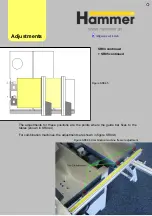
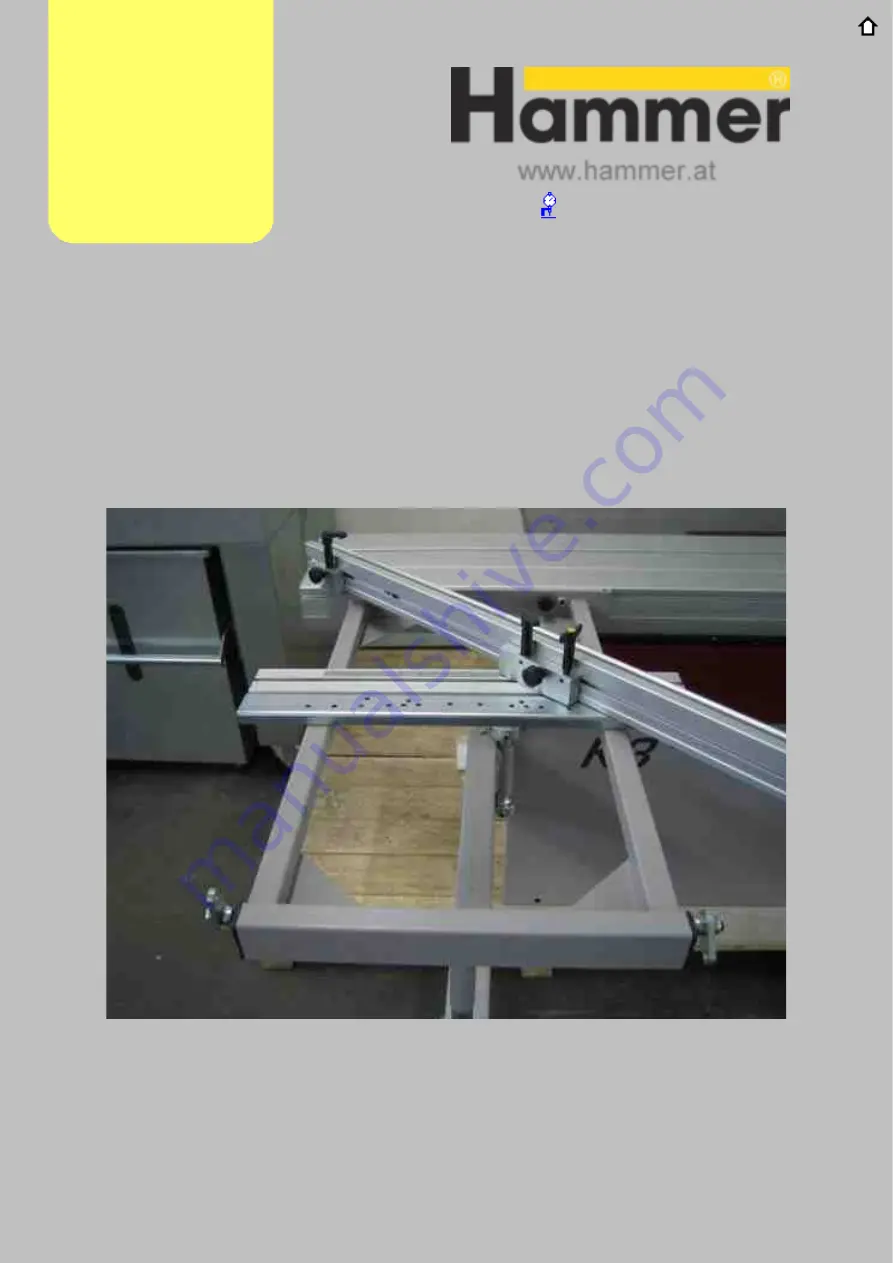
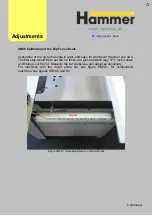
The first step would be to move the crosscut fence into the 45°position, from the front 
of the outrigger (Figure SS08.1). Lock it down and proceed to make a cut through the 
workpiece.  


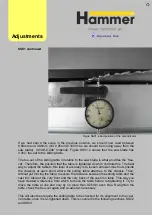
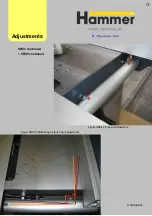
Figure SS08.1 From the front of the outrigger


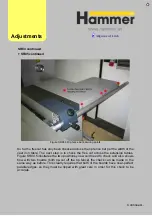
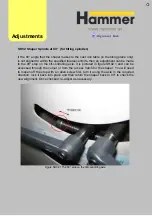
When  the  cut  is  made,  bring  the  angle  gauge  into  place  along  the  side  previously 
against  the  fence  and  the  new  cut  side.  The  offcut  can  also  be  used  if  the  angle 
gauge  does  not  permit  internal  45°  measurements  of  this  size.  Be  sure  to  use  the 
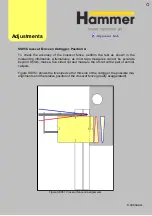
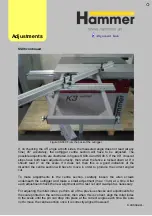
same  edges  (Fenced  surface  and  cut  surface).  Figure  SS08.2  shows  the  correct 
angles to check. Unless you can be certain the two edges are completely parallel, it 
is best to check this way so as not to combine errors. 


Adjust

ments 

Continued… 

Alig nm e nt Link

SS0

8 Angled Cut From Outrigger

Summary of Contents for Hammer

Page 1: ...Machine Setup Guide InstallVersion1 09...

Page 2: ...ariety of Hammer machines Safety First Before every use of the machine perform the safety checks that are detailed in the Operation Manual for your particular machine It is also important to understan...

Page 3: ...wering Up b For Basic Machine Checks 7 Removal From the Pallet a Pallet Fixings b Creating a Ramp c The Pallet jack d Pallet jack Dimensions 8 Positioning Your Machine 9 Extraction 10 Cleaning the Mac...

Page 4: ...2 Centre Locked Position c SS03 Sliding Table End Positions d SS05 Crosscut Fence on Outrigger Position A e SS07 Crosscut Fence Scales f SS08 Angled Cut From Outrigger g SR04 SR05 Free Cut h SR07 Alig...

Page 5: ...15 Completion You re Good To Go 16 FAQ s 17 Links Contact Details Contents 3...

Page 6: ...once it arrives no time will be wasted in getting you up and running with your new HAMMER woodworking machine Enjoy your new machine From everyone at HAMMER This CD ROM is aimed at helping you to achi...

Page 7: ...o you The machine is delivered You unpack the machine from the container s and study the Operation Manual You then remove the machine from the pallet Only after reading the Operation Manual clean all...

Page 8: ...tive cardboard enclosure Check for any signs of obvious damage to this enclosure or for signs of tampering Machines with sliding tables of length in excess of 78 2 meters will have the sliding table s...

Page 9: ...rything is present and correct sign for the delivery and begin the installation process 5 Delivery Pictured above the machine packed in enclosure pallet and box size may vary Pictured above the slidin...

Page 10: ...table assembly and to help bring the machine down from it s pallet Powering Up All new Hammer machines arrive with approximately 0 5 meters of cord and no plug due to the number of variations in plug...

Page 11: ...thickness for ease Vernier calipers Tape Measure Precision square 45 Engineering Angle Miter Gauge Angle gauge For Shapers Precision square 45 Engineering Angle Miter Gauge Angle gauge For Joiner Pla...

Page 12: ...iron tables and to secure some of the accessory boxes Pull off the plastic film or carefully cut through it avoiding scratching the machine or cutting through any cables Cardboard boxes that sit on th...

Page 13: ...do not come assembled and rip fence guide bars will also be screwed down onto the pallet Once these are removed and the rest of the pallet is cleared check underneath the machine as well you can remo...

Page 14: ...ite match up to the same height as the pallet An example is shown with 6 fixing points Creating a Ramp To remove the machine from the pallet you will need some boards similar to those pictured below a...

Page 15: ...NOTE for Joiner planers it is almost unavoidable having to use only one of the fork legs This will therefore require more care and definitely some assistance in bringng the machine into place Take ext...

Page 16: ...ith your Hammer representative if you are uncertain whether your particular pallet jack will fit your new Hammer machine The approximate dimensions of the pallet jack are shown below 7 Taking Off The...

Page 17: ...the machine and that sliding tables or joiner tables are not restricted in their travel Where outrigger tables are included make sure this can be used without interference including the use of the cro...

Page 18: ...n machining It would be unwise to begin machining without suitable extraction already in place as this would not only be a health hazard but will also impair the quality of the workpieces you can prod...

Page 19: ...orking processes Disposable strong paper towels are most appropriate for this job as they will end up very dirty and greasy FELDER offer specialized cleaning fluids and treatments specifically for thi...

Page 20: ...ve chipboards or boards with laminated plastic for machine components inside or outside cleaning of the car or to clean plastics in the house or in the office even very dirty plastics will appear new...

Page 21: ...r with an adjustable nozzle contents 0 5 liter The spray bottle can be refilled with a convenient 3 liter container Guideways and Spindle Fluid The Guideways and Spindle Fluid is ideal for all guidetr...

Page 22: ...treatment without problem Comes in a solid spray container with an adjustable nozzle contents 0 5 liter 10 Cleaning The Machine Note Regarding Sliding Tables To prolong the life of your sliding table...

Page 23: ...s Assembly details are always supplied with these parts please see the assembly diagrams for finer details of the components The following text and pictures provide additional information which may be...

Page 24: ...r the extension table s Begin as shown in the picture below with the support members Note Machines with 48 1250mm rip capacity also have an additional support member not shown in the pictures below bu...

Page 25: ...Access to the inside of the machine can be gained by removing the access panel at the front of the machine or the back shapers have access door provided at the rear The picture below shows the electr...

Page 26: ...ity once the supports are in place with the screws in location the table can placed on top of the screws and brought into alignment with the cast iron table ideally using a straight edge as shown belo...

Page 27: ...picture shows half length 31 800mm Rip capacity Adjusting the table to match the height of the cast iron table Continued 11 Assembly...

Page 28: ...rip capacity an additional bar must be assembled to the front support arm Once this is assembled the 31 800mm table can be brought into place and aligned correctly to the cast iron table before movin...

Page 29: ...then at the support arm to table point Once the table is in place it can be aligned correctly using a straight edge When everything is assembled you may wish to check that it is all within the stated...

Page 30: ...n tables Make sure that the arrangement of the screws nuts and washers is the same as that displayed in the exploded assembly diagram Also adhere to the height information given in the diagram for the...

Page 31: ...s not machined The machined side only requires a washer and nut Tighten the two screws that attach the guide bar to the cast iron table first checking the alignment as described in the adjustment and...

Page 32: ...The rip fence side is complete 11 Assembly...

Page 33: ...ner and into situe on the edge of the chassis as shown in figure ST01 1 If no help is available then the best help you can give yourself is to support one end of the table as shown in Fig ST01 1 whils...

Page 34: ...held level and that the screw head is turned so that two of its side faces are parallel to the inside of the sliding table channel ST01 2 Sliding table sliding into Carefully push the sliding table o...

Page 35: ...art of the cut out section in the black plastic insert Figure ST01 4 Front of the sliding table travel This position can be verified by moving the slding table to the very end of the travel where the...

Page 36: ...e you will alter the alignment of the sliding table to the cast iron table This screw is shown in figure ST01 6 Figure ST01 6 Showing the three locking nuts ONLY After the sliding table locke down you...

Page 37: ...no breakout on the top surface and none on the bottom when using the scoring blade The cut should only be made at the front of the blade not by the teeth at the back of the saw blade Shapers 1 90 Spi...

Page 38: ...l also need a pair of vernier calipers to accurately measure the off cut and a 13mm wrench to adjust the 90 crosscut stop if necessary Place the board on the outrigger table against the fence and labe...

Page 39: ...fence Continue until you reach number 1 side again and this time take off approximately 1 25mm Measure each end of the offcut If the workpiece does not have the arrow on at this stage it can easily l...

Page 40: ...h the Hammer logo you will find an Adjustment link which will lead you directly to a description with diagrams and photographs of how the adjustment on the machine can be made Please note the diagrams...

Page 41: ...e at it s mounting points and at the extremity of the table Test Point Unit type Tolerance Parallel to the table it is mounted on Metric 0 0mm to 0 40mm below mounting table Imperial 0 000 to 0 016 Al...

Page 42: ...from the blade at position 2 Test Point Unit type Tolerance Increase from 1 to 2 of Metric 0 05mm to 0 10mm over 300mm Saw Blade Imperial 0 002 to 0 004 Alignments Adjustme nt Link SS01 Free cut from...

Page 43: ...e very slightly different depending on which fence you cut from To start with we shall look at setting up the sliding table free cut Using a board of width at least equal to the saw blades diameter if...

Page 44: ...blade and the workpiece at the back tooth at this point It should not however be touching the workpiece Adjust the freecut as necessary follow link To check the free cut on the rip fence side you will...

Page 45: ...t do this then the rip fence freecut will either be too much or not at all toe in Adjust it closer if necessary With the workpiece in the position shown in FC01 3 and against the rip fence carefully r...

Page 46: ...s 1 2 3 and 4 with a feeler guage Test Point Unit type Tolerance Sliding table above the cast iron table Metric 0 0mm to 0 35mm Imperial 0 000 to 0 014 Alignments Adjustme nt Link SS02 Sliding Table C...

Page 47: ...Test Point Unit type Tolerance Sliding table above the cast iron table Metric 0 0mm to 0 40mm Imperial 0 000 to 0 016 Alignments Adjustme nt Link SS03 Sliding Table End Positions...

Page 48: ...cuts A and B Ideally make cuts A and B 1000mm apart Test Point Unit type Tolerance Difference between X and Y to be within Metric 0 2mm per 1000mm Imperial 0 008 per 1000mm Alignments Adjustme nt Link...

Page 49: ...e crosscut fence scales Make a cut and measure the boards new length Test Point Unit type Tolerance Lengths X and Y equal to readout on scale Metric 0 5mm Imperial 0 020 Alignments Adjustme nt Link SS...

Page 50: ...ent of the 45 position on the outrigger angle scale Test Point Unit type Tolerance From point 1 to 2 Metric 0 1mm From 1000mm x 500mm 45 angle Imperial 0 004 Alignments Adjustme nt Link SS08 Angled Cu...

Page 51: ...eeler guage to ascertain the difference in height between the two For the rip fence extension table make checks at the points indicated above with a straight edge and feeler guage Test Point Unit type...

Page 52: ...ase in the distance between the saw blade and the rip fence Test Point Unit type Tolerance Increase from 1 to 2 of Metric 0 05mm to 0 10mm over 300mm Saw Blade Imperial 0 002 to 0 004 Adjustme nt Link...

Page 53: ...e entire rip capacity With a 300mm Saw blade Test Point Unit type Tolerance Increase from 1 to 2 of Metric 0 05mm to 0 10mm over 300mm Saw Blade Imperial 0 002 to 0 004 Adjustme nt Link Alignments SR0...

Page 54: ...uare 200mm long check for any space at positions 1 and 2 Test Point Unit type Tolerance Permissible gap per 200mm Metric 0 00mm to 0 20mm Imperial 0 000 to 0 008 Alignments Adjustme nt Link SR07 Saw B...

Page 55: ...te a miter joint Using an engineers square 200mm long check for any space at positions 1 and 2 Test Point Unit type Tolerance Permissable gap per 200mm Metric 0 00mm to 0 20mm Imperial 0 000 to 0 008...

Page 56: ...Check the calibration of the Rip side scale Test Point Unit type Tolerance Width X equal to readout on scale Metric 0 50mm Imperial 0 020 Alignments Adjustme nt Link SR09 Calibration of the Scale...

Page 57: ...ge check the 90 alignment of the spindle in the two planes indicated above Test Point Unit type Tolerance Permissable gap at 1 or 2 Metric 0 0mm to 0 20mm Imperial 0 000 to 0 008 Alignments Adjustme n...

Page 58: ...ngle gauge set to 135 and a feeler gauge check the 45 tilt position Test Point Unit type Tolerance Permissable gap at 1 or 2 Metric 0 0mm to 0 20mm Imperial 0 000 to 0 008 Alignments Adjustme nt Link...

Page 59: ...Test Point Unit type Tolerance Gap in the middle X Metric 0 0mm to 0 20mm Imperial 0 000 to 0 010 Alignments Adjustme nt Link JR06 Joiner Test Cuts...

Page 60: ...Test Point Unit type Tolerance Target No snipe Metric Imperial Alignments Adjustme nt Link JR07 Snipe Check...

Page 61: ...th vernier calipers Test Point Unit type Tolerance 310mm table thickness difference from 1 to 2 Metric 0 10mm Imperial 0 004 410mm table thickness difference from 1 to 2 Metric 0 015mm Imperial 0 006...

Page 62: ...Check workpiece from planer at both ends for snipe Test Point Unit type Tolerance Target No snipe Metric Imperial Alignments Adjustme nt Link PL02 Test for Snipe...

Page 63: ...the alignment of the table to the mortiser bit at the front and back of the table Test Point Unit type Tolerance Difference between X and Y Metric 0 20mm Imperial 0 008 Alignments MR01 Mortiser Table...

Page 64: ...alignment of the table to the mortiser bit with a square and a feeler gauge Test Point Unit type Tolerance Difference from point 1 to point 2 Metric 0 20mm Imperial 0 008 Alignments MR02 Mortiser Tabl...

Page 65: ...l lead you directly to a description with diagram s of the alignment and what the corresponding setting should be within Before making adjustments to the machine satisfy yourself that the way in which...

Page 66: ...eck at the other end of the blade You can zero this low point on the scale or use arithmetic to calculate what the next reading must be within For a 300mm saw blade there should be between 0 05mm and...

Page 67: ...to loosen all lower most nuts inside the chassis at each point where the sliding table attaches to the chassis Then without yet moving the table measure the distance between the sliding table and the...

Page 68: ...herwise place directly onto the slidng table bed 2 The function of the top nut is to secure the sliding table bed to the screw 3 The middle nut just above the chassis controls the hieght of the slidin...

Page 69: ...Long chassis Sliding tables Mid to long size sliding tables Short sliding tables Adjustments Alignme nt Link Adjustments SS02 continued Continued...

Page 70: ...outer 4 points should remain tight Then place a straight edge along the tables as shown in figure SS02 2 Check the alignment of the sliding table here with the specified tolerances Make any adjustmen...

Page 71: ...f the specified tolerances then once correct move back to the previously checked position and check the alignment again It is likely that if adjustments are made at both positions because they have an...

Page 72: ...s and leave it for 24 hours to prevent any permanent damage being caused When re starting follow the same procedures as described before but this time begin with only 3 fixing points not 4 Try to adju...

Page 73: ...any adjustments always check the table at both ends The other position is shown in figure SS03 2 Because the two end postions are adjusted at the same position if it is not possible to adjust both en...

Page 74: ...Figure SS03 2 End position 2 Adjustments Alignme nt Link SS03 continued...

Page 75: ...make a five sided cut and measure the off cut with a pair of vernier calipers Figure SS05 1 shows the five sided cut for this side of the outrigger the possible mis alignments and the relative positio...

Page 76: ...ction Start by making no more of an adjustment than a quarter of a revolution to the nuts on either side of the stop After tightening make sure that the stop can still be turned up and down but also s...

Page 77: ...e and shifting the scale by the required amount shown in figure SS07 1 Tip Leave the crosscut stop locked in place and move the scale until the correct reading is shown by the stop N B Check that the...

Page 78: ...ic extension bar Figure SS07 3 shows the location of the allen screw which if slackened off slightly will permit the movement of the stop and block Make an adjustment to the position of the stop and b...

Page 79: ...Figure SS07 3 Crosscut stop and block adjustment Adjustments Alignme nt Link SS07 continued...


Page 80: ...a cut through the workpiece Figure SS08 1 From the front of the outrigger When the cut is made bring the angle gauge into place along the side previously against the fence and the new cut side The of...

Page 81: ...gle but do not yet make any adjustment as we also need to check the 45 angle from the other side of the outrigger as shown in figure SS08 3 Repeat the cut and measure the 45 angle produced from this p...

Page 82: ...n will have to move in order to produce the correct angled cut To make adjustments to the centre section carefully loosen the allen screws underneath the outrigger and make a small adjustment max 1mm...

Page 83: ...Figure SS08 5 Outrigger adjustments Adjustments Figure SS08 4 Outrigger adjustments Alignme nt Link SS08 continued...

Page 84: ...01 1 1 show the functions of the main supporting screws and nuts Figure SR01 1 1 The additionsl screws that support the table obviously do not attach to the table but provide support under the table t...

Page 85: ...en adjusting the height of the tables make sure that the nuts securing the rip fence bar to the extension tables are loose These nuts are shown in figure SR01 1 3 Adjustments Alignme nt Link Continued...

Page 86: ...Figure SR01 1 3 After adjusting the tables the nuts can be re tightenend Check that the rip fence moves easily across the extension tables once finished Adjustments Alignme nt Link SR01 1 continued...

Page 87: ...en making adjustments here first loosen off the outer bolts shown in figure SR04 4 and then adjust the rip fence bar After checking the free cut again these bolts can be re tightened Adjustments Align...

Page 88: ...Figure SR04 2 Free cut adjustment Figure SR04 3 Illustrating rip fence bar adjustments Adjustments Alignme nt Link Continued SR04 continued SR05 continued...
Page 89: ...les Figure SR04 5 illustrates the two positions you would need to check and also shows how with two boards both rip cut off the rip fence the check can be made in the same way as before This clearly r...

Page 90: ...are the points where the guide bar fixes to the tables shown in SR04 4 For combination machines the adjustments are shown in figure SR04 6 Figure SR04 6 Combination machine freecut adjustment Adjustme...

Page 91: ...ace the square along the cut face and the face that was against the cast iron table and check for any gaps If the cut is within the specified tolerance no further action is necessary To make any adjus...

Page 92: ...urate Make two cuts at 45 and join them together as shown in the tolerancing information Place a square along the outside of the joint and check for any gaps between the workpieces and the square Comp...

Page 93: ...position say 12 lock it down and make a cut from it Measure the cut workpiece and adjust as necessary For machines with the round guide bar see figure SR09 1 for combination machines see figures SR09...

Page 94: ...Figure SR09 2 Combination machine scale adjustment Figure SR09 3 Combination machine scale adjustment Adjustments Alignme nt Link SR09 continued...

Page 95: ...1 and can be accessed through the cutout or from the access hatch for the shaper You will need to loosen off the stop with an allen screw first turn it along the axle in the required direction lock it...

Page 96: ...shown in figure SH03 1 and requires loosening with an allen key to be able to then turn it to the required position Tighten the allen screw to secure it and return the shaper to 45 Check the new align...

Page 97: ...this position and perform the test once more 4 This adjustment can be repeated if the subsequent joint is still too concave until the knives are just underneath level 0 025mm 0 001 with the outfeed ta...

Page 98: ...ustrated in the tolerancing information This cut is called snipe and occurs when the knives are too high above the outfeed table The solution is to move the table up effectively moving the knives down...

Page 99: ...the table Be sure sure to lock the table in position each time after raising or lowering it When the workpieces have been planed using a pair of vernier calipers measure the thickness of both workpie...

Page 100: ...ck can be made If snipe does occur it will be necessary to make an adjustment to the feed rollers The feed rollers are mounted onto springs If the springs on one of the feed rollers are set too tight...

Page 101: ...de told you everything you needed to know There s a stack of lumber in the corner waiting for a job to do and a plan of some sorts for something on paper or in your head So now you ve seen what your m...

Page 102: ...cable in the correct place Is the main switch on Are you pressing the start button for long enough single phase machines in particular For full combination machines is the selector switch engaged corr...

Page 103: ...Linked Websites www hammerusa com www felderusa com www format 4usa com www felder group com Latest Hammer developments http docs felder it info hammer_report_usa pdf 17 Links...

Page 104: ...pplied with the machine HAMMER USA WEST 1851 Enterprise Blvd W Sacramento CA 95691 info hammerusa com http www hammerusa com Toll free 800 700 0071 Tel 916 375 3190 Fax 916 375 3199 HAMMER USA EAST 2...

Reviews: