12
5
GRAPHIC AND PRINTING
.
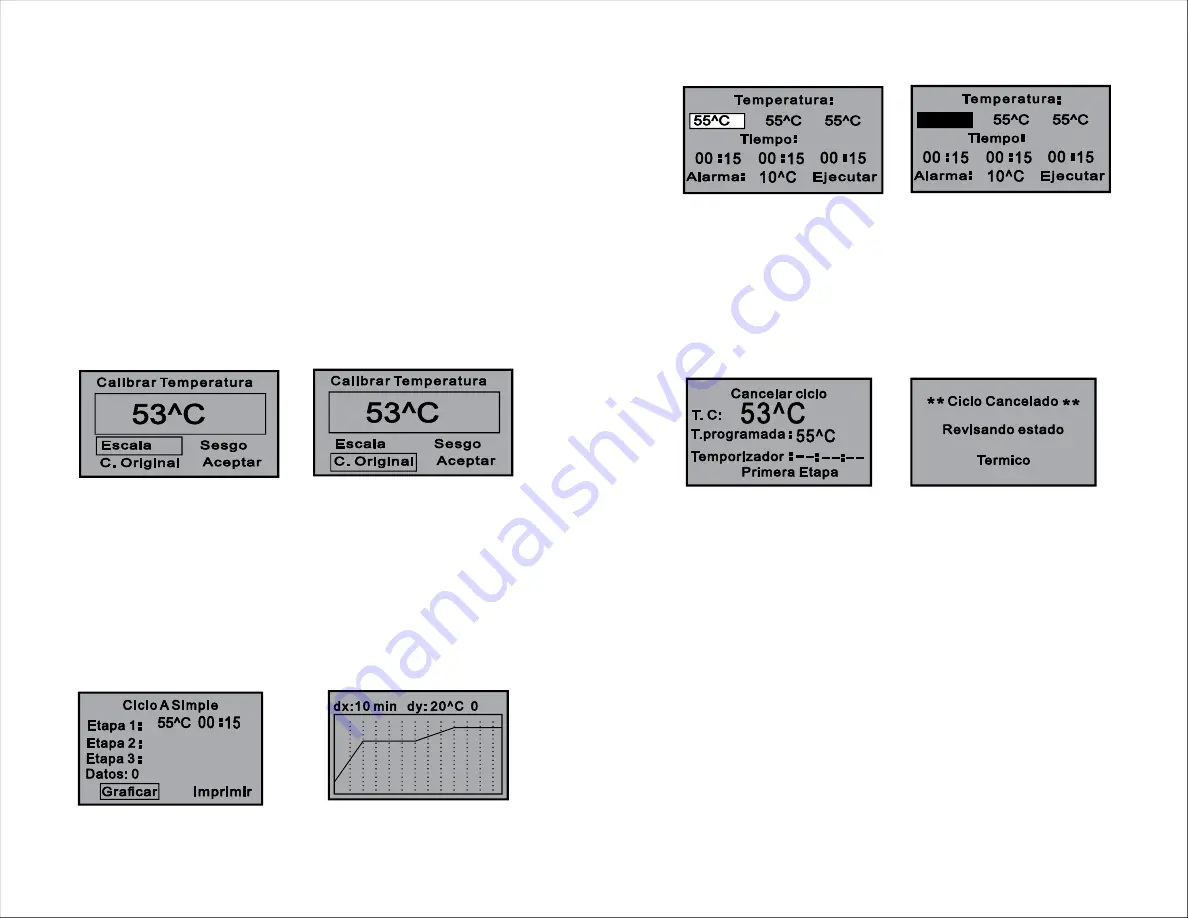
From the start menu press the buttons Cancel and Decrement at the
same time, you enter to the menu of graphic and printing of data
In
(13)
this menu are registered data from the last executed cycle. To observe
the generated graph option select Graficar and press Ok, by doing this
will show the graph on the screen
We can return to the previous
(14)
state by pressing Cancel.
The display shows the option D tos, this refers to the number of data
a
stored in the system memory. To print the stored data, select the option
Print and press
, then this data is sent to the thermal printer ( If your
OK
equipment has it.
CANCELADO DE CICLO
.
Para cancelar un ciclo que esta ejecutándose habrá que presionar la
tecla Aceptar, seguida de Cancelar dos veces, después de presionar
por primera vez la tecla Cancelar el sistema nos pregunta si queremos
cancelar el ciclo (9). Si se presiona nuevamente la tecla Cancelar el
ciclo queda cancelado (10), si no se presiona por segunda vez, pasados
unos segundos el sistema eliminará la orden y nos regresará al estado
anterior.
M
ENU DE CALIBRACIÓN
.
El control fue calibrado en planta, usando patrones confiables y
certificados, sin embargo, el transporte, temperatura ambiente o
condiciones específicas de ubicación pueden afectar esta calibración.
Si se cuenta con un termómetro confiable, es posible calibrar su equipo
contra esa referencia de la siguiente manera:
Programe su equipo a la temperatura de operación más frecuente.
Coloque su termómetro en la cámara, espere a que se estabilice la
temperatura dentro de la cámara para tomar las mediciones y comparar
contra el sistema de control. Para ingresar a este menú debe regresar
al menú de ciclo (3) y presionar la tecla Cancelar e Incremento al mismo
tiempo, aparecerá la pantalla (11).
Dentro de este menú debemos seleccionar la opción Escala y presionar
la tecla Aceptar esta se sombreará y con las teclas de Incremento o
Decremento ajustamos la temperatura a la marcada en el termómetro,
presionamos la tecla Aceptar para guardar la calibración y regresamos
al menú de inicio.
Si seleccionamos la opción C. Original (12) y presionamos Aceptar el
sistema regresará a los valores de calibración establecidos en planta.
55^C
(9)
(10)
(7)
(8)
(11)
(12)
CALIBRATION MENU
.
The control was calibrated in the plant using certified and reliable
instruments, however transportation, temperature or specific location
may affect this calibration. If you have a reliable temperature measurer,
you can calibrate your equipment against this reference as follows.
Program your Furnace to the required operating temperature. Place your
measurer in the thermometer holder located on top of the unit, ensuring
that the sensor is inside of the chamber. Wait for the temperature to
stabilize within the chamber (Approximately 30 minutes after reaching
the set temperature. Compare the temperature display against the
thermometer and adjust if there are difference as follow.Return to the
start menu 3 and press the Cancel and Increase buttons at the same
( )
time, the screen appear 11 Within this menu we select Escala, and
( )
press Set, with the Increment or Decrement keys adjust the temperature
in the display and press
.
OK
If you select the option C. Original 12 the system will return to the plant
(
)
calibration values.
(13)
(14)


