


TECHNICAL DATA
Telescopic wall sander
APF200/1010LE
Input power
W
1010
No-load speed
rpm
800-1600
Maximum diameter of sandpaper sheet
mm
200
Spindle thread
ISO
M14
Approx. weight (without acces.)
Kg
3.8
The instructions contained in this manual must be strictly
followed, it should be carefully read and kept close at
hand to use when carrying out maintenance on the
indicated parts.
If the machine is used carefully and normal maintenance
is carried out, it will work well for a long time.
The functions and use of the tool you have bought shall
be only those described in this manual.
Any other use
of the tool is strictly forbidden.
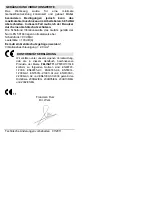
ILLUSTRATIONS
DESCRIPTION (See figures)
A
Start-up switch (Fig.1)
B
Adapter kit (Fig.1)
C Spindle blocking button (Fig.1)
D Dust output (Fig.1)
E
Foam plate fixing screw (Fig.2)
F
Aspiration tube (Fig.3)
EQUIPMENT
-
1 diamond disk assembly kit (diamond disk not in-
cluded)
-
Operating instructions
-
Safety instructions
-
Warranty
SAFETY INSTRUCTIONS
See
“Safety Instructions”
manual, supplied with this
instruction manual.
WARNING!
Material containing asbestos must not be
polished. Working with materials containing amian-
thus/asbestos and/or silica stones produces a dust,
which is harmful to health. Protect yourself from inhal-
ing this dust, in compliance with current regulations on
accident prevention.
For your personal safety, always connect the machine
to a mains supply protected by a differential and ther-
mal cutout switch, in accordance with regulations on
low-voltage wiring sitemaps.
Do not pierce the motor housing as this could damage
the double insulation (use adhesive labels).
Check the work area with a metal detector for hidden
wires, gas and/or water pipes.
Always unplug the machine before carrying out
work on it.
Always stop the machine by switching it off, not by
unplugging it.
WARNING!
Before each use, inspect the plug and
lead. Should they need replacing, have this done by an
official service centre.
Always keep the mains lead clear of the working range
of the machine.
Only plug the machine in when it is switched off.
Hold the machine firmly in both hands and in a stable
position.
Check that the stated disc speed is equal to or greater
than the polisher’s rated speed.
Verify that the disc dimensions are compatible with the
polisher.
The abrasive discs should be handled and kept with
the utmost care, in accordance with the manufacturer’s
instructions.
Protect the polisher from knocks, collisions and
grease.
Check the disc carefully before use to make sure it is
not damaged or cracked. Replace cracked or dam-
aged discs immediately.
Make sure the discs are fitted in accordance with the
manufacturer’s instructions.
Check that the disc has been properly fitted and se-
cured before using the machine. Start the machine
with no load and run for 30 seconds in a safe position;
if you notice serious vibration or any other defect stop
the machine immediately. This may be a sign of incor-
rect fitting or a badly balanced disc.
Use only clamps or plates specified for this tool. Do not
use separate bushings or adapters to adapt grinding
discs with large holes.
In machines designed to be used with accessories with
threaded holes, check that the thread on the disc is
long enough to take the length of the spindle.
Beware of shavings that fly off. Hold the tool that so
that sparks fly away from you or other people and in-
flammable materials.
When working on stone, use dust extraction equipment
and wear a mask.
In order for the job to be effective, you should select,
based on the material and surface finish, the appropri-
ate size and abrasive.
Do not touch rotating polishing tools.
WARNING!
The disc will continue to rotate for a time
after the machine is switched off.
When working with the machine, always wear safety
goggles and ear protection. Other personal protection
equipment such as dust masks, gloves, helmet and
apron should be worn when necessary, along with
non-slip safety footwear. When considering the need
to use a protective mask against the dust, this should
also be for the possible harmful effects of the polished
material and paint or other surface coating. If in doubt,
use safety equipment.
Make sure the vents are free when working with dust. If
they require cleaning, first unplug the machine, do not
use metal objects and avoid damaging internal parts.
WARNING:
Certain types of dust produced by me-
chanical polishing, sawing, grinding and drilling, to-
gether with other construction activities, contain
Summary of Contents for APF200/1010LE
Page 1: ......
Page 2: ...B Fig 1 D Fig 2 Fig 3 A C F E...
Page 22: ...APF200 1010LE 1010 800 1600 200 ISO M14 2 9 A 1 B 1 C 1 D 1 E 2 F 3 1 30...
Page 23: ...2 0 220 C 1 E 2 2 Velcro 3 4 A 1 ON...
Page 24: ...1 6 6 1 6 1 3 5 150 200 10 Felisatti...
Page 26: ......


