Page 8
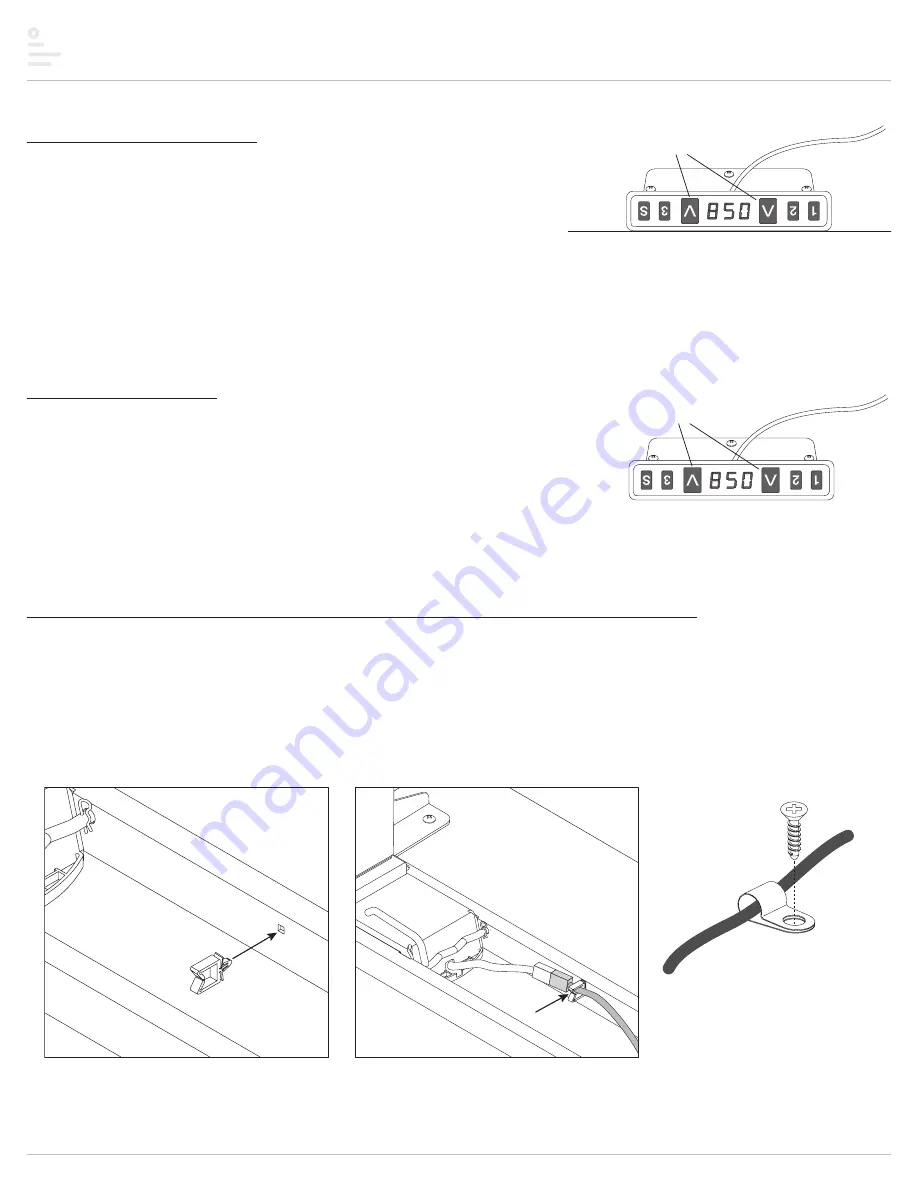
Step #11: initialize the system
• Press and hold the UP
s
and DOWN
t
buttons simultaneously for more than 3 seconds.
— The legs will begin to move down at half speed of normal operation.
• Continue to press the UP
s
and DOWN
t
buttons.
— The legs will move down to the lowest position, then rebound 0.06" to 0.2" (2mm to 5mm)
and stop.
• Release the UP
s
and DOWN
t
buttons at the same time. This completes the initialization
procedure.
CAUTION:
The initialization procedure above must be completed before operating the table.
NOTICE:
The unit must be re-initialized anytime power is cut to the unit.
Step #12: test operation
• Press the UP
s
and DOWN
t
buttons individually to test operation.
— End your test with the legs lowered.
— Unplug the power cord.
• If there are problems with operation, check that all cable and cord connections are secure,
and check that the control unit is securely attached to the worksurface.
— If problems continue, call ESI Customer Service: 800.833.3746.
NOTICE:
The table must be re-initialized when power is restored.
Step #13: use the motor cable locking clips and cord clips to secure cables and cords
IMPORTANT:
The cables and cords must not dangle under the table where they may present a hazard to the user or be accidentally disconnected.
• Motor cable locking clips:
— Push the motor cable locking clips into the square openings in the frame channels.
— Insert the motor cables into the clips.
• Cord clips:
— Place the cord clips onto the cables and cords.
— Use the M3.5x16 #2 Phillips flat head screws to fasten the cord clips to the table.
VictoryLX 3-leg
Assembly
press and hold
UP and DOWN buttons
Note:
Until the table is turned upright, the DOWN
button points up and the UP button points down.
press UP and DOWN buttons
to test operation
cord clip
M3.5x16
#2 Phillips
flat head
insert motor cable
into locking clip
motor cable
locking clip


