background image

FEMA ELECTRÓNICA . Series M . M40-A

6

the instrument  has two menus accessible to the user :

 ‘Configuration menu’ (key SQ) (

<

)

 ‘

Fast access

’ menu (key UP) (

5

)

Configuration menu

the ‘configuration menu’ modifies the configuration parameters to 
adapt the instrument to the application needs. To access the ‘

con-

figuration menu’ press for 1 second the SQ (

<

) key. This access can 

be  blocked  by  activating  the  ‘

Password

’ (‘

PASS

’)  function.  While 

operating the ‘configuration menu’, the alarm status is ‘hold’ to the 
status they had before accessing the menu, and the output and con-
trol modules remain in ‘

error

’ state. When leaving the ‘configuration 

menu

’,  the  instrument  applies  a  system  reset,  followed  by  a  brief 

disconnection  of  the  alarms  and  the  output  and  control  modules. 
Functionality is then recovered.

For a detailed explanation on the ‘configuration menu’ see section 
1.12, and for a full view of the ‘configuration  menu’ structure see 
section 1.13.

Fast access

’ menu

the ‘

fast access

’ menu is an operator configurable menu, providing 

fast and direct access to the most usual functions of the instrument 
with a single key pad stroke. Press key UP (

5

) to access this menu.

See section 1.12.5 for a list of functions eligible for ‘

fast access

’ in 

this instrument. the ‘

Password

’ (‘

PASS

’) function does not block ac-

cess to this menu. Accessing and modifying parameters in the ‘

fast 

access

’ menu does not interfere with the normal functionality of the 

instrument, and it does not generate any system reset when validat-
ing the changes.

Front key pad description

Key SQ

 (

<

) - press the SQ (

<

) key for 1 second to access the ‘

con-

figuration  menu’.  Inside  the  menu,  the  SQ  (

<

)  key  functions  as  a 

‘ENTER’ key. It selects and accesses the menu option currently dis-
played. At menus with numerical value entries, it validates the num-
ber displayed.

Key UP

 (

5

) - the UP (

5

) key gives access to the ‘fast access’ menu. 

Inside the menus, it moves vertically through the different menu op-
tions.  At  menus  with  numerical  value  entries,  it  modifies  the  digit 
selected by increasing its value to 0, 1, 2, 3, 4, 5, 6, 7, 8, 9.

Key LE

 (

3

) - inside the menus, the LE (

3

) key functions as the ‘

ES-

CAPE

’ key. It leaves the selected menu, and eventually, will leave the 

whole menu. When leaving the ‘configuration menu’ with the LE (

3

key, the changed parameters are activated. At menus with numeri-
cal value entries, the LE (

3

) key allows to select the active digit. To 

modify the value of the selected digit use the UP (

5

) key.

Menu ‘rollback’

After 30 seconds without interaction from the operator, the instru-
ment will rollback and leave the ‘configuration menu’ or the ‘

fast ac-

cess

’ menu. All changes will be discarded.

1.10 How to operate the menus

Messages and errors

‘h.udr’ 
‘h.oVr’

Hardware underrange (‘

h.udr

’) / overrange (‘

h.ovr

’). In-

put signal is lower / higher than the minimum / maxi-
mum signal the instrument can detect.

‘d.udr’ 
‘d.oVr’

display  underrange  (‘

d.udr

’) / overrange (‘

d.ovr

’). the 

instrument  already  displays  the  minimum  /  maximum 
value possible (-9999 / 9999).

‘hoLd’

the ‘

hold

’ function is active. Display is on hold.

‘P.hLd’

the ‘

Peak&Hold

’ function is active.

‘Err.0’*

at the ‘

scaling

’ (‘

ScAL

’) menu entry, the defined slope is 

higher than ‘5000’ (slope almost vertical). Entered values 
are dismissed and default values are activated.

‘Err.1’

incorrect password.

‘Err.2’

at ‘

oPt.X

’ menu entry. Installed module is not recognized.

Table 5 - Messages and error codes

The error messages are shown on display in flash mode.

(dhI-dLo)   [counts]
 (IhI-ILo)   [mA or Vdc]

< 5000

*slope calculation for error ‘

Err.0

’.

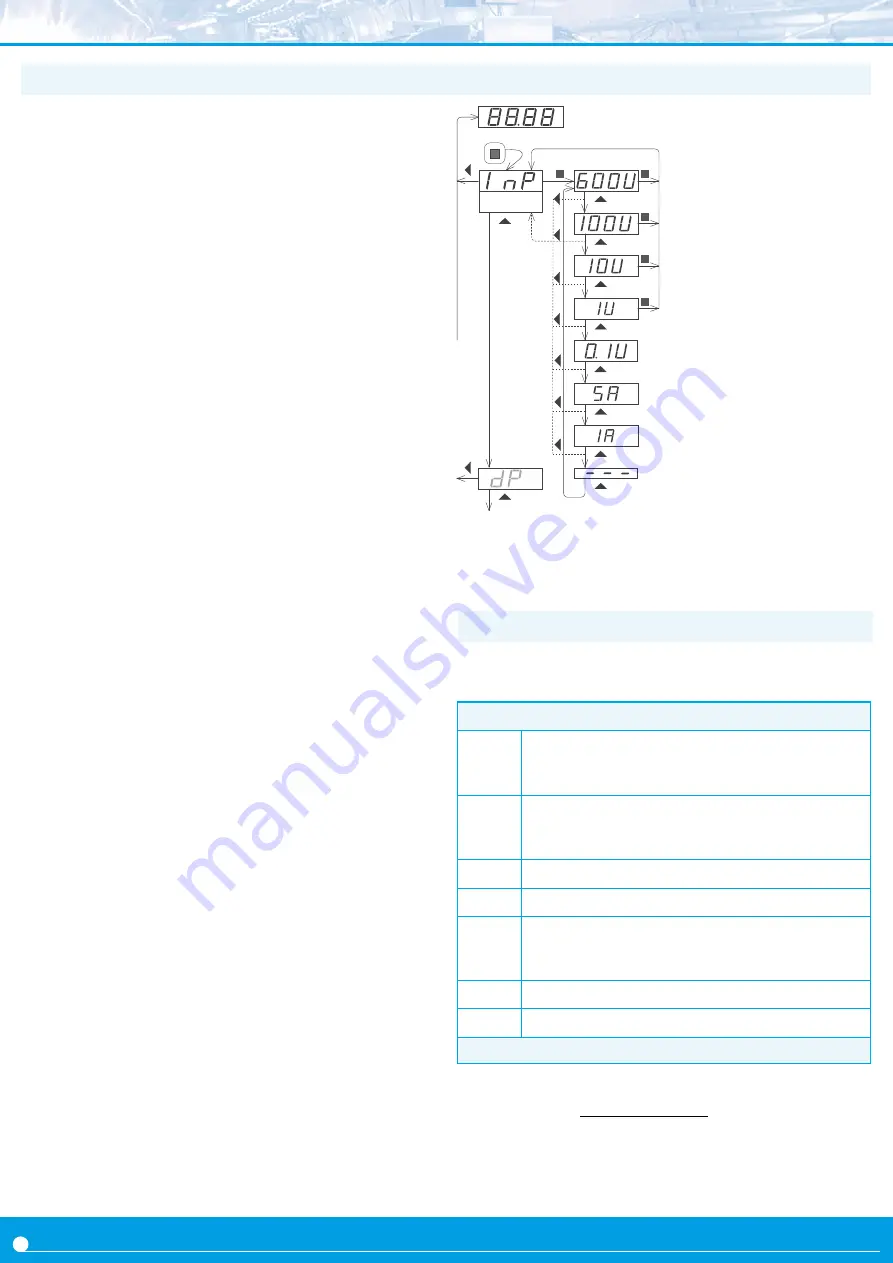
Example  of  operation  inside  the  
configuration menu’.

1. The SQ (

<

) key enters into the 

‘configuration menu’.

2. The SQ (

<

) key enters into the 

InP

’ option menu.

3. The UP (

5

) key moves through 

the menu options.

4.  The  SQ  (

<

)  key  selects  the 

desired range and returns to the 

InP

’ menu.

5. the LE (

3

) key leaves the ac-

tual menu level and moves to the 
previous menu level.

6. the LE (

3

) key leaves the ‘con-

figuration menu’. Changes are ap-
plied and saved at this moment.

1.11 Messages and errors

Input

(2)

(3)

(3)

(3)

(3)

(3)

(4)

(4)

(4)

(4)

(5)

(5)

(5)

(5)

(3)

(3)

(6)

(6)

(1)

(3)

(3)

(3)

(5)

(5)

(5)

Summary of Contents for M40-A

Page 1: ...48mm size 1 8 DIN Reading with 4 digit display Fast access to alarm setpoints on power up function measure function configurable reading brightness Universal AC and DC power Up to 3 optional modules for output and control relays analog outputs Modbus RTU communications RS 485 ASCII RS 232 www fema es Tel 34 93 729 6004 info fema es User s Manual ELECTRONICS FOR INDUSTRIAL AUTOMATION PANEL METERS S...

Page 2: ...rs memory for maximum and minimum reading password protection 5 brightness levels 1 1 How to order M40 A Model Power Option1 Others H Option2 Option3 R1 1 relay AO analog output RTU Modbus RTU S4 RS 485 S2 RS 232 empty H 85 265Vac dc L 11 60Vdc 24Vac 48Vac NBT no buttons 65 front IP65 G green led Index 1 Panel meter M40 A 2 1 1 How to order 2 1 2 Front view 3 1 3 Rear view 3 1 4 Power connections ...

Page 3: ...r see section 1 4 1 2 3 8 9 0 Detail of the plug in screw terminals provided with the instrument The instrument is provided with all terminals needed both male and female 1234 To configure the voltage AC measure select the jumper for the de sired scale as indicated in the table below Then activate the selected scale in the configuration menu see section 1 12 1 and connect the input signal to the s...

Page 4: ...s 2 0KHz for AC currents minimum frequency 25Hz for reading oscillation 1 count 1 7 Technical specifications Power power H 85 a 265Vac dc power L 11 a 60Vdc y 24 48Vac isolation 2500Veff with power H 1500Veff with power L all units tested during 60 seconds consumption 1 5W only meter 4 0W meter with options Configuration 3 buttons front keypad and rear jumper Front protection IP54 standard IP65 op...

Page 5: ... 12 4 Password configuration block 1 12 9 Measure yes 1 12 5 Peak Hold yes 1 12 4 Display brightness 5 levels 1 12 12 Table 4 Functions included 1 7 Technical specifications cont 44 92 Panel cut out 16 8 75 1 8 Mechanical dimensions mm 1 9 Coupling AC or AC DC The instrument provides and internal jumper to block the DC component of the signal By default the blocking of the DC com ponent is disable...

Page 6: ... through the different menu op tions At menus with numerical value entries it modifies the digit selected by increasing its value to 0 1 2 3 4 5 6 7 8 9 Key LE 3 inside the menus the LE 3 key functions as the ES CAPE key It leaves the selected menu and eventually will leave the whole menu When leaving the configuration menu with the LE 3 key the changed parameters are activated At menus with numer...

Page 7: ...gnal and access the Field low F Lo function Then the following sequence will start message with signal type mA or Vdc message wait WAIt in flash mode after 5 seconds message ok oK appears at this point press key SQ the menu returns to menu entry Field Low F Lo The instrument has read the input signal and automatically config ures the Input low I Lo for you Repeat the process generating the maximum...

Page 8: ...ays due to fluctuating input signals around the set point at Activation delay dEL 0 configure the delay to apply before alarm activation The activation delay starts counting when the set point value is passed Value from 0 0 to 99 9 seconds at Deactivation delay dEL 1 configure the delay to apply before alarm deactivation The deactivation delay starts counting when the setpoint value plus the hyste...

Page 9: ...ixed Reading remains in the following format XXXX0 the Memory of maximum MAX function displays the maximum reading value stored in memory It also provides a way to reset the value This parameter is eligible for configuration through the Fast access menu see section 1 12 5 the Memory of minimum MAX function displays the minimum reading value stored in memory It also provides a way to reset the valu...

Page 10: ...with an instrument with input 0 10Vac and with reading scaled to 0 750 0 the mea sure function will show the direct value in Vac without the scaling 1 12 5 Fast access If only a single function is selected for the fast access menu press ing the the UP 5 key will shortly display the function name and then automatically jump to the function value 1 12 6 Super fast access On power up Delay Seconds Th...

Page 11: ...front leds With this function it is possible to adapt the instrument to the environment light intensity 1 12 9 Function Password 1 12 10 Factory reset Menus OPt 1 OPt 2 and OPt 3 give access to the configuration menus of the output and control modules installed at slots Opt 1 Opt 2 and Opt 3 See section 2 for a list of output and control modules available for each slot The configuration menu of ea...

Page 12: ...ut high Display high Alarm1 Setpoint Hysteresis Setpoint2 Active Alarm type Activation delay Deactivation delay Left zeros Steps Average filters 0 0 to 99 9 Display Fixed digits Memory of maximum Memory of minimum Dummy zero Peak Hold Time seconds Alarm2 menu Alarm3 menu Relay inverted Locked alarm Scale 600Vac Scale 100Vac Scale 10Vac Scale 1Vac Scale 100mVac Scale 5Aac Scale 1Aac Field correctio...

Page 13: ...int2 Setpoint3 Measure On power up Delay Seconds Option1 Configuration menu for the module installed at Opt 1 Option2 Configuration menu for the module installed at Opt 2 Option3 Configuration menu for the module installed at Opt 3 Password Firmware version Factory reset Minimum Brightness Maximum Standard Key LE Alarm unlock No function ...

Page 14: ...ation for the position of each module You may need to access the inside of the instrument to add or re place internal modules Use a flat screwdriver to unlock the upper clips marked with A Then unlock the lower clips marked with B and remove the front cover Let the inside of the instrument slide out of the housing To reinsert the instrument make sure that all modules are correctly connected to the...

Page 15: ...ation of conformity This instrument is warranted against all manufacturing defects for a period of 24 MONTHS from the shipment date This warranty does not apply in case of misuse accident or manipulation by non autho rized personnel In case of malfunction get in contact with your local provider to arrange for repair Within the warranty period and after examination by the manufacturer the unit will...

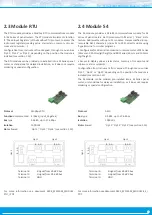
Page 16: ...standalone for delayed installation as they do not require soldering or special configuration 2 Output and control modules 2 1 Module R1 2 2 Module AO Terminal A Common Terminal B NO Normally Open Terminal C NC Normally Closed Opt 2 Opt 1 Opt 3 Power A B C A B C A B C Signal The AO module provides 1 analog output with 4 20mA or 0 10Vdc configurable output range Output current loop configurable as ...

Page 17: ...dule for M Series of panel meters ASCII protocol with Master Slave archi tecture Addressable with up to 31 modules Frames codified in rep resentable ASCII characters codes 32 to 255 directly visible using hyperterminal or similar programs Configurable for direct retransmission to remote meter of M Series 14mm and 20mm digit height and BDF Series 60mm and 100mm digit height Access to display values...

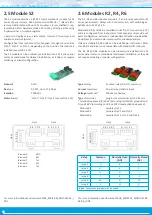
Page 18: ...patible with standard R1 modules The R2 R4 and R6 modules can be ordered pre installed into a M Series panel meter or standalone for delayed installation as they do not require soldering or special configuration The S2 module provides a RS 232 communications module for M Series of panel meters ASCII protocol with Master Slave archi tecture Addressable with up to 31 modules Frames codified in rep r...

Page 19: ...FEMA ELECTRÓNICA Series M M40 A 19 T h i s p a g e b l a n k ...

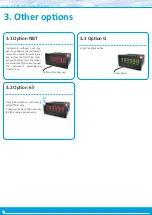
Page 20: ...m the panel and remove the front filter Inter nal press buttons for configuration are accessible Optionally request the instrument preconfigured from factory Without front keypad Front IP65 protection with sealing of front filter clips opening the front filter removes the IP65 sealing permanently 3 Other options 3 1 Option NBT 3 2 Option 65 3 3 Option G ...

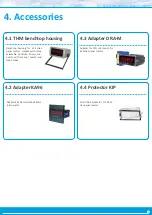
Page 21: ...96mmfor96x48mm instruments Front IP65 protector for M Se ries panel meters Benchtop housing for M Series panel meters Handle with three selectable positions Power con nector with manual switch and fuse holder 4 Accessories 4 1 THM benchtop housing 4 2 Adapter KA96 4 3 Adapter DRA M 4 4 Protector KIP ...

Page 22: ...FEMA ELECTRÓNICA Series M M40 A 22 Notes ...

Page 23: ...FEMA ELECTRÓNICA Series M M40 A 23 Notes ...

Page 24: ...3 info fema es www fema es Panel meters Standard 96x48mm Panel meters Compact 72x36mm Panel meters Miniature 48x24mm Large format meters Signal converters Isolators Bar meters Low cost Customized instruments mA Vdc Pt100 Pt100 Pot Load Shunts X 1 X 5 RS 232 RS 485 BCD MODBUS Vac Vac TrueRMS Vdc TrueRMS Aac Aac Hz Custom Adc TC ...

Reviews: