3.5.
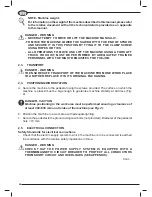
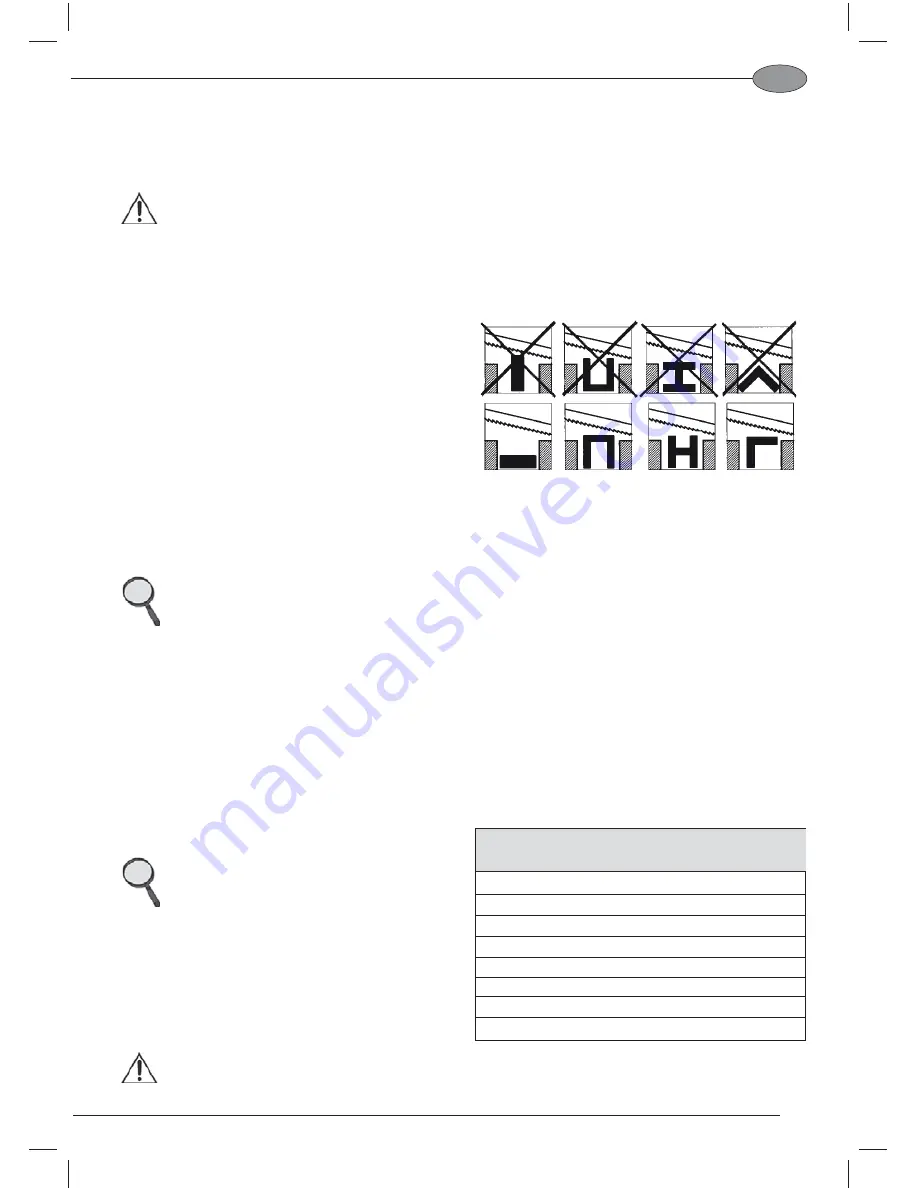
CORRECT POSITIONING OF THE WORKPIECE IN THE CLAMP
Position the workpiece to be cut directly between the jaws, without placing any other object/s
between the workpiece and the jaws.
DANGER - WARNING
TO POSITION FLAT OR SPECIAL SHAPED PROFILES, PLEASE REFER TO THE
EXAMPLES PROVIDED IN THE FIGURES. IF THE THICKNESS OF THE PROFILE
IS VERY THIN, TO STOP IT FROM GETTING CRUSHED IN THE JAWS OF THE
CLAMP, PUSH A MOULD INTO THE PROFILE WHICH MATCHES ITS SHAPE.
3.6.
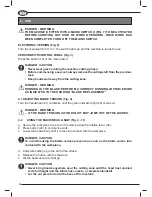
CLAMP ADJUSTMENT (Fig. 11)
To secure the workpiece in the clamp:
a. slacken the slide (43) by moving the lever
(42) towards the workpiece;
b. push the slide (43) up to the workpiece
until it is just a few millimetres away from
the latter;
c. lock the slide (43) in position by moving
the lever (42) towards you;
d. turn the lever (44) clockwise to lock the
workpiece securely in the jaws of the
clamp.
NOTES
If you need to cut several pieces from the same bar simply release and retighten the
clamp using lever (44).
To change bar, fi rst release the clamp by turning lever (44) anti-clockwise and then act
on the lever (42), moving the slide away from the workpiece.
3.7.
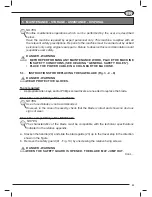
INSTALLATION AND ADJUSTMENT OF BAR HOLDER (OPTIONAL Fig. 6)
a. Install the guide rod (28) in the hole on the base.
b. Tighten nut (29).
c. Slacken the handwheel (30) and position the holder (31) at the required distance.
d. Tighten the handwheel (30).
AGIP
OXALIS
CASTROL
SUPER
CHEVRON
EP
ESSO
KUTWELL
MOBIL
SOLVAC
SHELL
DROMUS
TOTAL
LACTUGA
IP
UTENS
TABLE OF OILS
BRAND
TYPE OF OIL
3.8.
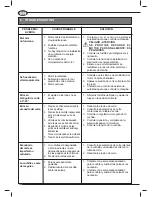
CUTTING FLUID SYSTEM (Fig. 9)
NOTES
To prepare the cutting fl uid, use special
cutting oils.
a. Prepare 12 litres of water-oil emulsion
(concentration ratio: 10%).
b. Pour the contents directly into the tank (39)
of the pump (38).
DANGER - WARNING
NEVER USE THE MACHINE WITHOUT CUTTING FLUID.
31
EN


