background image

15

EN

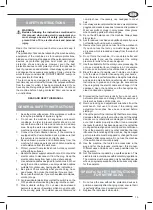
SAFETY INSTRUCTIONS


WARNING:


Besides following the instructions mentioned in 
this manual, when using electric equipment you 
must  always  observe  all  safety  precautions  to 
prevent  risk  of  fi re,  electric  shock  and  personal 
injury.   

Read  this  instruction  manual  before  use  and  keep  it 
carefully.
The probability of risk can be reduced by the machine safety 
equipment  of  the  machines,  as  for  example  protections, 
blade case, clamping, stoppage and the personal protection 
devices  as  protective  goggles,  dust  mask,  ear  plugs, 
protective  shoes  and  gloves.  However,  even  the  best 
protection devices cannot protect you from the risks due to 
lack of good sense and attention. Have always good sense 
and observe the necessary precautions. Carry out only the 
works that you consider safe. DO NOT FORGET: everyone 
is responsible for his safety.
This  tool  has  been  designed  for  specifi c  purposes.  We 
recommend you not to modify it or use it for purposes diff erent 
from the ones for which it has been manufactured. If you 
have any doubts regarding specifi c applications, do not use 
the  machine  before  having  contacted  Femi  and  received 
our instructions.

READ AND KEEP THIS MANUAL

GENERAL SAFETY INSTRUCTIONS

1.  Keep the work surface clean. If the work area or surface 

is busy the probability of injuries is higher.

2.  Do  not  use  the  machine  in  dangerous  environment 

conditions.  In  order  to  prevent  electric  shock,  do  not 
expose the machine to rain and do not use it in a damp 
area. Keep the work area illuminated. Do not use the 
machine near gas or infl ammable substances.

3.  Connect  the  dust  collection  device.  If  the  machine  is 

equipped with a dust collection device, make sure that 
this system is connected and correctly used.  

4.  Keep  unknown  persons  and  children  away  from  the 

machine. All unknown persons and children must keep 
a safe distance from the work area.

5.  Protect yourself from electric shock. Avoid any contact 

with earthing surfaces.

6.  Handle the power supply cable with care. Do not pull the 

electric cable to disconnect it from the plug. Keep the 
electric cable away from heat, oil and sharp edges.

7.  Use extension cables designed for outdoor use. When 

using the machine outdoors, use only extension cables 
suitable for outdoor use, having specifi c indications.  

8.  Be vigilant. Check carefully what you are doing, have 

good sense. Do not use the machine if you are tired.

9.  Do not use the machine if you are have taken medicines, 

alcohol, drugs.

10.  Avoid accidental starts. Be sure that the switch is on the 

OFF position before inserting the plug into the socket.

11.  Wear  suitable  clothing.  Do  not  wear  loose-sleeved 

garments or pieces of jewellery which may get caught 
in the moving parts. For outdoor use we recommend 

non-slip  shoes.  If  necessary,  use  headgear  to  cover 
hair.

12.  Use always personal protection devices: wear protective 

goggles and masks in case dust or sawdust is produced. 
Wear ear muff s or plugs in noisy areas. Wear gloves 
when handling parts with sharp edges. 

13.  Do not be off  balance over the machine. Always keep 

fi rmly stand.

14.  Ask for advices to skilled and qualifi ed people if you are 

not familiar with using such a machine.  

15.  Remove the tools you do not use from the workbench. 

If you do not use the tools, you must arrange them in 
a dry area which is locked and away from the reach of 
children.

16.  Do not force the machine. You can obtain better and 

safer  results  if  you  use  the  machine  at  the  cutting 
pressure for which it has been designed.

17.  Use the suitable tool for the work you are processing. Do 

not use a small tool for an intensive job. For example, 
do not use a circular saw to cut branches or stumps. 

18.  Block the piece. If possible, use C-clamps or a holder 

to fi x the piece. It is safer than using only your hands. 

19.  Keep the tools in perfect conditions. Keep the tools sharp 

and clean to obtain better and safer results. Follow the 
instructions  to  grease  and  change  the  accessories. 
Check regularly the electric cable and change it if it is 
damaged.  Keep  the  handles  and  the  handgrips  dry, 
clean, unoiled and ungreased. 

20.  Disconnect the tool from electricity if you do not use it, 

before maintenance and change of the accessories or 
tools such as blades, drills, mills, etc.

21.  Remove  locking  and  adjustment  wrenches  from  the 

workbench.  Get  used  to  check  if  the  locking  and 
adjustment  wrenches  have  been  removed  before 
starting it. 

22.  Check the parts of the tool to verify that there are not any 

damages. Before using the machine, check if the safety 
devices or any other parts are damaged in order to be 
sure  that it works properly and that it can accomplish 
the tasks for which it has been designed. Check that the 
moving parts are aligned, do not stop and are not broken. 
Check the assembly and any other condition that can 
infl uence the functioning of the machine. Any damaged 
part or protection must be repaired or changed from an 
authorised after sales centre. Do not use the machine 
if the switch does not work properly.

23.  Use  the  machine,  the  tools  and  accessories  in  the 

way  and  for  the  purposes  mentioned  i  this  manual. 
Diff erent uses and parts can cause possible risks for 
the operator.  

24.  Get the machine repaired by a qualifi ed person. This 

electric tool is in compliance with local safety regulations. 
The machine must be repaired only by qualifi ed people 
who use original spareparts, otherwise risks may arise 
for the operator.

SPECIFIC SAFETY INSTRUCTIONS

 FOR MITRE SAWS

1.  Do not use the saw without the protection devices in 

position, especially after changing mode; ensure that it 
is perfectly effi  cient and properly maintained.

2.  Replace the table insert when worn.

Summary of Contents for TR-090

Page 1: ...ASSEMBLY AND OPERATING MANUAL NOTICE D UTILISATION MANUAL DE INSTRUCCIONES MANUAL DE INSTRU ES TRONCATRICE CIRCOLARE MITRE SAW SCIE ONGLET SIERRA CIRCULAR DE MESA INGLETADORA SERRA CIRCULAR DE MESA E...

Page 2: ......

Page 3: ...le tradotto dall originale 21 30 ESPANOL ES Manual translated from the original manuale tradotto dall originale 31 40 PORTUGU S PT Manual traduzido do original manuale tradotto dall originale 41 50 DI...

Page 4: ......

Page 5: ...Fig 1 6 4 3 5 13 14 12 16 18 17 8 15 28 10 7 11 10 7 2 9 1 19 20 Fig 2 Fig 4 21 22 Fig 3 9 2 19 1 Fig 5 23 17 16 Fig 6 16 14 25 30...

Page 6: ...Fig 8 Fig 9 26 Fig 10 G1 18 Fig 11 90 95 cm 14 5 7 G2 B3 B1 18 5 B4 B2 Fig 7 23 25 Fig 12...

Page 7: ...Fig 13 19 16 2 Fig 15 11 28 Fig 14 B 23 Fig 16 11 28 Fig 17 Fig 18 10 29 A Fig 19...

Page 8: ...ONE DEI COMPONENTI 7 DELLA MACCHINA Fig 2 3 7 REGOLAZIONI 7 REGOLAZIONE DELL ANGOLO DI TAGLIO ROTAZIONE TESTA Fig 2 8 REGOLAZIONE DELL ANGOLO DI TAGLIO INCLINAZIONE TESTA Fig 4 8 REGOLAZIONE ALTEZZA P...

Page 9: ...in modo improprio CONSULTAZIONEDELMANUALEESIMBOLOGIA UTILIZZATA Porre particolare attenzione ai richiami ATTENZIONE CAUTELA e NOTE riportati in questo manuale Al ne di attirare l attenzione e dare me...

Page 10: ...elle super ci di messa a terra 6 Non maltrattate il cavo elettrico Non tirate mai il lo elettrico per scollegarlo dalla presa Mantenete il cavo elettrico lontano dal calore dall olio e dagli spigoli v...

Page 11: ...vono sempre essere tenuti fermamente nella morsa 22 Controllate i particolari dell utensile per veri care che non ci siano parti danneggiate Prima di continuare ad utilizzare l utensile controllate tu...

Page 12: ...ericolose prodotte PROTEZIONE DELL AMBIENTE INFORMAZIONE AGLI UTENTI Attuazione delle Direttive 2011 65 UE 2012 19 UE relative alla riduzione dell uso di sostanze pericolose nelle apparecchiature elet...

Page 13: ...oro 12 la squadra di appoggio 14 e la protezione mobile della lama 13 La base 3 viene impiegata come appoggio quando si devono eseguire operazioni di troncatura ed intestatura nelle diverse angolazion...

Page 14: ...ambiente altre sorgenti di rumore per esempio il numero di macchine e altre lavorazioni adiacenti Inoltre i livelli di esposizione possono variare da un Paese a Paese Queste informazioni mettono comu...

Page 15: ...ntare posizionandola nell apposita sede della base di appoggio Fig 7 posizionare e bloccare successivamente la testa operatrice con il perno di bloccaggio 16 ATTENZIONE IL PIANO SOSTENUTO DA UNA MOLLA...

Page 16: ...INTERRUTTORE DI RETE USO COME TRONCATRICE Fig 2 3 Predisposizioni in modalit troncatrice Smontare e conservare con cura la protezione inferiore 23 Fig 13 Sbloccate la testa con il perno di blocco 16 S...

Page 17: ...enti rivolgersi ai nostri centri di Assistenza Autorizzata distribuiti su tutto il territorio nazionale ASPIRAZIONE DELLE POLVERI OPTIONAL La troncatrice predisposta per il collegamento con un aspirat...

Page 18: ...e prime 50 ore di utilizzo se l utensile nuovo o dopo la posa di un nuovo gruppo di spazzole Dopo il primo controllo devono essere controllate ogni 10 ore di utilizzo no al momento in cui necessario s...

Page 19: ...ntrollare il motore da personale specializzato Non utilizzate servizi o altri motori sullo stesso circuito al quale collegate la macchina Evitare di sovraccaricare il motore durante l operazione di ta...

Page 20: ...E PARTS DESCRIPTION 19 Fig 2 3 19 ADJUSTMENTS 19 ADJUSTMENT OF CUTTING ANGLE HEAD ROTATION Fig 2 19 ADJUSTMENT OF CUTTING ANGLE HEAD ANGLE Fig 4 19 ADJUSTMENT OF UPPER SURFACE S HEIGHT Fig 5 6 7 19 AD...

Page 21: ...WITH IT FORCE IT OR USE IT IN ANY INAPPROPRIATE MANNER HOW TO CONSULT THIS MANUAL AND THE SYMBOLS ADOPTED Please pay particular attention to the words WARNING CAUTION and NOTES as used in this manual...

Page 22: ...ecommend non slip shoes If necessary use headgear to cover hair 12 Use always personal protection devices wear protective goggles and masks in case dust or sawdust is produced Wear ear mu s or plugs i...

Page 23: ...knife is thinner than the groove cut made by the saw blade and not wider than blade s body and the speed marked on the blade exceeds the speed of the machine indicated on the data plate 5 Do not use a...

Page 24: ...lug of the tool When using an electric tool at a remarkable distance from the power supply use an extension lead with su cient dimensions to transport the current which the tool needs If the extension...

Page 25: ...ECHNICAL SPECIFICATIONS Engine power 2000 W S1 Voltage and frequency 230 V 50 Hz Speed 4200 RPM Saw blade maximum dimensions 305x30X2 8 mm 40 teeth Crosscut at 90 185 X 85 mm Oblique cutting 45 125 X...

Page 26: ...ate the swivel support by using the handgrip 1 then lock it by tightening the knob 8 The head will automatically stop each time the index 17 is in alignment with the corresponding position indicated o...

Page 27: ...y adjustments in the safer possible conditions and with a su cient swinging room Fix the machine to the bench by using the four holes located on the base Before use the mitre saw must be rmly xed to a...

Page 28: ...tion that the sense of rotation indicated by the arrow on the protection device 10 corresponds to the cutting pitch of the teeth Before you assemble the blade thoroughly clean the support anges Reposi...

Page 29: ...mber 390542 487611 or by sending a request to the e mail address info femi it Faulty motor power supply cable or plug Low power supply voltage Damaged windings Damaged windings Faulty motor Overloaded...

Page 30: ...ALLAGE ET NETTOYAGE 29 IDENTIFICATION 29 DE LA MACHINE Fig 2 3 29 MONTAGE ET REGLAGE 30 REGLAGE DE L ANGLE DE COUPE ROTATION DE LA TETE Fig 2 30 REGLAGES Fig 4 30 REGLAGE DE LA HAUTEUR DU PLAN SUPERIE...

Page 31: ...MANUEL ET SYMBOLES UTILIS S Il est recommand de pr ter particuli re attention au rappels ATTENTION PR CAUTION et NOTE report s dans ce manuel A n d attirer l attention et de fournir des messages de s...

Page 32: ...plac par un centre de service apr s vente agr Ne pas utiliser l outil si l interrupteur ne fonctionne pas correctement 20 Avertissement l emploi de tout accessoire non recommand dans cette notice d ut...

Page 33: ...r en position de marche lorsque que vous travaillez en mode scie onglet 22 Important une fois la coupe termin e mettre l interrupteur l arr t et maintenir la lame abaiss e jusqu ce qu elle s arr te de...

Page 34: ...ation de votre scie peut entra ner les dangers suivants 1 Un choc lectrique avec contact direct ou indirect 2 Un contact avec la lame 3 Le rebond de la pi ce usiner ou d une partie de la pi ce 4 La ru...

Page 35: ...IT Fig 2 3 La tron onneuse circulaire est form e de trois l ments fondamentaux le corps central qui comprend le moteur 6 reli la base 3 par l interm diaire du joint 4 et du support rotatif 5 le groupe...

Page 36: ...e la pi ce ainsi que les autres sources de bruit ex le nombre de machines en fonctionnement autres op rations bruyantes e ectu es en m me temps Les seuils de niveau sonore varient d un pays l autre Po...

Page 37: ...eur il faut monter le carter de protection inf rieur 23 livr avec la machine En cas d application du carter suppl mentaire inf rieure 23 appliquer la protection suppl mentaire en la poussant contre le...

Page 38: ...AMACHINE EST QUIP E D UN INTERRUPTEUR DE R SEAU ACTIONNERAVANT D EFFECTUER TOUT USINAGE UNE FOIS TERMIN L USINAGE IL EST RECOMMAND DE D SACTIVER L INTERRUPTEUR DE R SEAU EMPLOI COMME TRON ONNEUSE Fig...

Page 39: ...ter 11 de mani re couvrir totalement la lame CHOIX DE LA LAME La tron onneuse est quip e en standard d une lame au WIDIA diam tre 305 x trou 30 En cas de lames dot es de dentures di rentes n h sitez p...

Page 40: ...du moteur Remplacez les deux balais lorsque le carbone d un balai est us et n a plus que 5 mm de longueur ou si un ressort ou un l est br l ou endommag Si les balais sont encore utilisables apr s ins...

Page 41: ...ialis Faites contr ler le moteur par un personnel sp cialis Ne pas faire appel aux services ou d autres moteurs sur le m me circuit auquel est reli la machine Evitez de surcharger le moteur durant les...

Page 42: ...N 41 Fig 2 3 41 REGULACIONES 41 REGULACI N DEL NGULO DE CORTE ROTACI N CABEZA Fig 2 41 REGULACI N DEL NGULO DE CORTE INCLINACI N CABEZA Fig 4 42 REGULACI N DE LA ALTURA PLANO SUPERIOR Fig 5 6 7 42 REG...

Page 43: ...R EL MANUAL Y LA SIMBOLOG A UTILIZADA No ignore los avisos de ATENCI N PRECAUCI N y NOTA incluidos en este manual Con objeto de llamar la atenci n sobre los mensajes de seguridad las operaciones pelig...

Page 44: ...lo no utilice una sierra circular para cortar ramas o troncos 8 Lleve siempre una ropa apropiada No use ropa amplia ni joyas que puedan ser enganchadas por las piezas m viles Los zapatos antidesliznte...

Page 45: ...girar 23 Nunca corte metales ferrosos o materiales de alba iler a 24 Nunca recorte pedazos peque os 25 Use medios de soporte adecuados en los lados de la sierra mientras corte piezas largas 26 Nunca...

Page 46: ...ra se usa en espacios cerrados 8 Use siempre dispositivos de aspiraci n de serr n mientras sea posible PROTECCI N DEL MEDIO AMBIENTE INFORMACI N PARA USUARIOS Actuaci n de la Directiva 2011 65 UE 2012...

Page 47: ...minar la dimensi n m nima de hilo requerida en un cable alargador Solo pueden ser utilizados los alargadores redondos con revestimiento que guran en la lista establecida por los laboratorios Longuitud...

Page 48: ...a a un centro de asistencia autorizado para la sustituci n de las partes defectuosas Para hacer funcionar perfectamente la sierra de corte deben ser montadas todas las piezas para lo cual se da una de...

Page 49: ...DE LA ESCUADRA DE APOYO Fig 8 SOLAMENTE PARA SIERRA CIRCULAR Puede acercar o alejar la escuadra de apoyo 14 de la cuchilla para cortar tablas seg n las medidas previamente establecidas A oje los manub...

Page 50: ...or 9 para desbloquear el movimiento de la cabeza Accione el motor con el pulsador de marcha 2 del interruptor Haga descender la cabeza y ponga gradualmente en contacto la cuchilla con la pieza que se...

Page 51: ...ejamos que vac en peri dicamente la bolsa o el contenedor del aspirador y que limpien el ltro La velocidad de salida del aire que crea el aspirador debe ser de por lo menos 30 metros al segundo Aspira...

Page 52: ...as buj as son todav a utilizables tras la inspecci n col quelas de nuevo en el lugar donde estaban originalmente ATENCI N Durante el uso de herramientas el ctricas siga siempre las normas de seguridad...

Page 53: ...a m quina Haga que personal especializado controle el motor de la m quina No utilice servicios u otros motores en el mismo circuito al cual conecta la m quina Evite sobrecargar el motor durante las op...

Page 54: ...A ES 54 REGULA O DO NGULO DE CORTE E ROTA O DA CABE A Fig 2 54 REGULA O DO NGULO DE CORTE INCLINA O DA CABE A Fig 4 54 REGULA O DA ALTURA DO PLANO SUPERIOR Fig 5 6 7 54 REGULA O DO ESQUADRO DE APOIO F...

Page 55: ...PRIO CONSULTA DO MANUAL E S MBOLOS UTILIZADOS Preste muita aten o s indica es ATEN O CUIDADO e NOTA presentes neste manual Para chamar a aten o do utilizador e fornecer mensagens de seguran a as oper...

Page 56: ...Utilize a ferramenta adequada N o force uma ferramenta pequena para fazer o trabalho duma ferramenta de trabalho intensivo Por exemplo n o utilize uma serra circular para cortar ramos ou troncos 8 Le...

Page 57: ...tar o interruptor 21 Nunca feche o interruptor na posi o de funcionamento enquanto trabalhe em modo esquadria 22 Importante uma vez que haja terminado o corte ponha o interruptor em paragem e mantenha...

Page 58: ...residuais O uso da serra pode provocar os seguintes perigos 1 Um choque el ctrico por contacto directo ou indirecto 2 Um contacto com a l mina 3 O ricochete da pe a de trabalho ou de uma parte da pe...

Page 59: ...r automaticamente Se a m quina se para involuntariamente n o se alarme e assegure se que no haja aus ncia de tens o no circuito el ctrico DESCRI O DA M QUINA Fig 2 3 A serra circular composta por tr s...

Page 60: ...suplement rias a levar a cabo Factores que tenham uma influ ncia potencial sobre o n vel de emiss o sonora no lugar de trabalho incluem a dura o do trabalho o tamanho da pe a assim como outras fontes...

Page 61: ...te o bloqueio da cabe a em qualquer posi o em todas as fases de trabalho REGULA O DAALTURADO PLANO SUPERIOR Fig 5 6 7 S PARA SERRA CIRCULAR ATEN O Quando trabalhar no plano superior necess rio instala...

Page 62: ...que o bra o de corte est colocado em posi o baixa 2 O perno de bloqueio 12 do plano de trabalho Fig 2 a manivela de bloqueio da inclina o 21 Fig 4 e o parafuso de bloqueio das extens es 20 Fig 2 da s...

Page 63: ...te dos dentes Antes de montar a l mina limpe muito bem as anges de apoio Coloque a ange externa 29 tomando aten o sua perfeita introdu o no veio e aperte o parafuso Antes de ligar a cha 28 coloque o c...

Page 64: ...se uma mola ou um o est queimado o dani cado Se as velas s o ainda utiliz veis ap s a inspec o coloque as de novo no lugar donde estavam originalmente ATEN O Durante o uso de ferramentas el ctricas s...

Page 65: ...na Haga que personal especializado controle el motor de la m quina No utilice servicios u otros motores en el mismo circuito al cual conecta la m quina Evite sobrecargar el motor durante las operacion...

Page 66: ...En outre elle est conforme aux dispo sitions des autres directives suivantes 2011 65 UE 2012 19 UE 2 014 30 UE et 2014 35 UE DECLARATION DE CONFORMIDAD CE DEL CONSTRUCTOR FEMI S p A Via Del lavoro 4 4...

Page 67: ...114 115 116 118 99 188 108 97 150 148 79 119 182 78 121 122 123 124 125 126 127 175 128 129 130 201 200 50 52 51 37 8 7 31 30 29 3 32 1 34 2 35 9 10 11 12 13 15 5 202 101 99 40 14 41 33 19 16 42 43 1...

Page 68: ...TR090 096 97 TR090 097 98 TR090 098 99 TR090 099 100 TR090 100 101 TR090 101 102 TR090 102 103 TR090 103 104 TR090 104 105 TR090 105 106 TR090 106 107 TR090 107 108 TR090 108 109 TR090 109 110 TR090...

Page 69: ...SCHEMA ELETTRICO WIRING DIAGRAM SCHEMA ELECTRIQUE ESQUEMA EL CTRICO ESQUEMA EL CTRICO...

Page 70: ......

Page 71: ...6 90 15 99_Rev C 40023 CASTEL GUELFO BO ITALY Via Del Lavoro 4 Tel 39 0542 487611 Fax 39 0542 488226 E Mail infocom femi it www femi it...

Reviews: