Feniex Industries, Inc.
1.800.615.8350
/
feniex.com
11
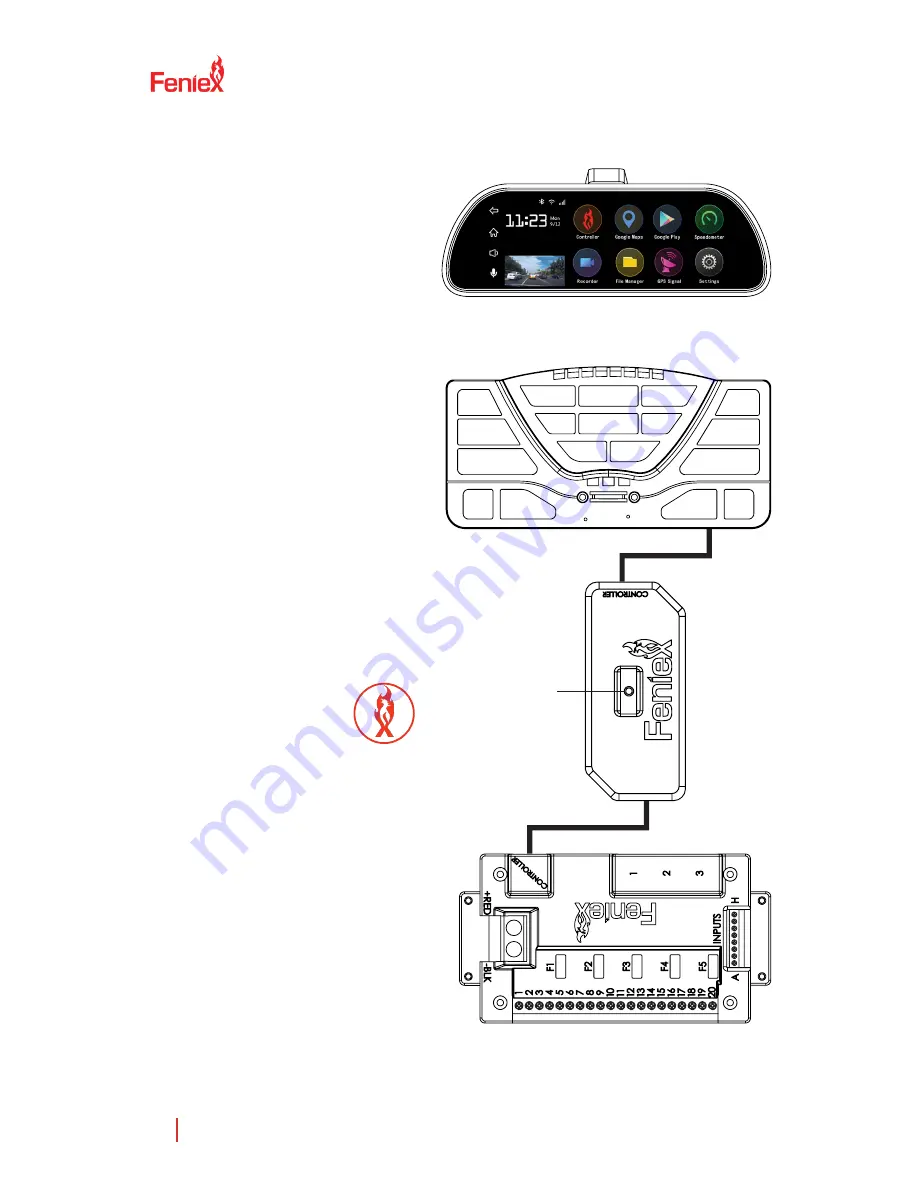
Pairing to 4200
The Feniex 4200 has the option of being
controlled by the Smart Mirror. To enable
this feature, you will need the Feniex in-line
Bluetooth module (part #: C-4200WB-V2).
Follow the installation instructions below to
pair the 4200 Controller with the Smart Mirror:
1.) Turn the Smart Mirror and 4200
systems "on" (see wiring diagram on
page 8 for more information). Both the
controller and mirror need 12V+ to activate.
2.) Connect the RJ45 cable to the 4200
relay port marked "controller" to the
bluetooth module marked "power supply".
3.) Connect the second RJ45 cable to
the bluetooth module marked "controller"
to the 4200 controller's RJ45 port.
4.) Press and hold the pairing switch button
on the bluetooth device for 3 seconds.
5.) Turn on the smart mirror
and open the 4200 controller
app. Select "connect" in
the upper right corner.
6.) Select "search/scan for device". When
the app is successfully paired with the
bluetooth module, the circle next to
"connect" changes from red to green.
7.) Once "Connect" turns green the
mirror is connected and ready to use.
Pairing
Button