background image

Feniex Industries, Inc.
1.800.615.8350

 /


feniex.com

7

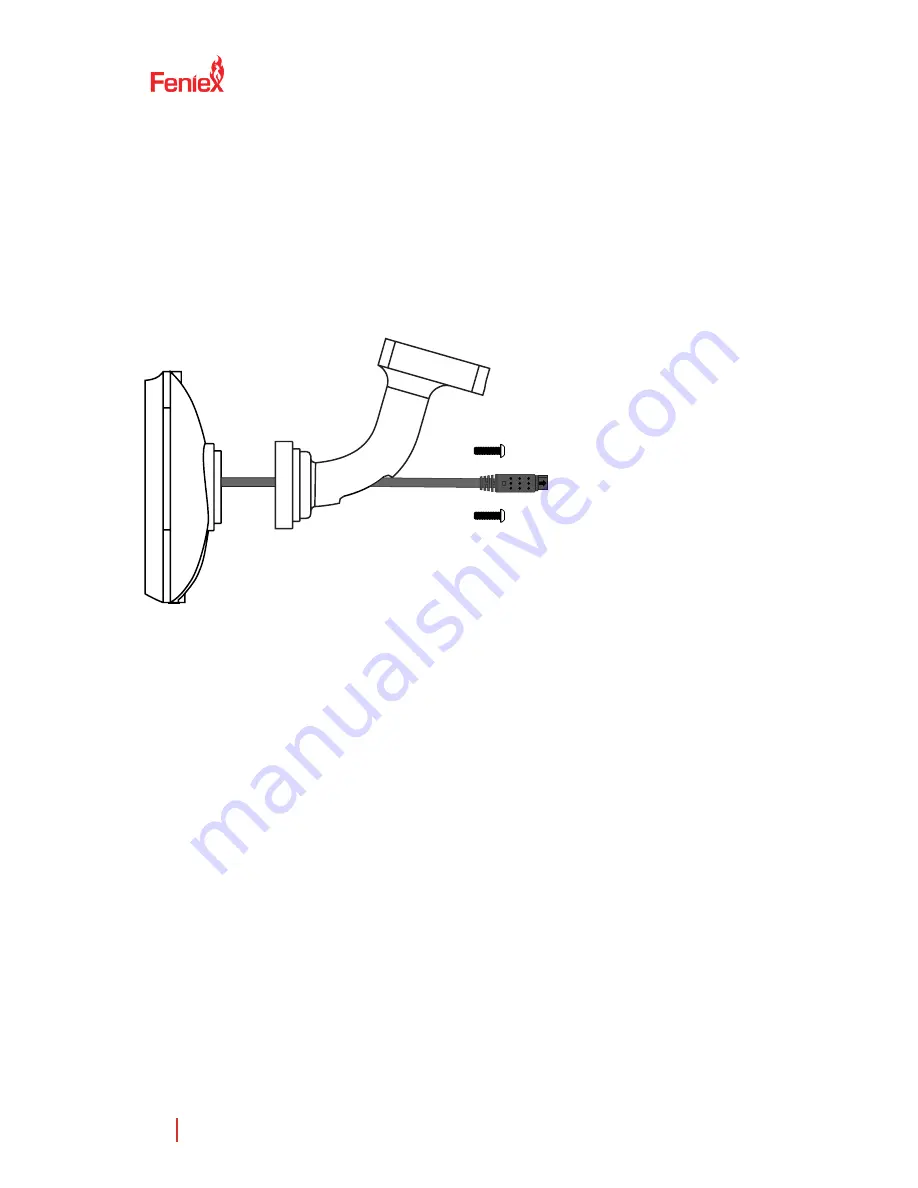
1.) Disconnect the mirror harness by 
disconnecting the male connector from 
the female connector (located 12" from the 
base of the mirror).

2.) Thread the cable through the bracket. 

3.) Attach the bracket to the back of the 
mirror using the provided screws, 

4.) Remove the current OEM mirror from 
the vehicle by using the manufacturer's 
recommended directions. Keep the base 
plate from the mirror attached to the 
window.

5.) Slide the base of the mirror (attached to 
mirror) onto the the plate on the window. 

Mounting Instructions

Mirror

Base

Cable

Screw

Summary of Contents for C-5500

Page 1: ...ce in any form distribute and make derivative works of the copyrighted material Accordingly any copyrighted material of Feniex and its licensors contained herein or in the Feniex products described in...

Page 2: ...ns Warranty 3 Service after Expiration 3 Copyright 3 Feniex Product Copyright 3 Limitation of Liability 4 Equipment Dimensions 5 Box Contents 6 System Specifications 6 Mounting Instructions 7 Wiring D...

Page 3: ...rate the previously listed products of Feniex Industries Inc Please read this manual thoroughly before installing or operating your new product in order to prevent any damage or injury Failure to foll...

Page 4: ...mercial or economic loss even if Feniex Industries have been advised of the possibility of such damages or they are foreseeable Feniex Industries are also not responsible for claims by a third party T...

Page 5: ...Feniex Industries Inc 1 800 615 8350 feniex com 5 Equipment Dimensions 9 75 3 19 4 63 1 13...

Page 6: ...ting Base 1 Mounting Bracket 2 Hardware 5 Wire 1 Mounting Base Mirror Mounting Bracket Hardware System Specifications Input Voltage 12 88V Temperature Range Working Temperature 13F to 176F Storage Tem...

Page 7: ...the cable through the bracket 3 Attach the bracket to the back of the mirror using the provided screws 4 Remove the current OEM mirror from the vehicle by using the manufacturer s recommended directi...

Page 8: ...egative terminal of the vehicle s battery Red Battery 12VDC Connects to the positive terminal of the vehicle s battery Blue ACC 12VDC Connects to the positive terminal of the vehicle s battery Green B...

Page 9: ...Feniex Industries Inc 1 800 615 8350 feniex com 9 Power Micro SD Card Back Home Volume Microphone Camera Camera Feed Time Display Information Mini USB SIM Card...

Page 10: ...the latest Android apps games music movies TV books magazines and more anytime anywhere across your devices Recorder This application takes still images to capture footage from the viewpoint of the dr...

Page 11: ...2V to activate 2 Connect the RJ45 cable to the 4200 relay port marked controller to the bluetooth module marked power supply 3 Connect the second RJ45 cable to the bluetooth module marked controller t...

Page 12: ...ard SeediagrambelowfortheSIMcardslot To activatetheSIMcard purchaseaplanwhich supportWCDMAandinserttheSIMcardinto themirror AnAT TorT Mobileplancanbe purchased IfyouhavenotinsertedtheSIMcard youmustus...

Reviews: