background image

Congratulations to the purchase of this Audizio product. Please read this manual thoroughly prior to using the unit in order to 
benefit fully from all features. 


Read the manual prior to using the unit. Follow the instructions in order not to invalidate the warranty. Take all precautions to 
avoid fire and/or electrical shock. Repairs must only be carried out by a qualified technician in order to avoid electrical shock. 
Keep the manual for future reference. 


Prior to using the unit, please ask advice from a 
specialist. When the unit is switched on for the first 
time, some smell may occur. This is normal and will 
disappear after a while. 


The unit contains voltage carrying parts. Therefore do 
NOT open the housing. 


Do not place metal objects or pour liquids into the unit 
This may cause electrical shock and malfunction. 


Do not place the unit near heat sources such as 
radiators, etc. Do not place the unit on a vibrating 
surface. Do not cover the ventilation holes. 


The unit is not suitable for continuous use. 


Be careful with the mains lead and do not damage it. A 
faulty or damaged mains lead can cause electrical shock 
and malfunction.  


When unplugging the unit from a mains outlet, always 
pull the plug, never the lead. 


Do not plug or unplug the unit with wet hands. 


If the plug and/or the mains lead are damaged, they 
need to be replaced by a qualified technician. 


If the unit is damaged to such an extent that internal 
parts are visible, do NOT plug the unit into a mains 
outlet and DO NOT switch the unit on. Contact your 
dealer. Do NOT connect the unit to a rheostat or 
dimmer. 


To avoid fire and shock hazard, do not expose the unit 
to rain and moisture. 


All repairs should be carried out by a qualified 
technician only. 


Connect the unit to an earthed mains outlet (220-
240Vac/50Hz) protected by a 10-16A fuse. 


During a thunderstorm or if the unit will not be used for 
a longer period of time, unplug it from the mains. The 
rule is: Unplug it from the mains when not in use. 


If the unit has not been used for a longer period of time, 
condensation may occur. Let the unit reach room 
temperature before you switch it on. Never use the unit 
in humid rooms or outdoors. 


To prevent accidents in companies, you must follow the 
applicable guide lines and follow the instructions. 


Do not repeatedly switch the fixture on and off. This 
shortens the life time. 


Keep the unit out of the reach of children. Do not leave 
the unit unattended. 


Do not use cleaning sprays to clean switches. The 
residues of these sprays cause deposits of dust and 
grease. In case of malfunction, always seek advice from 
a specialist. 


Do not force the controls. 


This unit is with speaker inside which can cause 
magnetic field. Keep this unit at least 60cm away from 
computer or TV. 


If this product have a built-in lead-acid rechargeable 
battery. Please recharge the battery every 3 months if 
you are not going to use the product for a long period of 
time. Otherwise the battery may be permanently 
damaged. 


If the battery is damaged please replace with same 
specifications battery. And dispose the damaged 
battery environment friendly. 


If the unit has fallen, always have it checked by a 
qualified technician before you switch the unit on 
again. 


Do not use chemicals to clean the unit. They damage 
the varnish. Only clean the unit with a dry cloth. 


Keep away from electronic equipment that may cause 
interference. 


Only use original spares for repairs, otherwise serious 
damage and/or dangerous radiation may occur. 


Switch the unit off prior to unplugging it from the mains 
and/or other equipment. Unplug all leads and cables 
prior to moving the unit. 


Make sure that the mains lead cannot be damaged when 
people walk on it. Check the mains lead before every 
use for damages and faults! 


The mains voltage is 220-240Vac/50Hz. Check if power 
outlet match. If you travel, make sure that the mains 
voltage of the country is suitable for this unit. 


Keep the original packing material so that you can 
transport the unit in safe conditions.


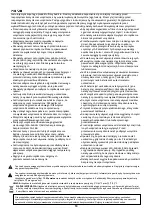
This mark attracts the attention of the user to high voltages that are present inside the housing and that are of 
sufficient magnitude to cause a shock hazard. 


This mark attracts the attention of the user to important instructions that are contained in the manual and that he 
should read and adhere to. 


The unit has been certified CE. It is prohibited to make any changes to the unit. They would invalidate the CE certificate and 
their guarantee! 


NOTE: 

To make sure that the unit will function normally, it must be used in rooms with a temperature between 5°C/41°F and 

35°C/95°F.  


Electric products must not be put into household waste. Please bring them to a recycling centre. Ask your local authorities or your 
dealer about the way to proceed. The specifications are typical. The actual values can slightly change from one unit to the other. 
Specifications can be changed without prior notice.


Do not attempt to make any repairs yourself. This would invalid your warranty. Do not make any changes to the unit. This would also invalid 
your warranty. The warranty is not applicable in case of accidents or damages caused by inappropriate use or disrespect of the warnings 
contained in this manual. Audizio cannot be held responsible for personal injuries caused by a disrespect of the safety recommendations and 
warnings. This is also applicable to all damages in whatever form. 

Summary of Contents for AD200 Series

Page 1: ...Ref nr 110 100 110 110 INSTRUCTION MANUAL GEBRUIKSAANWIJZING BEDIENUNGSANLEITUNG MANUAL DE INSTRUCCIONES MANUEL D INSTRUCTIONS INSTRUKCJA OBSŁUGI NÁVOD K POUŽITÍ V1 2 ...

Page 2: ...2 ...

Page 3: ...L TRASERO 14 CAMBIANDO EL FUSIBLE 14 REPRODUCCIÓN BT 15 AUX IN ENTRADA AUXILIAR 15 CONTROL REMOTO 15 FRANÇAIS 16 DEBALLAGE 17 ALIMENTATION 17 REGLAGES 17 PANNEAU ARRIÈRE 17 REMPLACEMENT DU FUSIBLE 17 LECTURE BT 18 AUX IN 18 TÉLÉCOMMANDE 18 POLSKI 19 INSTRUKCJA ROZPAKOWANIA 20 ZASILANIE 20 STEROWANIE 20 PANEL TYLNY 20 WYMIANA BEZPIECZNIKA 20 ODTWARZANIE BT 21 AUX IN 21 ZDALNE STEROWANIE 21 ČESKY 22...

Page 4: ...rom a specialist Do not force the controls This unit is with speaker inside which can cause magnetic field Keep this unit at least 60cm away from computer or TV If this product have a built in lead acid rechargeable battery Please recharge the battery every 3 months if you are not going to use the product for a long period of time Otherwise the battery may be permanently damaged If the battery is ...

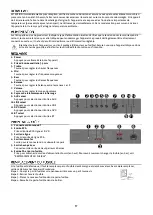
Page 5: ...Make sure the device has an appropriate electrical ground to avoid the risk of electrocution or fire 1 Power Press to switch the device on off 2 Aux in jack 3 5 mm 3 Treble Rotate to adjust the high frequencies 4 Mid Rotate to adjust the mid frequencies 5 Bass Rotate to adjust the low frequencies 6 Balance Rotate to adjust the balance between L and R channel 7 Volume Rotate to adjust the volume le...

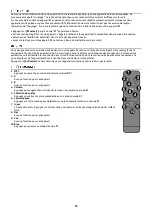
Page 6: ...mitting sound from the radio You can listen to the music stored in other audio device or smart phone via the radio through the connection to the 3 5 mm aux in jack on the front panel Use a cable with 3 5 mm pins at both ends one end connected to the aux in jack on the radio the other end connected to the earphone jack on the audio device or line out socket if available Press AUX select Play music ...

Page 7: ...rden gevolgd Het apparaat buiten bereik van kinderen houden Bovendien mag het apparaat nooit onbeheerd gelaten worden Gebruik geen schoonmaakspray om de schakelaars te reinigen Restanten van deze spray zorgen ervoor dat smeer en stof ophopen Raadpleeg bij storing te allen tijde een deskundige Gebruik geen overmatige kracht bij het bedienen van het apparaat Dit apparaat kan magnetisch veld veroorza...

Page 8: ...vermijden 1 Power Indrukken om het apparaat aan uit te zetten 2 AUX 3 5 mm jack ingang 3 Treble Draaien om de hoge frequenties aan te passen 4 Mid Draaien om de middenfrequenties aan te passen 5 Bass Draaien om de lage frequenties aan te passen 6 Balance Draaien om de balans tussen L en R kanaal aan te passen 7 Volume Draaien om het volume aan te passen 8 Infrarood afstandsbedieningssensor 9 AUX s...

Page 9: ... U kunt luisteren naar de muziek die is opgeslagen in een ander audioapparaat of smartphone op de radio via de aansluiting op de 3 5 mm aux in aansluiting aan de voorzijde Gebruik de kabel met beide uiteinden in de 3 5 mm pen het ene uiteinde aan de aux ingang op de radio het andere uiteinde aan de oortelefoonaansluiting op het audioapparaat of als deze een line out aansluiting heeft Druk op AUX s...

Page 10: ...rät niemals unbeaufsichtigt lassen Die Regler nicht mit Reinigungssprays reinigen Diese hinterlassen Rückstände die zu Staub und Fettansammlungen führen Bei Störungen immer einen Fachmann um Rat fragen Das Gerät nur mit sauberen Händen bedienen Das Gerät nicht mit Gewalt bedienen Dieses Gerät kann dazu führen Magnetfeld Halten Sie das Gerät mindestens 60 cm vom Computer oder Fernseher Wenn dieses ...

Page 11: ... Eingang 3 Treble Drehen um hohe Frequenzen einzustellen 4 Mid Drehen um die Mittenfrequenzen einzustellen 5 Bass Drehen um tiefe Frequenzen einzustellen 6 Balance Drehen um die Balance zwischen L und R Kanal einzustellen 7 Volume Drehen um die Lautstärke einzustellen 8 Infrarot Fernbedienungssensor 9 AUX selekt Drücken um den AUX Eingang zu wählen 10 LINE selekt Drücken um den Line Eingang zu wäh...

Page 12: ...sprecher des Radios Über den Anschluss an die 3 5 mm Aux In auf der Vorderseite können Sie die in einem anderen Audiogerät oder Smartphone gespeicherte Musik über das Radio hören Verwenden Sie das Kabel mit beiden Enden in 3 5 mm Stift ein Ende an die Aux In Buchse am Radio das andere Ende an die Kopfhörerbuchse am Audiogerät oder wenn es eine Line Out Buchse hat Drücken Sie AUX selekt Spielen Sie...

Page 13: ...iños No deje el aparato sin vigilancia No utilice sprays limpiadores para limpiar los interruptores Los residuos de estos sprays producen depósitos de polvo y grasa En caso de mal funcionamiento siempre consulte a un profesional No fuerce los controles Si el aparato se ha caído siempre haga que lo verifique un técnico cualificado antes de encenderlo otra vez NO utilice productos químicos para limp...

Page 14: ...que el producto tiene una toma de tierra adecuada para evitar el riesgo de electrocución o incendio 1 Power Pulse para encender o apagar el dispositivo 2 Entrada auxiliar de Jack 3 5 mm 3 Treble Gire para ajustar las frecuencias altas 4 Mid Girar para ajustar las frecuencias medias 5 Bass Gire para ajustar las frecuencias bajas 6 Balance Gire para ajustar el equilibrio entre los canales L y R 7 Vo...

Page 15: ...de la radio Puede escuchar la música almacenada en otro dispositivo de audio o teléfono inteligente a través de la radio mediante la conexión a la toma auxiliar de 3 5 mm de la parte frontal Utilice un cable con clavijas de 3 5 mm en ambos extremos un extremo conectado a la toma de entrada auxiliar de la radio y el otro extremo conectado a la toma de auriculares del dispositivo de audio o a la tom...

Page 16: ... contient un haut parleur pouvant engendrer des champs magnétiques Tenez cet appareil à 60 cm au moins d un téléviseur ou ordinateur Si le produit comprend un accumulateur intégré plomb acide rechargez l accumulateur tous les 3 mois en cas de non utilisation prolongée de l appareil Sinon l accumulateur pourrait être endommagé de manière permanente Si l accumulateur est endommagé remplacez le par u...

Page 17: ...trée auxiliaire 3 5 mm 3 Treble Tournez pour régler les hautes fréquences 4 Mid Tournez pour régler les fréquences moyennes 5 Bass Tournez pour régler les basses fréquences 6 Balance Tournez pour régler la balance entre les canaux L et R 7 Volume Tournez pour régler le niveau du volume 8 Capteur de télécommande à infrarouge 9 AUX select Appuyez pour sélectionner l entrée AUX 10 LINE select Appuyez...

Page 18: ...ue stockée dans un autre appareil audio ou un téléphone intelligent via la radio grâce à la connexion à la prise d entrée auxiliaire de 3 5 mm située à l avant Utilisez un câble avec des broches de 3 5 mm aux deux extrémités une extrémité étant connectée à la prise d entrée auxiliaire de la radio l autre extrémité étant connectée à la prise écouteurs de l appareil audio ou à la prise de sortie de ...

Page 19: ...oru Do czyszczenia przełączników nie używać sprayów czyszczących Pozostałości tych sprayów powodują osadzanie się kurzu i smaru W przypadku awarii należy zawsze zasięgnąć porady specjalisty Nie wolno wymuszać używania elementów sterujących Wewnątrz urządzenia znajduje się głośnik który może powodować pole magnetyczne Urządzenie należy trzymać w odległości co najmniej 60 cm od komputera lub telewiz...

Page 20: ...enie ma odpowiednie uziemienie elektryczne aby uniknąć ryzyka porażenia prądem lub pożaru 1 Power Naciśnij aby włączyć wyłączyć urządzenie 2 Gniazdo wejściowe Aux 3 5 mm 3 Treble Obrócić aby dostosować wysokie częstotliwości 4 Mid Obróć aby dostosować średnie częstotliwości 5 Bass Obróć aby dostosować niskie częstotliwości 6 Balance Obróć aby dostosować równowagę między kanałem L i R 7 Volume Obró...

Page 21: ...zapisanej w innym urządzeniu audio lub smartfonie można słuchać za pośrednictwem radia poprzez połączenie z gniazdem aux in 3 5 mm na panelu przednim Użyj kabla z wtykami 3 5 mm na obu końcach jeden koniec podłączony do gniazda aux in w radiu drugi koniec podłączony do gniazda słuchawkowego w urządzeniu audio lub gniazda line out jeśli jest dostępne Naciśnij AUX select Odtwarzaj muzykę na podłączo...

Page 22: ...adě poruchy vždy vyhledejte radu od odborníka Na ovládací prvky netlačte silou Tato jednotka má uvnitř reproduktor který může způsobit magnetické pole Udržujte proto toto zařízení ve vzdálenosti alespoň 60 cm od počítače nebo televize Pokud má tato jednotka vestavěnou dobíjecí baterii tak ji dobijte alespoň 1x za 3 měsíce Jinak může dojít k poškození baterie Pokud je baterie poškozená vyměňte ji z...

Page 23: ...stěte se že má zařízení vhodné elektrické uzemnění abyste předešli riziku úrazu elektrickým proudem nebo požáru 1 Napájení Stiskem zařízení zapnete vypnete 2 Aux in jack 3 5 mm 3 Výšky Otáčením upravujete vysoké frekvence 4 Středy Otáčením upravujete střední frekvence 5 Basy Otáčením upravujete basové frekvence 6 Vyvážení Otáčením upravujete vyvážení mezi pravou a levou stranou 7 Hlasitost Otáčení...

Page 24: ... se zvukem z rádia Prostřednictvím rádia můžete poslouchat hudbu uloženou v jiném zvukovém zařízení nebo chytrém telefonu prostřednictvím připojení ke konektoru aux in 3 5 mm na předním panelu Použijte kabel s konektory jack 3 5 mm na obou koncích jeden konec připojený ke konektoru aux in na rádiu druhý konec připojený ke konektoru sluchátek na audio zařízení nebo k výstupnímu konektoru pokud je k...

Page 25: ...25 ...

Page 26: ...pical The actual values can slightly change from one unit to the other Specifications can be changed without prior notice The products referred to in this manual conform to the European Community Directives to which they are subject European Union United Kingdom Tronios B V Bedrijvenpark Twente Noord 18 7602KR Almelo The Netherlands Tronios Ltd 130 Harley Street London W1G 7JU United Kingdom 2014 ...

Page 27: ...27 ...

Page 28: ...28 Specifications and design are subject to change without prior notice www audizio com Copyright 2023 by Tronios The Netherlands ...

Reviews: