background image

Ferax

07

Secure the work piece with clamps or similar.

Place the front sole on the edge of the work piece in such a way that the planing tool does
not yet touch the work piece. The work piece must be level.

This machine is equipped with a safety switch.

Start the machine by pressing the “lock off” button (to disengage the switch) and switch on
the machine.

The planer is now switched on and you can let go of the release button.

Always hold the planer with both hands on the handles, so as to gain the best possible
control over your planing operations. Besides you do not risk becoming in touch with the
moving parts.

When the machine has reached full speed it can be pushed to the front over the work piece.
At the beginning of the planing operation, put some pressure on the front and at the end of
the operation, on the rear of the appliance. This results in the appliance remaining flat on
the work piece and prevents the corners from getting rounded off.

To obtain a level and smooth surface use a greater planing depth when rough planing and a
lesser planing depth when planing a layer. Hold the electric tool straight during the
operation, otherwise you will obtain an uneven surface. After the operation switch off the
electric tool and remove the mains plug.

Bevelling edges

Fig. 1

The V-groove in the planer shoe allows easy beveling of workpiece edges. Place the planer
with the V-groove (7) onto the edge of the workpiece and guide along the edge.

Rebating

The rebating depth stop can be used by planing for example a window- or doorpost.
Loosen the locking nut and adjust the required rebating depth with the scale (Fig. 2, 9).
Carry out the the planing procedure several times (guide the planer with sideward suppor-
ting pressure), until the required rebating depth is reached. The maximum rebating depth
is 11 mm.

Warning!

Take care that your hand never comes in contact with the work piece during the operation.

Only use the electric plane on the upper side of the work piece, never from below or from
the side.

Store the appliance only after it has come to a complete standstill.

Use a suction device to suck off wood shavings or dust. For this use the connecting pipe
and connect a suction pipe to it.

Use a holding device to work on small work pieces.

Fitting the rip fence

Fig. 4

Fit the bracket (12) to the planer 

Tighten knob (11)

Fit the rip fence on to the bracket

Set the correct cut width and tighten the butterfly nut

GB

58

Ferax

Sustitución de la correa

Fig. 5

Afloje el tornillo (15) y extraiga la cubierta de la correa (16).

Sustituya la correa desgastada (17).

Antes de instalar la nueva correa, limpie cuidadosamente ambas poleas.

Coloque la correa nueva en la polea pequeña y después insértela en la grande con la
mano mientras la gira.

Vuelva a colocar la cubierta de la correa (16) y apriétela con el tornillo correspondiente
(15).

Resolución de problemas

El interruptor de servi-
cio está encendido,
pero el motor no mar-
cha.

El interruptor de servi-
cio está encendido,
pero se oyen ruidos
extraños, el motor no
marcha o marcha muy
despacio.

El motor se calienta
mucho.

Circuito eléctrico inter-
rumpido.

Conexiones sueltas en
el enchufe o la toma
de red.

Defecto en el interrup-
tor.

El contacto del inter-
ruptor se ha fundido.

Componente blo-
queado.

Potencia de empuje
demasiado grande,
que quema el motor.

Hay cuerpos extraños
en el interior del motor.

Falta grasa lubricante
o está sucia.

Carga demasiado alta.

Cuchilla de cepillar
roma.

Haga reparar el circui-
to.

Haga comprobar o
reparar el enchufe y la
toma de red.

Haga sustituir el inter-
ruptor.

Haga sustituir el inter-
ruptor.

Haga probar o reparar
la herramienta eléctri-
ca.

Utilice una potencia
menor al trabajar.

Haga eliminar los cuer-
pos extraños.

Haga que apliquen
grasa o la cambien.

Utilice una potencia
menor al trabajar.

Cambie la cuchilla.

ES
Summary of Contents for FEH-710

Page 1: ...ствуетвыпускаемуюею проедукцию Позтомувтехничесие характеристикимогутвноситься безпредварительного уведомления ES Reservadoelderechode modificacionestécnicas Art No 14353 0103 FEH 710 GB DE CZ HU IT RU ES USERS MANUAL 04 GEBRAUCHSANWEISUNG 12 NÁVOD K POUŽITÍ 20 HASZNÁLATI UTASÍTÁS 28 MANUALE UTILIZZATI 36 РУКОВОДСТВО ПО ЭКСПЛУАТАЦИИ 44 MANUAL DE INSTRUCCIONES 53 ...

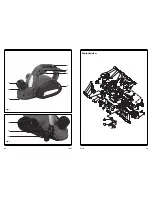
Page 2: ...Ferax 63 Explodedview 02 Ferax 6 5 4 3 1 2 7 10 9 8 Fig 1 Fig 2 ...

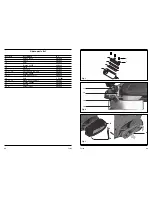
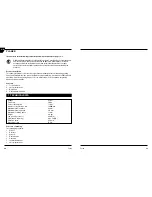
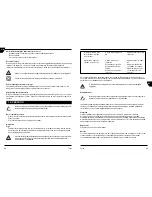
Page 3: ...ing 626ZZ 800626 20 Stator 402043 23 Drive belt 402044 24 37 38 Drive wheels complete 402045 27 Bearing 608ZZ 800608 30 31 Knife mounting set 402046 32 Knife PPA1003 40 42 44 Clamp knob complete 402047 43 Bearing 6000ZZ 806000 65 Wrench 402048 66 67 Parallel guide 402049 1 2 3 4 6 5 11 12 13 14 Fig 3 Fig 4 15 16 17 Fig 5 ...

Page 4: ...sions whichfacilitateeasytransportation Itissafeandreliablewhenin operation ItisdrivenbyasinglephaseelectricmotorviaaV belt Itissuitableforplaning woodenbeamsorboards Contents 1 Technicaldata 2 Safetyinstructions 3 Operation 4 Careandmaintenance 1 TECHNICALDATA Contents ofpacking Thispackagingcontains 1 Planer 1 Ripfence 1 Wrench 1 Dustadapter 1 Dustbag 1 Instructionmanual 1 Safetyinstructions Vol...

Page 5: ...d ordiscardedelectricalorelectronicapparatushavetobecollectedat theappropriaterecyclinglocations GB 60 Ferax Usoecológico Paraprevenirlosdañosduranteeltransporte elaparatohasidoembalado Dichoembalaje estáhecho enlamedidadeloposible dematerialreciclable Lerogamos porlotanto que recicledichomaterial Cualquieraparatoeléctricooelectrónicodesechadoy odefectuosotieneque depositarseenloslugaresapropiados...

Page 6: ...ga sustituir la correa trapecial Haga sustituir el induci do Haga comprobar las escobillas de carbón Haga limpiar o rectifi car la superficie del colector 06 Ferax Switchoffthemachineimmediatelyincaseof Malfunctioninthemainsplug powercableordamagingofcable Brokenswitch Smokeorstenchofscorchedinsulation Electricalsafety Whenusingelectricmachinesalwaysobservethesafetyregulationsapplicableinyourcount...

Page 7: ...rcomesincontactwiththeworkpieceduringtheoperation Onlyusetheelectricplaneontheuppersideoftheworkpiece neverfrombeloworfrom theside Storetheapplianceonlyafterithascometoacompletestandstill Useasuctiondevicetosuckoffwoodshavingsordust Forthisusetheconnectingpipe andconnectasuctionpipetoit Useaholdingdevicetoworkonsmallworkpieces Fitting the rip fence Fig 4 Fit the bracket 12 to the planer Tighten kn...

Page 8: ...tostornillossólopuedeserllevadoacaboporelfabricante Comprueberegularmentequelostornillosdeaprieteesténbiensujetos Apriételossiemprebienfuerte ES 08 Ferax 4 CARE MAINTENANCE Beforeundertakinganycareormaintenancealwaysremovethemainsplugfrom thesocket Theplaningtoolbecomeswornafteraperiodofoperation Ifyouuseabluntordamaged planingtooloperationalefficiencyisreducedandtheelectricmotormightbecomeoverloa...

Page 9: ...tordeseguridad Paraempezaratrabajarconlamáquina pulseelbotónde desenclavamiento para desbloquearelinterruptor yconéctela Asegúresedequelaafiladoraangularsiempre funcionaenvacío esteessincarga alenchufarydesenchufar Laaplanadorayaestáencendidaasíquepuedesoltarelpulsadordedesconexión Cojasiemprelaaplanadoraconlasdosmanosyporlosmangosparaconseguirelmayor controlposibledesusoperacionesdeaplanamiento A...

Page 10: ...tos delaplacaindicadora Coloquelamesadetrabajosobreunasuperficieestableyplana Servicio Fig 1 Gireelbotóndeajuste 1 enelsentidodelasagujasdelrelojparadeterminarla profundidaddecepillado Conelbotóndeajusteseencuentraunindicador queindicala profundidaddecepilladoenmm Gireelbotóndeajustehastaqueveaseñaladala profundidaddeseada ES 10 Ferax Useonlyoriginalsparepartsandoriginalplaneblades Maintenance Mak...

Page 11: ...didad de cepillado 2 Indicador de la profundidad de cepillado 3 Interruptor de servicio 4 Botón de desbloqueo 5 Mango 6 Cubierta izquierda 7 Patín de aplanadora con ranura en forma de V 8 Conexión a la bolsa para el polvo 9 Tope de profundidad de rebaje con tuerca de bloqueo 10 Dispositivo de protección 2 NORMASDESEGURIDAD Explicacióndelossímbolos Enestemanualy oenelaparatomismoseutilizanlossiguie...

Page 12: ...rofundidad de rebaja máxima 11 mm Peso 2 8 kg Lpa presión acústica 88 dB A Lwa potencia acústica 99 3 dB A Vibración 3 58 m s2 Clase IP IP 20 ES 12 Ferax HOBELMASCHINE DieNummerimnachfolgendenTextkorrespondierenmitdenAbbildungenauf Seite2 3 LesenSiedieAnleitungvonElektrogerätenvorBenutzungimmergründlichdurch DadurchverstehenSieIhrProduktbesserundvermeidenunnötigeRisiken BewahrenSiedieseAnleitungzu...

Page 13: ...haltungderSicherheitsvorschriftenindieserAnleitung Elektroschockgefahr SteckerausderNetzsteckdoseziehen SchutzbrilleundGehörschutztragen TragenSieeineStaubschutzmaske Schadhafteund oderentsorgteelektrischeoderelektronischeGerätemüssenan dendafürvorgesehenenRecycling Stellenabgegebenwerden DE 52 Ferax CE ДЕКЛАРАЦИЯОСООТВЕТСТВИИ RU Поднашуисключительнуюответственностьудостоверяем чтоданное FEH 710 у...

Page 14: ...chinenimmerdieörtlichenSicherheitsvor schriften bezüglichFeuerrisiko ElektroschockundVerletzung LesenSieaußerdenfolgenden HinweisenebenfallsdieSicherheitsvorschriftenimeinschlägigenSonderteil VergewissernSiesichstets daßdieNetzspannungdenAngabendes Typenschildsentspricht DieMaschineistdoppeltisoliert einErdungskabelistdeshalbnichterforderlich BeimAustauschvonKabelnoderSteckern EntsorgenSiealteKabe...

Page 15: ...t ist Die max Falztiefe beträgt 11 mm Achtung AchtenSiedarauf daßIhreHandwährendderArbeitniemitdemWerkstückinBerührung kommt BenutzenSiedenElektrohobelnuraufderOberseitedesWerkstücks niemalsüberKopf oderseitlich LagernSiedasGeräterstnachdemeszumvollständigenStillstandgekommenist SetzenSiezumAbsaugenvonHobelspänenoderStaubeineSaugvorrichtungein VerwendenSiedazudasVerbindungsrohr undverbindenSiedami...

Page 16: ...zungszeitabgenutzt WennSieeinenstumpfen oderbeschädigtenHobelmeißelweiterverwenden wirddadurchIhreArbeitseffektivität reduziertundeventuellderElektromotorüberlastet ÜberprüfenSiedenHobelmeißel regelmäßigaufVerschleißoderBeschädigung JenachZustandmußderHobelmeißelersetzt werden Hobelmesserausbau Abb 3 VerwendenSiedenbeiliegendenMaulschlüssel Zubehör ZuerstlösenSiemitdem MaulschlüsseldiedreiKlemmsch...

Page 17: ...остиилиснизу Инструментубиратьнахранениетолькопослеполнойостановкиегоработы Выможетеустановитьадаптерпылесборникаиподсоединитьэлектрорубаноккпы лесборнику Дляудалениястружкиидревеснойпылииспользуйтеустройство пылеудаления Дляэтогонеобходимоиспользоватьсоединительныйпатрубок к которомуподключаетсятрубаустройствапылеудаления Дляобработкинебольшихзаготовокиспользуйтефиксирующееприспособление Установк...

Page 18: ...олькрая Вырезание пазов Строгальный станок может использовать ограничитель длины для окон и дверных проемов Ослабьте контргайку и отрегулируйте ограничитель на нужную длину с помощью шкалы Рис 2 9 Несколько раз проведите строгальным станком по поверхности направляйте строгальный станок с поддерживающим боковым давлением до тех пор пока не достигнете нужной глубины паза Максимальная глубина вырезан...

Page 19: ...енноотключитьмашинуотсетивследующихслучаях Неисправностьштекернойвилки сетевогошнураилиповреждениешнура Поломкасетевоговыключателя Появлениедымаилизапахагорелойизоляции Электробезопасность Приэксплуатацииэлектрическихмашинвсегдасоблюдайтедействующиеправила техникибезопасностидляснижениярискапожара пораженияэлектрическимтокоми травм Прочитайтенастоящиетребования атакжевходящуювкомплектинструкциюпо ...

Page 20: ...вилкуотисточникаэлектропитанияиво времяпроведениятехобслуживания Надевайтесредствазащитыоргановслухаизрения RU 20 Ferax HOBLOVKA Číslavdalšímtextuodpovídajízobrazenímnastraně2 3 Pozor Uelektrickýchvýrobkůsipředpoužitímvždyprostudujtenávod Lépepak výrobkuporozumíteavyhnetesezbytečnýmrizikům Tentonávodsibezpečně uschovejte abystesekněmumohlivbudoucnuvracet Popisvýrobku Totodvojitěizolovanéelektrické...

Page 21: ...Ferax ЭЛЕКТРОРУБАНОК Цифры приведенныенижевтексте относятсякриункамнастр 2 3 Внимание Передприменениемлюбогоэлектротехническогоизделия всегдачитайтеинструкцию Этооблегчитвамознакомлениес особенностямииспользованияВашегоинструментаипозволит избежатьненужногориска Сохранитеэтуинструкциюдлядальнейшего использования Описаниеизделия Вашамашинаимеетдвойнуюизоляциюипредназначенадляработывручную Привлекат...

Page 22: ...nostnípokynyaseznamteseisbezpečnostnímipokyny přiloženýmiknástroji Uložtetytopokynynabezpečnémmístě Vždyzkontrolujte zdanapětívsítiodpovídáhodnotěnaštítkupřístroje Strojmádvojíizolaci uzemněníprotonenípotřeba Přivýměněkabelůazástrček Staréšňůryazástrčkyvždyokamžitěvyhoďte jakmilejenahradítenovými Jenebezpečné strkatdozásuvkyzástrčkuuvolněnéhokabelu Připoužitíprodlužovacíchkabelů Používejtevýhradně...

Page 23: ...škemdolůnebonabočnístraně Přístrojodložteteprvepoté ažjezcelazastaven Proodsáváníhoblinpoužívejteodsávacíinstalacenebovysavače Používejteproto spojovacítrubku Přimalýchopracovávanýchpředmětechpoužívejteformu opracovávanéhopředmětu Uchycení podélného pravítka Obr 4 Držák 12 připevněte k hoblovce Utáhněte knoflík 11 CZ 42 Ferax Duranteilfunzionamentoperlasicurezzaproprianonasportaremaipartioaccessor...

Page 24: ... řezání a utáhněte křídlovou matici 4 ÚDRŽBA Předtím nežzačnetesúdržbou vytáhnětevždyzástrčkuzezásuvky Želízkohoblíkujepourčitédoběpoužíváníopotřebované Jestližebudeteinadálepoužívat tupénebopoškozenéželízko efektivitasetímzmenšíapřípadněsemůžepřetížit elektromotor Kontrolujtepravidelněželízkahoblíku zdanejsouopotřebovanénebo poškozené Želízkasemusívyměnitvzávislostivjakémstavusenacházejí Demontáž...

Page 25: ...ostare la larghezza di taglio desiderata e stringere il dado a farfalla 4 MANUTENZIONE Primadieffettuarelamanutenzionestaccarelaspinadallapresadicorrente Dopouncertoperiododifunzionamentogliscalpellidipiallaturasiconsumano Sesicontinua alavorareconunoscalpellononaffilatoocomunquedanneggiato laqualitàdeirisultatisarà certamenteinferioreallanormael elettromotorepotràessereeventualmentesovraccaricato...

Page 26: ... Fig 2 9 Eseguire ripetutamente l operazione con la piallatrice guidare la piallatrice esercitando pressione sul lato fino a raggiungere la prof ondità di taglio necessaria La profondità di scanalatura massima è di 11 mm Attenzione Duranteillavorofareattenzioneanontoccareilpezzodalavorare Usarelapiallatriceelettricasoloperlapartesuperioredelpezzodalavorare nonusarla maisottosopraoinposizionelatera...

Page 27: ...nsle cahierdesécuritéfourniàpart Conservezsoigneusementcesinstructions Accertarsisemprecheilvoltaggioelettricocoincidaconilvaloreriportatosulla targhettadellespecifichetecniche L apparecchioèprovvistodidoppioisolamento nonèpertantonecessarioun cavoperloscaricoaterra Incasodisostituzionedicaviespine Gettarecaviespinevecchinonappenasostituiti Èpericolosoinserirenellapresadicorrentela spinadiuncavodi...

Page 28: ...otezione Indossareunamascherinaperlapolvere IT 28 Ferax GYALUGÉP Aszövegbenszereplószámoka2 3 oldalonláthatóképekrevonatkoznak Figyelem Használatelőttmindigfigyelmesenolvassaelazelektromos készülékekhezadotthasználatiutasítást Ezsegítabban hogykönnyebben megértseaszerkezetműködését ésnevállaljonfeleslegeskockázatot Tartsaezta tájékoztatótbiztonságoshelyen későbbszükséglehetrá Termékleírás Ezakettő...

Page 29: ...resempreattentamenteleistruzioniperiprodottielettriciprimadell uso Vi aiuterannoacapireilfunzionamentodelvostroprodottopiùfacilmenteeadevitare rischiinutili Conservarequestomanualediistruzioniinunluogosicuroperuso futuro Descrizionedelprodotto Questoutensileelettricoisolatodoppioserveperessereusatoamano Lasuaformaèstata adattataaquestoscopoedèquindididimensioniridotte ciòneconsentefacilmenteil tra...

Page 30: ...tonság Villamosgépekhasználatakoratűzveszélyilletveaszemélyisérülésekésazáramütés veszélyénekelkerüléseérdekébenmindigpontosantartsabeazországábanérvénybenlévő biztonságirendszabályokat Figyelmesenolvassaelazalábbiakbanfelsoroltilletvea kézikönyvhözcsatoltbiztonságiutasításokat Tároljaezeketazutasításokatbiztonságos helyen Mindenesetbenellenőrizze hogyahálózatifeszültségegyezik eatechnikai adatokn...

Page 31: ...a gyalut az oldaltámaszhoz nyomva vezessük végig amíg a szükséges horonymélységet el nem érjük A maximális horo nymélység 11 mm Figyelem Ügyeljenrá hogymunkaközbensohaneérjenkezeamegmunkálandóanyaghoz Azelektromosgyalutcsakamunkadarabfelsőlapjánhasználja azoldalánvagyazalján soha HU 34 Ferax Sajátbiztonságaérdekébensohasetávolítsaelhasználatközbenelektromosszerszámok alkatrészeitvagykiegészítőelem...

Page 32: ...eállt Aforgácsvagyfűrészporelszívásáhozhasználjonelszívóberendezéstvagyporszívót Használjaehhezazösszekötőcsövet Kicsimunkadarabokhozhasználjonsablont A hosszanti vonalzó rögzítése 4 Ábra A fogantyút 12 rögzítse a gyaluhoz Húzza be a gombot 11 A hosszanti vonalzót szerelje a fogantyúhoz Állítsa be a megfelelő vágási szélességet és húzza be a szárnyas csavart 4 KARBANTARTÁS Akarbantartáséstisztítás...

Reviews: