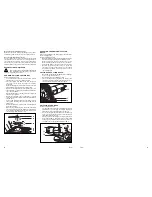
TO ADJUST THE CUTTING DEPTH
Referring to the illustration below.
-
Move the motor body backwards as far as it will go,
then turn the adjustment knob (7) to the required
setting (see chart below).
-
Move the motor base forwards and check that pin (A)
engages in the notch.
Knob marking Thickness
Biscuit
Cutting
of material
Dowel
depth in mm.
0
8-12 mm
No. 0
8.0
10
12-15 mm
No. 10
10.0
20
> 15 mm
No. 20
12.3
S
-
Simplex
13.0
D
-
Duplex
14.7
Max.
-
-
18.0
ADJUSTING THE CUTTING ANGLE
Referring to the illustration below.
-
Set the cutting angle by unlocking the clamping lever
(8) (turn anticlockwise), and rotating the angle stop
(4) to the required angle indicated on the quadrant
scale.
-
After you have set the cutting angle, securely lock the
lever by turning clockwise, if the lever is in the way in
that position, pull it outwards and rotate to a better
position without unscrewing the adjustment clamp.
ATTACHING THE DUST BAG/DUST
EXTRACTION
-
Insert the dust bag with its adaptor into the nozzle on
the right hand side of the jointer base. Empty the bag
frequently during use.
-
The nozzle on the jointer base can also be used for
connection to vacuum dust extraction unit – not sup-
plied.
-
Be aware this machine can produce fine dust,
which can be hazardous to your health.
Always wear a suitable protective mask and
use dust extraction.
USING THE BISCUIT JOINTER
This jointer is intended for use on wood, wood deri-
ved and plastic products only
BEFORE OPERATING
-
Check the voltage on the jointer corresponds with
your power supply voltage and that the plug and lead
are in good condition.
-
Check you have the correct type of saw blade for the
machine, that it suitable for the spindle speed of the
jointer and that it is mounted correctly.
-
Do not use cutting discs or circular saw blades in this
machine.
-
Do not use parts other than supplied with the
machine to make the blade fit properly.
-
Check you have a blade suitable for the material being
cut and that it is in good condition. If any teeth are
missing or the blade shows cracks or other damage -
replace immediately.
-
Run idle for 30 seconds - if there is any abnormal
vibration or other fault – switch off, inspect and rec-
tify before continuing.
OPERATION
-
Plug into a suitable mains supply and switch on.
-
Be aware that this machine has a powerful
motor and needs two hands to operate it
safely.
-
To switch the jointer ON Slide the ON/OFF switch
forwards.
-
To switch OFF Depress the ON/OFF switch – the
switch will automatically move to the OFF position.
DURING USE
-
Place the base/angle stop gently but firmly onto the
work piece and let the blade come to full speed
before cutting the work piece – this is a powerful
machine and will kick if the blade is pressed too hard
or jammed in the cut. Always use two hands to con-
trol the machine.
-
Keep the base/angle stop in firm contact with the
work piece.
-
Do not force the jointer. Move gently and steadily
along the line of cut.
-
Check material for foreign bodies
-
For example check for nails screws etc.
-
Clamp material properly. Do not use hand or foot to
support the work piece. Saw away from yourself.
-
Use constant gentle pressure.
4
8
7
15
A
Ferm
5
GUARANTEE
The guarantee conditions can be found on the separately
enclosed guarantee card.
We declare under our sole responsability that this
product is in conformity with the following
standards or standardized documents
EN50144-1, EN55014-1, EN-55014-2,
EN61000-3-2, EN61000-3-3
in accordance with the regulations.
98/37EEC, 73/23EEC,
89/336EEC
from 03-01-2001
GENEMUIDEN NL
W. Kamphof
Quality department
CE
ı
DECLARATION OF CONFORMITY
(UK)
8
Ferm


