9
EN
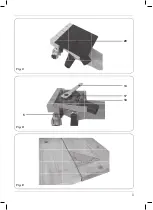
Fine adjusting the cutting depth
Fig. B
When the cutting depth is not correct, it can be
adjusted as following.
• Move the motor base (3) as far as possible
backwards.
• Loosen the nut on the fine adjustment screw
while keeping the screw in position by using a
screw driver
• Increase the cutting depth by turning the
screw (10) counterclockwise.
• Decrease the cutting depth by turning the
screw (10) clockwise
• Repeat the procedure till the cutting depth is
correct.
• Fasten the nut on the fine adjustment screw
(10) again while keeping the screw in position
by using a screw driver
6. MAINTENANCE
Make sure that the machine is not live
when carrying out maintenance work on
the motor.
The machines have been designed to operate
over along period of time with a minimum of
maintenance. Continuous satisfactory operation
depends upon proper machine care and regular
cleaning.
Cleaning
Keep the ventilation slots of the machine clean to
prevent overheating of the engine.
Regularly clean the machine housing with a
soft cloth, preferably after each use. Keep the
ventilation slots free from dust and dirt. If the dirt
does not come off use a soft cloth moistened with
soapy water. Never use solvents such as petrol,
alcohol, ammonia water, etc. These solvents may
damage the plastic parts.
Lubrication
The machine requiers no additional lubrication.
Faults
Should a fault occur, e.g. after wear of a part,
please contact the service address on the
warranty card. In the back of this manual you find
an exploded view showing the parts that can be
ordered.
ENVIRONMENT
To prevent damage during transport, the
appliance is delivered in a solid packaging which
consists largely of reusable material. Therefore
please make use of options for recycling the
packaging.
Faulty and/or discarded electrical or
electronic apparatus have to be
collected at the appropriate recycling
locations.
Only for EC countries
Do not dispose of power tools into domestic
waste. According to the European Guideline
2012/19/EU for Waste Electrical and Electronic
Equipment and its implementation into national
right, power tools that are no longer usable must
be collected separately and disposed of in an
environmentally friendly way.
WARRANTY
The guarantee conditions can be found on the
separately enclosed guarantee card.
Summary of Contents for BJM1009
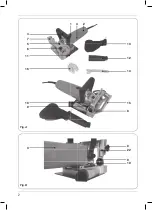
Page 2: ...2 Fig A Fig B 8 22 9 10 13 12 14 15 8 1 3 2 3 6 11 4 5 7 16 10 9...
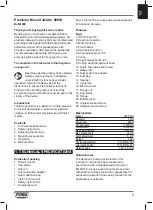
Page 3: ...3 Fig C Fig E Fig D 20 14 17 18 5...
Page 4: ...4 Fig F Fig G 21 15...
Page 107: ...107 RU EN 60745 2 O 16...
Page 109: ...109 RU C D 4 20 17 14 18 17 17 17 20 4 A 13 12 13 5 A E 10 F 15...
Page 110: ...110 RU 16 G B 3 10 10 10 6 H...
Page 111: ...111 UK 2012 19 U 900W BJM1009 O Ferm Ferm 2 4 1 2 3 4 5 6 1 1 1...
Page 113: ...113 UK 16 EN60745 1 5 2 3 3 9 9 16...
Page 115: ...115 UK 5 E 10 F 15 16 G B 3 10 10 10...
Page 116: ...116 UK 6 Ferm Ferm 2012 19 EU...
Page 118: ...118 AR 2 61 NE 54706 5 1 3 3 9 9 16 01 01 0 8 12 0 8 0 10 12 15 10 10 0 20 15 20 12 3 14 0...
Page 119: ...119 AR 6 6 12 6 8 22 8 4 02 5 71 41 71 81 71 71 02 31 21 31 5 1 1 01 51...
Page 120: ...120 AR 61 3 01 01 01 6 EC 2012 19...
Page 127: ...127 MK EN 60745 2 16...
Page 129: ...129 MK 18 17 17 17 20 4 A 13 12 13 5 A 1 1 off E 10 cm F 15 16 mm G...
Page 130: ...130 MK B 3 10 10 10 6...
Page 131: ...131 MK 2012 19 EU...
Page 133: ...133 Exploded view...
Page 134: ...134...
Page 136: ...WWW FERM COM 2020 FERM 2005 18...


