background image

Ferm

67

¢˘ÛÏÛÏÂÈÙÔ˘ÚÁÈ·

¶·Ú·Î¿Ùˆ ·Ó·Ê¤ÚÔÓÙ·È ‰È¿ÊÔÚ˜ Èı·Ó¤˜
·Èٛ˜ Î·È ÔÈ ·ÓÙ›ÛÙÔȯ˜ χÛÂȘ, Û ÂÚ›ÙˆÛË
Ô˘ ÙÔ Ì˯¿ÓËÌ· ‰ÂÓ ÏÂÈÙÔ˘ÚÁ› fiˆ˜ ı·
¤ÚÂÂ:

1. ÀÂÚ‚ÔÏÈÎÔ› ÛÈÓı‹Ú˜

ñ  ∞˘Ùfi Û˘Ó‹ıˆ˜ ˘Ô‰ÂÈÎÓ‡ÂÈ ‚ÚÔÌÈ¿ ÛÙÔÓ

ÎÈÓËÙ‹Ú· ‹ Êı·Ṳ́Ó˜ „‹ÎÙÚ˜ ¿Óıڷη.

ñ

∞˘ı˘Óı›Ù ÛÙÔ ÙÌ‹Ì· ۤڂȘ ÛÙË
‰È‡ı˘ÓÛË Ô˘ ı· ‚Ú›Ù ÛÙËÓ Î¿ÚÙ·
ÁÁ‡ËÛ˘.

2. ÀÂÚı¤ÚÌ·ÓÛË ÙÔ˘ ÎÚÔ˘ÛÙÈÎÔ‡ ÙÚ˘·ÓÈÔ‡.

ñ  √È Ô¤˜ ÂÍ·ÂÚÈÛÌÔ‡ Â›Ó·È Î·Ï˘Ì̤Ó˜ ÌÂ

‚ÚÔÌÈ¿.

∫·ı·Ú›ÛÙ ÙȘ Ì ÛÙÂÁÓfi ·Ó›.

ñ  ÀÂÚÊfiÚÙˆÛË ÙÔ˘ ÎÚÔ˘ÛÙÈÎÔ‡ ÙÚ˘·ÓÈÔ‡.

ñ

¡· ¯ÚËÛÈÌÔÔț٠ÙÔ Ì˯¿ÓËÌ· ÁÈ· ÙȘ
ÂÚÁ·Û›Â˜ ÁÈ· ÙȘ Ôԛ˜ ÚÔÔÚ›˙ÂÙ·È.

ñ

∞ÓÙÈηٷÛÙ‹ÛÙ ÙÔ ÙÚ˘¿ÓÈ Ì ¤Ó·
·È¯ÌËÚfi ‹ ·ÎÔÓ›ÛÙ ÙÔ ÙÚ˘¿ÓÈ
¯ÚËÛÈÌÔÔÈÒÓÙ·˜ ¤Ó·Ó ÏÂÈ·ÓÙ‹Ú· ¿ÁÎÔ˘
Î·È ¤Ó· ÚÔÛ¿ÚÙËÌ· Ï›·ÓÛ˘
Û˘ÛÙÚ·Ì̤ÓÔ˘ ÙÚ˘·ÓÈÔ‡.

ñ  √ ÎÈÓËÙ‹Ú·˜ Â›Ó·È ÂÏ·Ùو̷ÙÈÎfi˜.

ñ

∞˘ı˘Óı›Ù ÛÙÔ ÙÌ‹Ì· ۤڂȘ ÛÙË
‰È‡ı˘ÓÛË Ô˘ ı· ‚Ú›Ù ÛÙËÓ Î¿ÚÙ·
ÁÁ‡ËÛ˘.

∫·ı·ÚÈÛÌfi˜

¡· ηı·Ú›˙ÂÙ ٷÎÙÈο ÙÔ ÂÚ›‚ÏËÌ· ÙÔ˘
Ì˯·Ó‹Ì·ÙÔ˜ ¯ÚËÛÈÌÔÔÈÒÓÙ·˜ ηı·Úfi ‡Ê·ÛÌ·,
ηٿ ÚÔÙ›ÌËÛË ÌÂÙ¿ ·fi ÙËÓ Î¿ı ¯Ú‹ÛË. ¡·
ηı·Ú›˙ÂÙ ÙȘ Û¯ÈṲ̂˜ ÂÍ·ÂÚÈÛÌÔ‡ ·fi ÙË
ÛÎfiÓË Î·È ÙË ‚ÚÔÌÈ¿. ∂¿Ó Ë ‚ÚÔÌÈ¿ ‰ÂÓ
·ÔÌ·ÎÚ‡ÓÂÙ·È, ¯ÚËÛÈÌÔÔÈ‹ÛÙÂ ¤Ó· Ì·Ï·Îfi
‡Ê·ÛÌ· ‚ÚÂÁ̤ÓÔ Ì ÓÂÚfi Ì ۷Ô‡ÓÈ. ¶ÔÙ¤ Ó·
ÌËÓ ¯ÚËÛÈÌÔÔț٠‰È·Ï‡Ù˜ fiˆ˜ ‚ÂÓ˙›ÓË,
·ÏÎÔfiÏË, ÓÂÚfi Ì ·Ì̈ӛ· Î.Ï. √È ‰È·Ï‡Ù˜
·˘ÙÔ› ÂÓ‰¤¯ÂÙ·È Ó· ÚÔηϤÛÔ˘Ó ‚Ï¿‚Ë ÛÙ·
Ï·ÛÙÈο ̤ÚË.

§›·ÓÛË

ΔÔ Ì˯¿ÓËÌ· ‰ÂÓ ··ÈÙ› ÚfiÛıÂÙË Ï›·ÓÛË.

μÏ¿‚˜

™ Ú›ÙˆÛË Ô˘ ÚÔ·„È Î¿ÔÈ· ‚Ï¿‚Ë ÏfiÁˆ
ÊıÔÚ¿˜ Û Î¿ÔÈÔ Ì¤ÚÔ˜ ÙÔ˘ ÚÁ·Ï›Ô˘, ·˘ı˘Óı›Ù
ÛÙÔ ÙÌ‹Ì· ۤڂȘ ÛÙË ‰È‡ı˘ÓÛË Ô˘ ı· ‚Ú›Ù
ÛÙËÓ Î¿ÚÙ· ÁÁ‡ËÛ˘.  ™ÙÔ Ù¤ÏÔ˜ ÙˆÓ Ô‰ËÁÈÒÓ
¯Ú‹Û˘ ·ÚÔ˘ÛÈ¿˙ÔÓÙ·È Ù· ‰È·ı¤ÛÈÌ·
·ÓÙ·ÏÏ·ÎÙÈο.

¶ÂÚÈ‚·ÏÏÔÓ

¶ÚÔÎÈ̤ÓÔ˘ Ó· ·ÔÙÚ·Ô‡Ó ÊıÔÚ¤˜ ηٿ ÙË
ÌÙ·ÊÔÚ¿, ÙÔ ÚÁ·Ï›Ô ·Ú·‰›‰Ù·È Û ·ÓıÎÙÈ΋
Û˘Û΢·Û›·. ∏ Û˘Û΢·Û›· ·ÔÙÏ›Ù·È Î·Ù¿ ÙÔ
ÌÁ·Ï‡ÙÚÔ Ì¤ÚÔ˜ Ù˘ ·fi ˘ÏÈÎfi Ô˘ ÌÔÚ› Ó·
·Ó·¯ÚËÛÈÌÔÔÈËı›. ∞ÍÈÔÔÈ‹ÛÙ, Û˘ÓÒ˜, ÙË
‰˘Ó·ÙfiÙËÙ· ·Ó·Î‡ÎψÛ˘ Ù˘ Û˘Û΢·Û›·˜. Δ·
ÛÙÔȯ›· ÙÔ˘ Û˘ÛÛˆÚ˘Ù‹ ›Ó·È ·Ó·Î˘ÎÏÒÛÈÌ·.
∞ÔÚÚ›„Ù Ù· ÛÙÔÓ Î·Ù¿ÏÏËÏÔ ¯ÒÚÔ ‰È¿ıÛ˘
¯ËÌÈÎÒÓ ·Ô‚Ï‹ÙˆÓ, ÒÛÙ Ô Û˘ÛÛˆÚ˘Ù‹˜ Ó·
·Ó·Î˘Îψı› ‹ Ó· ·ÔÚÚÈÊı› Ì ÙÚfiÔ ÊÈÏÈÎfi
ÚÔ˜ ÙÔ ÚÈ‚¿ÏÏÔÓ.

∂Ï·Ùو̷ÙÈο Î·È / ‹ ·ÔÚÚÈÌ̤ӷ
ËÏÂÎÙÚÈο ‹ ËÏÂÎÙÚÔÓÈο ·ÓÙÈΛÌÂÓ·
Ú¤ÂÈ Ó· Û˘ÏϤÁÔÓÙ·È ÛÙȘ
ηٿÏÏËϘ ÙÔÔıÂۛ˜
·Ó·Î˘ÎÏÒÛˆ˜.

∂ÁÁ˘Ë˜Ë

¢È·‚¿ÛÙ ÙÔ˘˜ fiÚÔ˘˜ ÁÁ‡ËÛ˘ ÛÙËÓ Î¿ÚÙ·
ÁÁ‡ËÛ˘ Ô˘ ‰È·Ù›ıÙ·È Í¯ˆÚÈÛÙ¿. °È· ÚˆÙ‹ÛȘ
Û¯ÙÈο Ì Ù· Í·ÚÙ‹Ì·Ù· ηÈ/‹ ÙÔ Û˘ÛÛˆÚ˘Ù‹
·˘ı˘Óı›Ù ÛÙÔ ÙÌ‹Ì· ۤڂȘ.

GR

06

Ferm

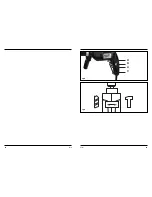
Switch lock

•  You can lock the On/Off switch by pressing

the triggerswitch (A) and then pressing knob

(B). Release the switch-lock by pressing the

triggerswitch (A) shortly.

Speed controle

•  The rotation-speed can be continuously

adjusted between 0 and 2500 rotations per

minute by  pressing the switch (A) deeper or

less deep.

Adjusting of the maximum rotationspeed

•  Switch the machine on by pressing

triggerswitch (A).

•  Lock the triggerswitch (A) by pressing knob

(B).

•  Adjust the speed by turning the small wheel

(C) to the desired maximum rotation speed.

Switching the direction of rotation

•  Direction of rotation counter-clockwise: shift

switch (D) to “L”.

•  Direction of rotation clockwise: shift switch (D)

to “R”.

Switch for percussion drilling

Fig.E

With the switch on top of the machine you can

select normal or percussion drilling.

•  Slide the switch to the “Drill” symbol for

normal drilling.

•  Slide the switch to the “Hammer” symbol for

percussion drilling.

5. MAINTENANCE

Make sure that the machine is not live

when carrying out maintenance work on

the motor. 

These machines have been designed to operate

over a long period of time with a minimum of

maintenance. Continuous satisfactory operation

depends upon proper machine care and regular

cleaning.

Malfunction

Below we have listed a number of possible

causes and corresponding solutions in case the

machine does not function as it should:

1. Excessive sparkling

•  This usely indicates dirt in the motor or

worndown carbon brushes.

• Please contact the service address on the

warranty card.

2. The percussion drill is overheating

•  The ventilationslots are covered with dirt.

• Clean them with a dry cloth.

•  The percussion drill is overloaded.

• Use the machine for work for which it is

ment to be.

• Replace the drill for a sharp one or

sharpen the drill by using a benchgrinder

and a twist drill grinding attachment.

•  The motor is defect.

• Please contact the service address on the

warranty card.

Cleaning

Regularly clean the machine housing with a soft

cloth, preferably after each use. Keep the

ventilation slots free from dust and dirt. If the dirt

does not come off use a soft cloth moistened

with soapy water. Never use solvents such as

petrol, alcohol, ammonia water, etc. These

solvents may damage the plastic parts.

Lubrication

The machine requires no additional lubrication.

Faults

Should a fault occur, e.g. after wear of a part,

please contact the service address on the

warranty card. In the back of this manual you find

an exploded view showing the parts that can be

ordered. 

Environment

To prevent damage during transport, the

appliance is  delivered in a solid packaging which

consists largely of reusable material. Therefore

please make use of options for recycling the

packaging.

Faulty and/or discarded electrical or

electronic apparatus have to be

collected at the appropriate recycling

locations.

Warranty

The guarantee conditions can be found on the

separately enclosed guarantee card.

GB

Summary of Contents for FKB-13/650K

Page 1: ...uk CZ Zm ny vyhrazeny SLO Predmet sprememb PL Temat do zmiany LT Akeitim objektas LV Var tikt veiktas izmai as EST V imalikud on muudatused RO Cuprinsul poate suferi modific ri RUS Ferm UA GR H Art no...

Page 2: ...i erkl rer herved udelukkende p eget ansvar at dette produkt opfylder f lgende standarder eller standardiserede dokumenter H Saj t kiz r lagos felel ss g nk tudat ban kijelentj k hogy jelen term k meg...

Page 3: ...70 Ferm GB Ferm 03 A D B C Fig D Fig E...

Page 4: ...uctions in this manual Indicates electrical shock hazard Variable speed control Wear protective gloves Wear a dust mask Working with wood metals and other materials may produce dust that is harmful to...

Page 5: ...HSS Mounting accesories Fig C Prior to mounting an accessory always unplug the tool Placing and removing bits In addition to bits the machine can also hold screw bits with a hexagonal shaft Loosen th...

Page 6: ...function as it should 1 Excessive sparkling This usely indicates dirt in the motor or worndown carbon brushes Please contact the service address on the warranty card 2 The percussion drill is overhea...

Page 7: ...amme Bezeichnet Verletzungsgefahr Lebensgefahr oder Gefahr einer Besch digung des Werkzeugs bei Nichtbeachtung der in dieser Anleitung enthaltenen Vorschriften Weist auf Stromschlaggefahr hin Verstell...

Page 8: ...Die Ader m ssen einen Mindestquerschnitt von 1 5 mm2 haben Befindet das Kabel sich auf einem Haspel mu es v llig abgerollt werden 3 WARTUNGS UND VERSCHLEI TEILE Ben tzen Sie nur sch rfe Bohre vom rich...

Page 9: ...drehungen pro minute in Position 2 E Durch das tief oder nur ein bischen tief ein drucken der Ein Aus Schalter A kann der Umdreh ungsgeschwindigkeit eingestellt werden Einstellen der maximale Umdrehun...

Page 10: ...gefeuchtet mit Seifenwasser Verwenden Sie keine L sungsmittel wie Benzin Alkohol Ammonia usw Derartige Stoffe besch digen die Kunststoffteile Schmieren Die Maschine braucht keine zus tzliche Schmierun...

Page 11: ...t Gevaar voor lichamelijk letsel of materi le schade wanneer de instructies in deze handleiding niet worden opgevolgd Gevaar voor elektrische schok Variabele toerentalregeling Draag beschermende hands...

Page 12: ...gsnoer dat geschikt is voor het vermogen van de machine De aders moeten een doorsnede hebben van minimaal 1 5 mm2 Wanneer het verlengsnoer op een haspel zit rol het snoer dan helemaal af 3 MONTAGE ACC...

Page 13: ...oor gewoon boren Druk de schakelaar naar het hamer symbool voor klopboren 5 SERVICE ONDERHOUD Zorg dat de machine niet onder spanning staat wanneer onderhoudswerkzaamheden aan het mechaniek worden uit...

Page 14: ...cie cz ci nale y skontaktowa si z punktem serwisowym adresy punkt w serwisowych znajduj si na karcie gwarancyjnej Na ko cu niniejszej instrukcji zamieszczony zosta schemat cz ci zamiennych kt re mog b...

Page 15: ...250 V i b dzie obecne uziemienie Gwarantuje si sprawne funkcjonowanie pr bnika napi cia w temperaturze od 10 C do 50 C oraz dla cz stotliwo ci w przedziale od 50 do 500 Hz Bezpiecze stwo Warto ci napi...

Page 16: ...urs maximal des accessoires avec le nombre de tours de la perceuse D branchez d abord la fiche secteur avant d introduire ou de remplacer un foret ou un autre accessoire Pendant la mise en service de...

Page 17: ...En nettoyant r guli rement et correctement la machine vous contribuerez une longue dur e de vie de votre machine Pannes Si la perceuse ne fonctionne pas comme il se doit nous vous donnons ci apr s un...

Page 18: ...ce indiqu sur la carte de garantie Nettoyage Nettoyez r guli rement le carter au moyen d un chiffon doux de pr f rence l issue de chaque utilisation Veillez ce que les fentes d a ration soient indemne...

Page 19: ...le za preizku anje napetosti in NE v druge namene Po kodovanih ali okvarjenih merilnikov napetosti NI DOVOLJENO uporabljati 4 DELOVANJE Stikalo On Off Slika D S pritiskom na stikalo pro ilec A orodje...

Page 20: ...mm2 y s lo cuando el prolongador est completamente desenrollado En caso de bloqueo en la posici n de taladro desconecte la m quina enseguida Antes de trabajar compare siempre el n mero de revoluciones...

Page 21: ...Utilice la m quina para el trabajo para el que est dise ado Cambie la broca para un ejemplar afilado Afile la broca con una afiladora y un accesorio para afilar brocas La m quina funciona cuando est...

Page 22: ...i se presenta una aver a por ejemplo por el desgaste de una pieza p ngase en contacto con el proveedor de servicios indicado en la tarjeta de garant a En el dorso de este manual encontrar un amplio re...

Page 23: ...te pomoc vyp na e A Po uvoln n vyp na e A se stroj vypne Pojistka vyp na e Vyp na m ete zablokovat pomoc kohoutku A a stisknut m knofl ku B Pojistku vyp na e uvoln te spus te stisknut m kohoutku A Re...

Page 24: ...lize extens es el ctricas de cabos com uma bitola m nima de 1 5 mm2 e apenas quando o cabo de alimenta o j estiver completamente desenrolado Na eventualidade de ocorrer uma obstru o desligue imediatam...

Page 25: ...ibilidade de seleccionar a perfura o normal ou o trabalho com percuss o Desloque o comutador para o s mbolo Broca para executar uma perfura o normal Desloque o comutador para o s mbolo Martelo para ex...

Page 26: ...de ventila o est o cobertas de sujidade Contacte o endere o de assist ncia indicado no cart o de garantia O berbequim de percuss o est em sobrecarga Utilize a m quina apenas em trabalhos para os quais...

Page 27: ...t negat van befoly solhatj k a k rnyez f nyviszonyok p ld ul a k zvetlen napf ny vagy a kedvez tlen megtekint si k r lm nyek p ld ul l tr n llva A jelz s nem garant lt szigetelt padl k s f ldeletlen v...

Page 28: ...blocco spegnere immediatamente la macchina Confrontare sempre la velocit massima di rotazione degli accessori con la velocit massima del trapano a percussione Scollegare la spina dalla presa prima di...

Page 29: ...zione a percussione 5 ASSITENZA E MANUTENZIONE Assicurarsi che l apparecchio non sia attivo quando si effettuano lavori di manutenzione sul motore Gli apparecchi sono stati progettati per funzionare d...

Page 30: ...ingen opl sningsmidler s som benzin alkohol ammoniak osv Den slags stoffer beskadiger kunststofdelene Sm ring Maskinen beh ver ingen ekstra sm ring Fejl Skulle en fejl opst f eks pga slidtage af en en...

Page 31: ...es i tilf lde af Defekt netstik netledning eller beskadigelse af ledning Defekt kontakt Gnistdannelse i kullene eller ringild i kollektoren R g eller lugt fra sveden isolering Elektrisk sikkerhed Kont...

Page 32: ...n l ngs sidan T ck aldrig ver maskinens ventilationsh l Stanna omedelbart maskinen n r Maskinen genererar onormalt mycket gnistor fr n kollektorn Elkabel eller kontakter uppvisar n gon som helst defek...

Page 33: ...takta servicest llet som anges p garantibeviset om ett fel uppst r t ex p grund av en del som r nedsliten S 40 Ferm Bryterl s Sett avtrekkerbryteren fast ved trykke med tommelen p knapp B Koples ut ve...

Page 34: ...stik N r alle forberedelser er udf rt kan maskinen tilsluttes lysnettet ved at s tte stikket i stikkontakten Kontroller f rst om maskinen skulle v re t ndt og st p h jrerotation Spenningstester Betjen...

Page 35: ...kg Lpa nenpaine 92 9 dB A Lwa nen tehotaso 105 9 dB A V r htelyarvo 7 3 m s2 FIN 38 Ferm SLAGDRILL Tallene i f lgende tekst viser til bildene p side 2 3 Les denne bruksanvisningen n ye f r maskinen ta...

Page 36: ...ta FIN 36 Ferm Katkaise porakoneen virta ennen kuin lasket koneen alas l helt kehoasi l peit tuuletusaukkoja Katkaise laitteen virta v litt m sti kun Hiiliharjoista tulee liikaa kipin it ja kokoojassa...

Reviews: