FERNO/MAN/0721/220-R2/UK
10
5.1 Daily pre-checks
•
Prior to using ensure to check the overall condition
of the unit for any signs of damage / missing parts
•
Check for correct operation of the emergency
release pins
•
Check for correct operation of the clamp fixing-bars
and look for any signs of damage / wear
•
Check for correct operation of the ratcheting fixing
bars and look for any signs of damage / wear
•
Check the condition of the straps. Replace if any
damage is found
•
Check for loose / missing hardware. Tighten/replace
where necessary
5.2 Assembly of UNI-ClipDoc
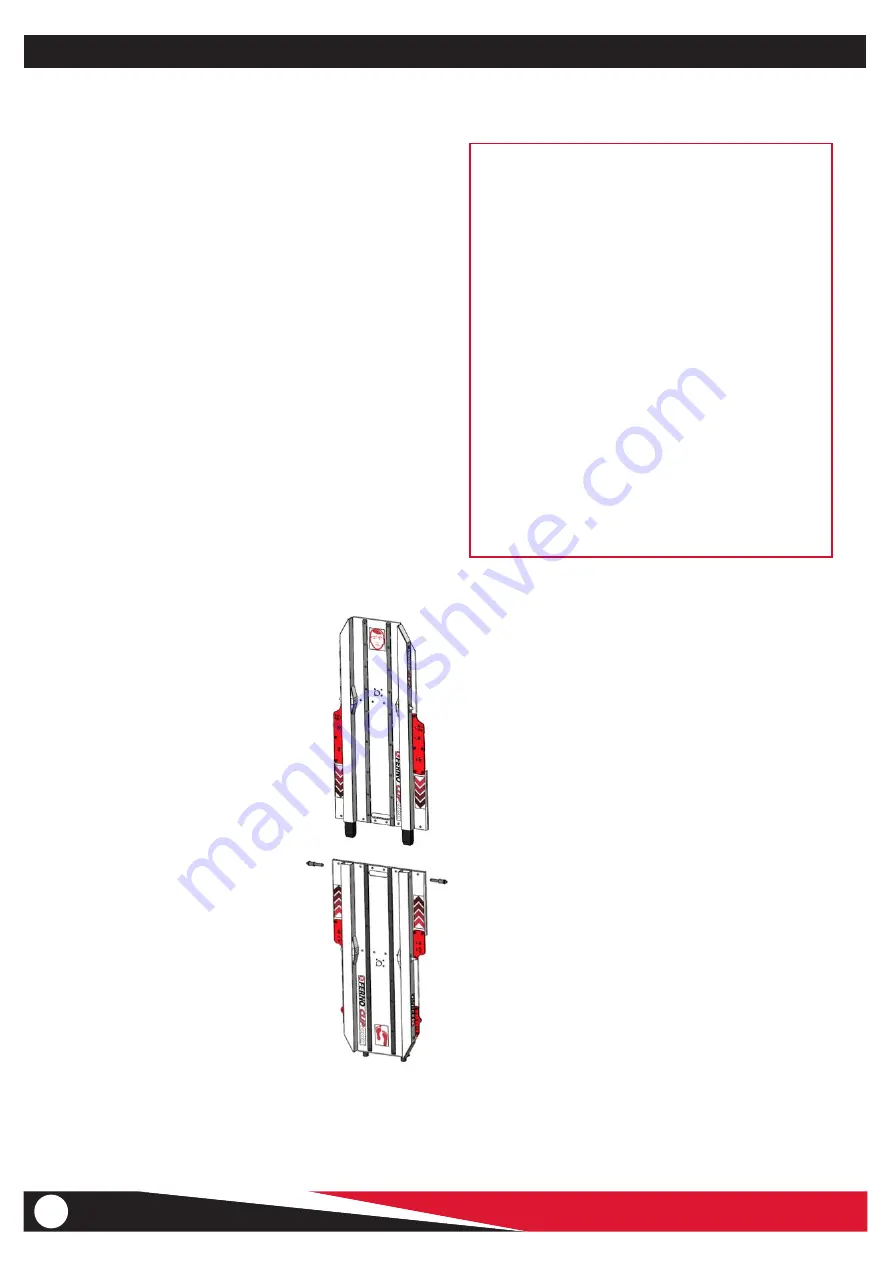
UNI-ClipDoc can be split into two sections to aid storage
and transport when not in use. Assembly / dis-assembly
of the UNI-ClipDoc requires two operators and does not
require the use of any tools. The UNI-ClipDoc should be
assembled on a smooth, level surface and debris gloves
should be worn to avoid any possible operator injury.
•
Remove the two halves of the
UNI-ClipDoc from their storage
bags and check all items are
present and in good condition
before proceeding. Each
section is marked to denote
head-end and foot-end.
•
Stand the foot-end section of
the unit upright on the rubber
feet.
•
Whilst the first operator holds
the foot-end section upright,
the second operator can then
lift the head-end section up
and insert the black spigots
into the sockets on the foot-
end section.
•
Keeping fingers clear, push
down on the head-end section
to ensure the pegs are fully
inserted and no gap exists
between the two sections.
•
Insert the spring loaded
locking pins (one on each side)
5.0 - OPERATION OF UNI-CLIPDOC
TO PREPARE THE AMBULANCE TROLLEY FOR
INSTALLATION OF THE UNI-CLIP DOC:
•
APPLY THE BRAKES TO PREVENT THE
TROLLEY FROM MOVING DURING
INSTALLATION
•
REMOVE THE PATIENT HARNESS AND LEG
RESTRAINTS
•
REMOVE THE MATTRESS
•
FOLD THE COTSIDES/ SURFACE EXTENDERS
INTO THE VERTICAL DOWN POSITION
•
LOWER THE BACK REST AND LEG RAISE
PANELS INTO THE FULLY FLAT POSITIONS
•
REMOVE ANY OTHER ACCESSORIES WHICH
MAY INTERFERE WITH CORRECT OPERATION
OF THE UNI-CLIP DOC
5.3 Installing the fixing-bars
First determine the type of fixing-bar required depending
on the model of trolley to be used for transport. Using the
installation drawing and the position labels on the UNI-
ClipDoc itself, determine the correct positions where the
fixing -bars should be attached to the UNI-ClipDoc, which
is dependant on the trolley type being used.
The abbreviated trolley names etched onto the
UNI-ClipDoc are as follows:
P = FERNO PEGASUS
M = FERNO MEGASUS
H = FERNO HARRIER / HARRIER LT
PX = FERNO POWERX
INX = FERNO INX
S = STRYKER POWER PRO
Both variants of fixing bar attach to the
UNI-ClipDoc in the same manner, using two
thumbscrews per fixing-bar
Tighten the thumbscrews by hand only. Do
not use tools to tighten the thumbscrews
UNI-ClipDoc


