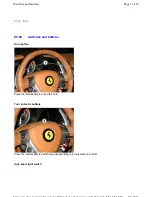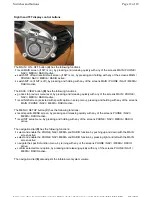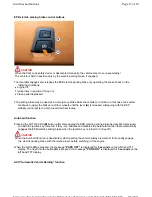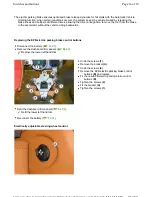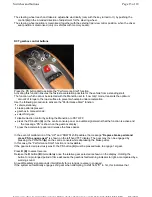
The UP and DOWN
(D)
buttons have the following functions:
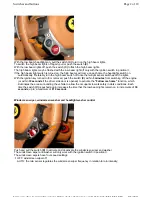
The RIGHT button
(D)
has the following functions:
The LEFT button
(D)
has the following functions:
screen;
toggling between Trip Tot / Trip A / Trip B / Range, by pressing and releasing quickly with any of the screens
SPORT / SPORT 2 / TYRES / SERVICE / VEHICLE STATUS / MANETTINO STATUS active;
reset Trip A / Trip B, while the relative function is flashing, by pressing and releasing quickly with the screens
TRIP A / TRIP B active;
start chronometer (if chronometer is not already running), by pressing and releasing quickly with the
CHRONOMETER screen active;
start / stop chronometer (if the chronometer is running), by pressing and releasing quickly with the
CHRONOMETER screen active;
confirm menu option selection, by pressing and releasing quickly with the MENU screen active;
confirm setting/modification made and go back to previous menu level (when in a submenu), by pressing and
releasing quickly with the MENU screen active;
reset Trip A (if Trip B is disabled), by pressing and holding with screens TRIP A / TRIP B active;
set Trip A to flashing mode, if Trip A information is currently displayed, by pressing and holding with any of
the screens SPORT / SPORT 2 / TYRES / SERVICE / VEHICLE STATUS / MANETTINO STATUS /
CHRONOMETER active;
set Trip B to flashing mode, if Trip B information is currently displayed, by pressing and holding with any of
the screens SPORT / SPORT 2 / TYRES / SERVICE / VEHICLE STATUS / MANETTINO STATUS /
CHRONOMETER active;
go back to the previous menu level, by pressing and holding with the MENU screen active.
enable and set brightness adjustment, by pressing and releasing quickly with any of the screens SPORT /
SPORT 2 / TYRES / SERVICE / VEHICLE STATUS / MANETTINO STATUS / TRIP A / TRIP B active;
adjust twilight sensor sensitivity, if activated, by pressing and releasing quickly with any of the screens
SPORT / SPORT 2 / TYRES / SERVICE / VEHICLE STATUS / MANETTINO STATUS / TRIP A / TRIP B
active;
toggling between Trip A / Trip B, if the odometer function is currently flashing, by pressing and releasing
quickly with any of the screens SPORT / SPORT 2 / TYRES / SERVICE / VEHICLE STATUS /
MANETTINO STATUS / TRIP A / TRIP B active;
start chronometer (if chronometer is not already running), by pressing and releasing quickly with the
CHRONOMETER screen active;
stop chronometer (if the chronometer is running), by pressing and releasing quickly with the
CHRONOMETER screen active;
select menu and submenu options, by pressing and releasing quickly with the MENU screen active;
reset chronometer (if the chronometer is stopped / running), by pressing and holding with the
CHRONOMETER screen active.
scrolling between main screens (to the right), by pressing and releasing quickly with any of the screens
SPORT / SPORT 2 / TYRES / SERVICE / VEHICLE STATUS / MANETTINO STATUS / TRIP A / TRIP B /
CHRONOMETER active;
confirm menu option selection, by pressing and releasing quickly with the MENU screen active.
scrolling between main screens (to the left), by pressing and releasing quickly with any of the screens
SPORT / SPORT 2 / TYRES / SERVICE / VEHICLE STATUS / MANETTINO STATUS / TRIP A / TRIP B /
CHRONOMETER active;
go back to the previous menu level, by pressing and releasing quickly with the MENU screen active.
Page 11 of 18
Switches and buttons
8/5/2011
https://modiscs.ferrari.it/KnowledgeOnline/index.php?action=mo&link=link::SM_SM_E50...
Summary of Contents for 458 Italia
Page 1: ......
Page 24: ...1 7 Car Bench vehicle bench Copyright 2010 ...
Page 25: ...1 7 Car Bench vehicle bench Copyright 2010 ...
Page 26: ...1 7 Car Bench vehicle bench Copyright 2010 ...
Page 27: ...1 7 Car Bench vehicle bench Copyright 2010 ...
Page 28: ...1 7 Car Bench vehicle bench Copyright 2010 ...
Page 29: ...1 7 Car Bench vehicle bench Copyright 2010 ...
Page 30: ...1 7 Car Bench vehicle bench Copyright 2010 ...
Page 31: ...1 7 Car Bench vehicle bench Copyright 2010 ...
Page 522: ...Hook 95977564 AS 107564 for lifting the gearbox Page 5 of 5 Specific tooling and equipment ...
Page 586: ...In preparation Page 6 of 6 Engine overhaul Disassembly ...
Page 620: ...Perform the Fuel tank tightness test cycle Page 4 of 4 Fuel level sensor ...
Page 967: ...Refit the wheels D2 01 Page 10 of 10 Stabiliser bars Tie rods ...
Page 1127: ...Refit the wheels D2 01 Page 8 of 8 Wheelhouse ...
Page 1167: ...Prise out and remove the plug 4 Undo the nut 5 Undo the nut 6 Page 32 of 37 Doors ...
Page 1242: ...In the LOWEST position two movements are possible Page 8 of 12 Seats ...
Page 1243: ...In the INTERMEDIATE LOW position three movements are possible Page 9 of 12 Seats ...
Page 1244: ...In the INTERMEDIATE HIGH position three movements are possible Page 10 of 12 Seats ...
Page 1549: ...Reconnect the battery F2 01 Page 5 of 5 Starter motor ...
Page 1721: ...Charge the air conditioning system F5 12 Page 5 of 5 Condenser ...
Page 1740: ...Refit Page 13 of 13 A C unit ...
Page 1764: ...FD0001 Fuel supply distribution 0 99999 Page 10 of 56 PDF ...
Page 1765: ...FD0001 Fuel supply distribution 0 99999 Page 11 of 56 PDF ...
Page 1773: ...FD0001 Fuel supply distribution 0 99999 Page 19 of 56 PDF ...
Page 1774: ...FD0001 Fuel supply distribution 0 99999 Page 20 of 56 PDF ...
Page 1781: ...FD0001 Fuel supply distribution 0 99999 Page 27 of 56 PDF ...
Page 1782: ...FD0001 Fuel supply distribution 0 99999 Page 28 of 56 PDF ...
Page 1789: ...FD0001 Fuel supply distribution 0 99999 Page 35 of 56 PDF ...
Page 1790: ...FD0001 Fuel supply distribution 0 99999 Page 36 of 56 PDF ...
Page 1797: ...FD0001 Fuel supply distribution 0 99999 Page 43 of 56 PDF ...
Page 1798: ...FD0001 Fuel supply distribution 0 99999 Page 44 of 56 PDF ...
Page 1803: ...FD0001 Fuel supply distribution 0 99999 Page 49 of 56 PDF ...
Page 1804: ...FD0001 Fuel supply distribution 0 99999 Page 50 of 56 PDF ...
Page 1809: ...FD0001 Fuel supply distribution 0 99999 Page 55 of 56 PDF ...


