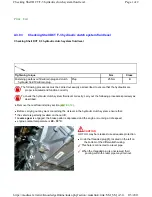
Drain the engine lubrication system (
A3.01
).
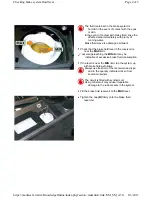
Remove the engine oil filter
(A)
with a
32 mm
socket wrench fitted in the relative seat, an extension (USAG 236
1/2" L = 250mm) and a reversible ratchet.
Turning counterclockwise (as indicated by the arrow), unscrew the complete engine oil filter
(A)
.
Protect the surrounding area with absorbent cloths.
Remove the complete filter
(A)
via the space between the engine oil tank and the intake manifold.
On the workbench, detach the filter element
(A1)
from the cover
(A2)
, releasing the retainer tabs.
There are plastic tabs at the top of the filter element which fasten to the cover.
Dispose of the filter element
(A1)
correctly in accordance with applicable recycling procedures.
Remove the gasket
(1)
from the cover
(A2)
, taking particular care not to damage the seal recess.
Replace damaged parts or parts that have been dropped, even if there is no visual damage.
Select a new gasket
(1)
from the spare parts kit and install on the cover
(A2)
, taking particular care not to
damage the gasket itself and the relative seal recess.
Ensure that the gasket
(1)
is installed correctly and is not twisted.
Replace damaged parts or parts that have been dropped, even if there is no visual damage.
DO NOT assemble the filter element if the drain pipe O-ring is missing.
Select a new filter element
(A1)
from the spare parts kit and check that the drain pipe O-ring
(2)
is installed
correctly
DO NOT fit the filter element directly onto the casting without fastening to the cover first.
Fit the new filter element
(A1)
onto the cover
(A2)
, ensuring that the plastic retainer tabs click audibly into place.
When installing the filter element, take particular care not to bend or damage the plastic retainer tabs.
If the filter element does not fix correctly to the cover, check that the By-pass valve is still correctly installed
in the cover. If the valve has accidentally detached, replace the cover with a new component. Do not
attempt to repair the By-pass valve, as this may severely compromise filtration.
Check that the filter element
(A1)
is securely fastened to the cover
(A2)
.
Lubricate the outer edge of the gasket
(1)
with new engine oil.
Checking engine oil level and changing engine oil and engine lubrication s... https://modiscs.ferrari.it/KnowledgeOnline/index.php?action=mo&link=li...
3 of 5
8/5/2011 11:21 AM
Summary of Contents for 458 Italia
Page 1: ......
Page 24: ...1 7 Car Bench vehicle bench Copyright 2010 ...
Page 25: ...1 7 Car Bench vehicle bench Copyright 2010 ...
Page 26: ...1 7 Car Bench vehicle bench Copyright 2010 ...
Page 27: ...1 7 Car Bench vehicle bench Copyright 2010 ...
Page 28: ...1 7 Car Bench vehicle bench Copyright 2010 ...
Page 29: ...1 7 Car Bench vehicle bench Copyright 2010 ...
Page 30: ...1 7 Car Bench vehicle bench Copyright 2010 ...
Page 31: ...1 7 Car Bench vehicle bench Copyright 2010 ...
Page 522: ...Hook 95977564 AS 107564 for lifting the gearbox Page 5 of 5 Specific tooling and equipment ...
Page 586: ...In preparation Page 6 of 6 Engine overhaul Disassembly ...
Page 620: ...Perform the Fuel tank tightness test cycle Page 4 of 4 Fuel level sensor ...
Page 967: ...Refit the wheels D2 01 Page 10 of 10 Stabiliser bars Tie rods ...
Page 1127: ...Refit the wheels D2 01 Page 8 of 8 Wheelhouse ...
Page 1167: ...Prise out and remove the plug 4 Undo the nut 5 Undo the nut 6 Page 32 of 37 Doors ...
Page 1242: ...In the LOWEST position two movements are possible Page 8 of 12 Seats ...
Page 1243: ...In the INTERMEDIATE LOW position three movements are possible Page 9 of 12 Seats ...
Page 1244: ...In the INTERMEDIATE HIGH position three movements are possible Page 10 of 12 Seats ...
Page 1549: ...Reconnect the battery F2 01 Page 5 of 5 Starter motor ...
Page 1721: ...Charge the air conditioning system F5 12 Page 5 of 5 Condenser ...
Page 1740: ...Refit Page 13 of 13 A C unit ...
Page 1764: ...FD0001 Fuel supply distribution 0 99999 Page 10 of 56 PDF ...
Page 1765: ...FD0001 Fuel supply distribution 0 99999 Page 11 of 56 PDF ...
Page 1773: ...FD0001 Fuel supply distribution 0 99999 Page 19 of 56 PDF ...
Page 1774: ...FD0001 Fuel supply distribution 0 99999 Page 20 of 56 PDF ...
Page 1781: ...FD0001 Fuel supply distribution 0 99999 Page 27 of 56 PDF ...
Page 1782: ...FD0001 Fuel supply distribution 0 99999 Page 28 of 56 PDF ...
Page 1789: ...FD0001 Fuel supply distribution 0 99999 Page 35 of 56 PDF ...
Page 1790: ...FD0001 Fuel supply distribution 0 99999 Page 36 of 56 PDF ...
Page 1797: ...FD0001 Fuel supply distribution 0 99999 Page 43 of 56 PDF ...
Page 1798: ...FD0001 Fuel supply distribution 0 99999 Page 44 of 56 PDF ...
Page 1803: ...FD0001 Fuel supply distribution 0 99999 Page 49 of 56 PDF ...
Page 1804: ...FD0001 Fuel supply distribution 0 99999 Page 50 of 56 PDF ...
Page 1809: ...FD0001 Fuel supply distribution 0 99999 Page 55 of 56 PDF ...

