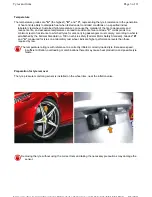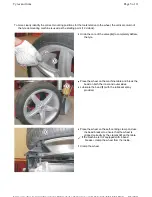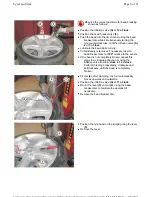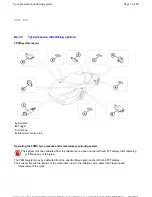
When carrying out regular maintenance or replacing tyres, check the state of the wheel rims.
Visually inspect the external and internal wheel rim surfaces; if cracks or deep gouges are noted, replace the
wheel.
In the case of scratching, minor dents or superficial scuffs, repaint the affected area or, if necessary, the
entire rim. Use the standard procedure for repainting an alloy wheel, applying a coat of silver based paint
then, once the coat had dried to a matte finish, applying a layer of clear coat. Dry the wheel in the oven to
polymerise the layers of paint applied.
Cover the valve mounting and the hub badge when repainting, as the additional thickness of the paint may
impede correct assembly and compromise the effectiveness of the corrosion treatment applied.
Take particular care around the mating surface with the brake disc; this area is only coated with a single layer
of cataphoresis film.
This treatment has a limited lifespan as the film is gradually eroded by fretting between the surfaces. This
area cannot be repainted and a rim with a deteriorated film must be replaced.
Before refitting, always check that the mating surfaces between the wheel and the brake disc are perfectly
clean.
Using inappropriate tools for removing and refitting the tyre may damage the wheel rim and compromise
the protective layer.
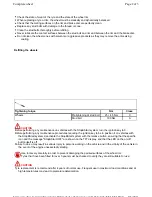
Balance the wheel without the tyre but with the pressure sensor and valve installed: if, after removing the
balancer weights, the values for static balance exceed
36
(including vertical bouncing and wobble), the rim
must be replaced.
Refitting the tyre
Ensure that tyres are not kept in stock for more than 4 years. Tyres may be kept in stock for a maximum
of 4 years, provided that they are kept out of direct sunlight, protected from the weather and humidity
and stored in low oxygen conditions. If necessary, the Ferrari Service Network will verify whether old
tyres are suitable for use. In all cases, tyres mounted on a vehicle for over 3 years must be inspected
by an authorised Ferrari Service Centre.
Tyre replacement is recommend after 4 years of normal use. Frequent use in maximum load conditions
and at high temperatures may lead to premature deterioration.
When removing and refitting tyres, DO NOT use tyre levers which could damage the rim and compromise
its protective layer. Use levers coated in protective material.
Refit the tyre pressure sensor (
D2.03
).
Proceed as follows if the component has already been removed.
Page 8 of 11
Tyres and rims
8/5/2011
https://modiscs.ferrari.it/KnowledgeOnline/index.php?action=mo&link=link::SM_SM_D20...
Summary of Contents for 458 Italia
Page 1: ......
Page 24: ...1 7 Car Bench vehicle bench Copyright 2010 ...
Page 25: ...1 7 Car Bench vehicle bench Copyright 2010 ...
Page 26: ...1 7 Car Bench vehicle bench Copyright 2010 ...
Page 27: ...1 7 Car Bench vehicle bench Copyright 2010 ...
Page 28: ...1 7 Car Bench vehicle bench Copyright 2010 ...
Page 29: ...1 7 Car Bench vehicle bench Copyright 2010 ...
Page 30: ...1 7 Car Bench vehicle bench Copyright 2010 ...
Page 31: ...1 7 Car Bench vehicle bench Copyright 2010 ...
Page 522: ...Hook 95977564 AS 107564 for lifting the gearbox Page 5 of 5 Specific tooling and equipment ...
Page 586: ...In preparation Page 6 of 6 Engine overhaul Disassembly ...
Page 620: ...Perform the Fuel tank tightness test cycle Page 4 of 4 Fuel level sensor ...
Page 967: ...Refit the wheels D2 01 Page 10 of 10 Stabiliser bars Tie rods ...
Page 1127: ...Refit the wheels D2 01 Page 8 of 8 Wheelhouse ...
Page 1167: ...Prise out and remove the plug 4 Undo the nut 5 Undo the nut 6 Page 32 of 37 Doors ...
Page 1242: ...In the LOWEST position two movements are possible Page 8 of 12 Seats ...
Page 1243: ...In the INTERMEDIATE LOW position three movements are possible Page 9 of 12 Seats ...
Page 1244: ...In the INTERMEDIATE HIGH position three movements are possible Page 10 of 12 Seats ...
Page 1549: ...Reconnect the battery F2 01 Page 5 of 5 Starter motor ...
Page 1721: ...Charge the air conditioning system F5 12 Page 5 of 5 Condenser ...
Page 1740: ...Refit Page 13 of 13 A C unit ...
Page 1764: ...FD0001 Fuel supply distribution 0 99999 Page 10 of 56 PDF ...
Page 1765: ...FD0001 Fuel supply distribution 0 99999 Page 11 of 56 PDF ...
Page 1773: ...FD0001 Fuel supply distribution 0 99999 Page 19 of 56 PDF ...
Page 1774: ...FD0001 Fuel supply distribution 0 99999 Page 20 of 56 PDF ...
Page 1781: ...FD0001 Fuel supply distribution 0 99999 Page 27 of 56 PDF ...
Page 1782: ...FD0001 Fuel supply distribution 0 99999 Page 28 of 56 PDF ...
Page 1789: ...FD0001 Fuel supply distribution 0 99999 Page 35 of 56 PDF ...
Page 1790: ...FD0001 Fuel supply distribution 0 99999 Page 36 of 56 PDF ...
Page 1797: ...FD0001 Fuel supply distribution 0 99999 Page 43 of 56 PDF ...
Page 1798: ...FD0001 Fuel supply distribution 0 99999 Page 44 of 56 PDF ...
Page 1803: ...FD0001 Fuel supply distribution 0 99999 Page 49 of 56 PDF ...
Page 1804: ...FD0001 Fuel supply distribution 0 99999 Page 50 of 56 PDF ...
Page 1809: ...FD0001 Fuel supply distribution 0 99999 Page 55 of 56 PDF ...

