D2.02 Tyres
and
rims
Checking the state of the tyres
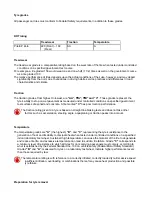
Tyre replacement is recommend after 4 years of normal use. Frequent use in maximum load
conditions and at high temperatures may lead to premature deterioration.
Check the state of the tyres during the scheduled maintenance.
CAUTION
Pressure increases with increasing tyre temperature. Never reduce the tyre pressure if measured when the
tyres are hot.
Tyre overheating due to underinflation may seriously compromise handling and tyre integrity.
Do not inflate the tyres to a pressure other than the specified value, as this would render the tyre pressure
monitoring system useless.
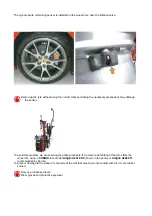
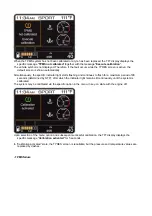
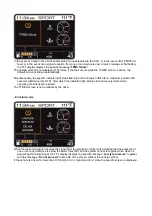
After replacing one or more tyres, always calibrate the tyre pressure monitoring system by pressing the
button on the passenger compartment dome light panel.
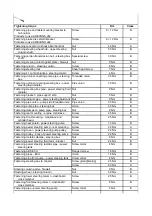
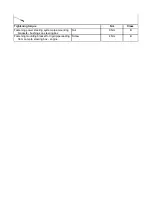
Check the inflation pressure: pressure must be measured with cold tyres and must match the values
specified.
CAUTION
Always inspect any tyre damage very carefully to assess severity: damage may greatly reduce tyre life and
cause accidents.
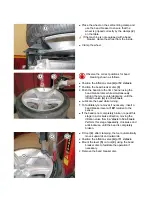
Check the tyres to ensure that there are no signs of damage such as abrasion, cuts, cracks, bubbles etc.
Violent knocks against kerbs, holes or other obstacles and driving on poor road surfaces for extended
periods may cause tyre damage. This damage may not always be visible. Any foreign objects
penetrating the tyre in these conditions may cause structural damage that is only identifiable after
removing the tyre from the wheel.
CAUTION
If the same tyres have been fitted on the vehicle for over 3 years, check frequently and carefully for signs of
deterioration.
Do not monitor the pressure of a damaged tyre.
Tyres will deteriorate even if the vehicle is used rarely or kept stationary. Cracks in the rubber on the tread
and sidewalls, at times accompanied by blisters, are an indication of tyre deterioration.
CAUTION
Never fit a tyre with tread depth under the specified limit, even if only in a single localised area.
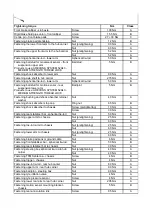
Check the tread depth: the minimum permissible value is
1.7 mm
. This depth is identified by the tyre wear
indicators.
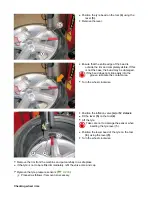
Check the wear over the entire tread; in the event of uneven tread wear, perform static and dynamic wheel
balancing.
Note that once Run Flat tyres have been fitted, the instrument panel must be reprogrammed when
refitting conventional tyres to prevent a warning message from being shown on the TFT display.
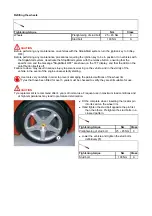
Replace any tyres that have been punctured and/or been inflated with the tyre inflation bottle included with
vehicle toolkit. For safety reasons, we do not recommend attempting to repair punctured tyres.
Summary of Contents for California
Page 19: ...Z Tyre type and pressure label ...
Page 20: ...04 02 Assembly number Assembly number A Assembly number label ...
Page 21: ...04 03 Chassis number Chassis number B Punched chassis number ...
Page 22: ...04 04 Engine type and number Engine type and number C Punched engine type and number ...
Page 23: ...04 05 Chassis number Chassis number D Chassis number ...
Page 24: ...04 06 Gearbox type and number Gearbox type and number E Gearbox type and number plate ...
Page 25: ...04 07 Vehicle identification Vehicle identification K VIN label Vehicle Identification Number ...
Page 28: ...04 10 Fuel Fuel I Fuel label ...
Page 29: ...04 11 Paintwork Paintwork L Paintwork label ...
Page 30: ...04 12 Emissions control Emissions control M Emissions control data label ...
Page 31: ...04 13 Airbag Airbag N Do not install child seat on passenger seat label ...
Page 32: ...04 14 Airbag Airbag O Airbag maintenance label ...
Page 33: ...04 15 Airbag Airbag P Airbag warning label ...
Page 43: ...Fluids and lubricants table Model Fluids and lubricants table Download ...
Page 71: ...Screw the cap A back on tightly ...
Page 104: ...Connect the battery F2 01 ...
Page 118: ...Vehicle Setup Parameter Check Form Model Vehicle Setup Parameter Check Form Download ...
Page 520: ...A DCT gearbox clutch oil tank and clutch oil pump B Clutch oil pipes C Clutch oil radiator ...
Page 623: ...CCM Brake Disc Wear Form Model All Models CCM Brake Disc Wear Form Download ...
Page 1070: ...A Horn button B Engine start button C Manettino ...
Page 1102: ...Perform the respective cycle with the DEIS diagnostic tester ...
Page 1144: ...Connect the battery F2 01 ...
Page 1220: ...Precautions and guidelines for using the RHT retractable hard top ...
Page 1334: ...Undo the indicated fasteners Retrieve the indicated shims Release the clip 1 ...
Page 1335: ...Remove the indicated clip Undo the indicated screw Undo the screws indicated ...
Page 1452: ...Refit the rear wheelhouses E3 05 Connect the battery F2 01 ...
Page 1453: ...F2 07 Lights Diagnosing condensation in headlamps ...
Page 1561: ...Ss Sensor signal λ Lambda ratio excess g Rich mixture M Lean mixture ...
Page 1570: ...Refit the DCT gearbox C2 03 Connect the battery F2 01 ...
Page 1656: ...G Heater evaporator H Pollen filter I Air vents M Expansion valve ...
Page 1677: ...Refit the front wheelhouses E3 05 ...
Page 1686: ...Refit the caps 1 Refit the engine compartment cosmetic shields E3 13 ...

