background image

Instruction manual


Aluminum rolling-up door


ALU

MINUM R

OLLING

-UP DOOR


MOT-A14 

Rev.1


Summary of Contents for Aluminum Rolling Up High Speed Door

Page 1: ...Instruction manual Aluminum rolling up door ALUMINUM ROLLING UP DOOR MOT A14 Rev 1 ...

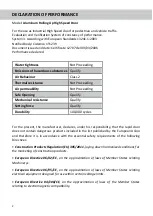
Page 2: ...Qualify Durability 100 000 cycles For the present the manufacturer declares under his responsibility that the rapid door does not contain dangerous products included in the list published by the European Union and therefore it is in accordance with the essential safety requirements of the following Directives Construction Products Regulation EU 305 2011 laying down harmonized conditions for the ma...

Page 3: ...evention of unexpected star up UNE EN 60204 1 2007 A1 2009 Safety of machinery Electrical Equipment of Machines Part 1 General Requirements UNE EN 61000 6 2 2006 Electromagnetic compatibility EMC Part 6 Generic standards Section 2 Inmunity for industrial environments UNE EN 61000 6 3 2007 Electromagnetic compatibility EMC Part 6 Generic standards Section 3 Emission standard for residential commerc...

Page 4: ...IDENTIFICATION CARD 4 ...

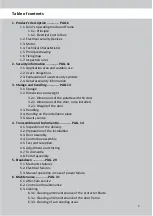
Page 5: ...with the door 3 2 2 Dimensions of the door once installed 3 2 3 Weight of the door 3 3 Handling 3 4 Handing on the installation place 3 5 Gravity centre 4 To assemble and to dismantle PAG 14 4 1 Inspection of the delivery 4 2 Preparation of the installation 4 3 Door assembly 4 4 Control box assembly 4 5 Test and reception 4 6 Adjustment and starting 4 7 To dismantle 4 8 End of assembly 5 Breakdown...

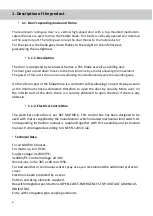
Page 6: ... its way as soon as the minimum chock is detected therefore to open the door by security More over on the inferior part of the door there is a security photocell to open the door if there is any obstacle 1 1 2 Electrical Control Box The electrical control box is our Ref MATRIX 6 This control box has been designed to be used with motors supplied by the manufacturer which included mechanical limit s...

Page 7: ...nternal test is done on the photocell and the electrical control box security category Nº2 according to the DIN EN 954 1 rule In case of technical failure and for security reasons the door will be automatically rolled up If the contact of the safety edge is damaged the door will be also automatically rolled up for security reasons Photocell and safety edge must to be controlled per authorised staf...

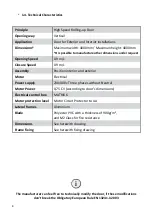
Page 8: ... exterior Motor Electrical Power supply 230 400v Three phases without Neutral Motor Power 0 75 CV According to door s dimensions Electrical control box MATRIX 6 Motor protection level Motor Circuit Protector to 4A Lateral frames Aluminium Blade Polyester PVC with a thickness of 900g m2 and M2 Class for fire resistance Dimensions See herewith drawing Frame fixing See herewith fixing drawing The man...

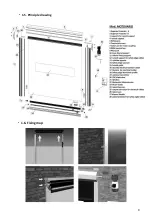
Page 9: ... 1 5 Principle drawing 1 6 Fixing map 9 ...

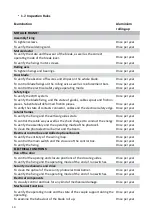
Page 10: ... and the vertical guides state Once per year To control the cable way as well as the chain charged to conduct the energy Once per year To verify the assembly and the operating mode of the photocell Once per year To clean the photoelectrical barrier and the beam Once per year Electrical control box and Added optional boards To verify the entirety of the wiring map Once per year To control the main ...

Page 11: ...d to keep them The user has to specially check that The installation the starting the inspection the maintaining the repair the dismantle have to be only done by staff authorised by the manufacturer or by competent staff Only authorised and enough experimented staff activate the high speed door The door must be only used according to expected application see previously The door must only be used i...

Page 12: ...hen you have to use the crank supplied for this purpose During the door s operating don t touch lateral parts The door operating area has to be free of people These doors are destined to staff circulation Don t run across the door opening Cross it upright and at a normal speed Maintain clean the area close to the door operating Otherwise accidents can occur Don t climb up the high speed door Don t...

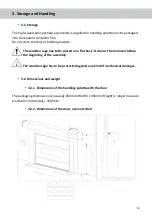
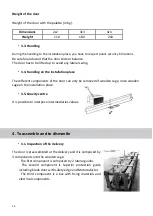
Page 13: ... cage has to be placed on a flat basis It doesn t be removed before the beginning of the assembly The wooden cage has to be protected against any kind of mechanical damages 3 2 Dimensions and weight 3 2 1 Dimensions of the handling palette with the door The packaging dimensions are usually 450mm Width x 450mm Height x longer measure vertical or horizontal 1000mm 3 2 2 Dimensions of the door once i...

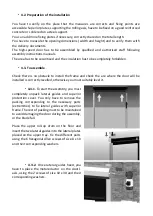
Page 14: ...ent components of the door can only be removed of wooden cage once wooden cage on the installation place 3 5 Gravity centre It is possible to interpose intermediaries values 4 To assemble and to dismantle 4 1 Inspection of the delivery The door is preassembled at the delivery and it is composed by 3 components into the wooden cage The first component is composed by 2 lateral guides The second comp...

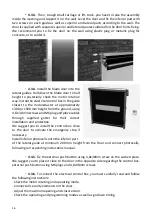
Page 15: ... is no obstacle to install the frame and check the are where the door will be installed is correctly levelled otherwise you must suitably level it 4 3 1 To start the assembly you must completely unpack lateral guides and superior protection cover You only have to remove the packing corresponding to the necessary parts extremities to fix lateral guides with superior frame The rest of packing must t...

Page 16: ...using 4 8 x 38mm screws and M6 plug and place cables through supplied gutter for their correct installation and protection We suggest you to install the control box close to the door to activate the emergency stop if necessary Install inferior photocells onto the inferior part of the lateral guide at minimum 200 mm height from the floor and connect photocells following corresponding instructions m...

Page 17: ...ure combining with safety edge protector Automatic detection and handling of three different safety edges types 8K2 Normally active contact Automatic closure After a waiting time adjustable from 1 up to 90 seconds as maximum The time can be reduced interrupting the photocell light beam it can be interrupted with auxiliary switch Connection to supply external devices Terminal block with indication ...

Page 18: ...minal Check on the central part of themotherboard that operating power supply cables are in 230V and 0V terminals Motor and break To connect the motor to the motherboard you have to connect the 3 phases of the motor to U V and W terminals and the ground cable to the corresponding terminal Cables of the motor break s rectifier must to be connected to the terminal indicated as FRENO on terminal bloc...

Page 19: ...ll electronic board will light on In order to verify that it operates correctly you have to pass the hand to cut the light beam and the signal LED will be immediately lighted and you could heard a small click from the contact change status CONNECTION ON CONTROL BOX RED Cable 5 AC Terminal BLACK Cable 6 AC Terminal GREEN Cable 10 Photocell Terminal YELLOWCable 9 Photocell Terminal GREEN YELLOW BLAC...

Page 20: ...the suitable place 7 Wire the power supply the test input and the receiver output to the control box 8 Activate the power supply 9 Make a test with the connected safety edge with door in different positions mainly close to the opening and closure position 10 We recommend to follow step 1 to 4 before to install the device Respect a minimum distance of 1m between transmitter and receiver to have the...

Page 21: ...On the control box you have to connect the 3 cables to the Up Down and Common 13 Brown 14 Blue 15 Red corresponding terminals In order to adjust the limit switch to the wished measure you have to follow these steps Once the control box motoreductor and limit switch are wired you have to Adjust micro switches turning the screw with the cam up placing it according to the drawing horizontal position ...

Page 22: ...on to the stop between 0 and 1 sec Switches Note switch in up position is considered as ON position 1 To activate traffic light or flash light 2 To activate present man 3 To activate automatic go down 4 To activate the magnetic loop 5 To activate the 3º micro switch of the end run to disconnect previous photocell In OFF position the frequency inverter function is activated It must be installed Jum...

Page 23: ...n external All additional opening must to be connected in parallel to the alternative push button Pull cord Install it on the wished place and connect 2 cables to terminals indicated as plusador alternativo on the control box and to 23 and 24 N O contact of the pull cord Remote control receiver card Install the box on the place indicated as X5 on the control box To connect transmitter and receiver...

Page 24: ...acle and at a height between 4 and 4 9 m Use the radar box screws pattern to drill holes In case of doubt the box includes the complete manufacturer s manual Power supply 24V White and Brown to terminals 5 and 6 Opening signal contact NO Contact 24V flash lights Place light in the wished place Connect light terminals to 1 and 6 terminals on the control box Make a bridge between 2 and 5 terminals o...

Page 25: ...n Present man or Timer mode The connection to supply external devices 230V 400V with N mains up to 1A maximum consumption 24 VDC up to 150mA Note The operating tests must be always done by qualified staff and always after to adjust limit switches and to connect security systems previously disconnected for up and down adjustments The assembly area are must be cleaned after the door installation 4 6...

Page 26: ...fter waiting time which is adjustable between 1 and 90 seconds as maximum Waiting time can be reduced will be stopped interrupting a photocell light beam Can be interrupted with an additional switch Connection for external devices supply Terminal block with indication to connect all devices Cover includes 3 push buttons to go UP DOWN and EMERGENCY STOP Additional connections for control devices 1 ...

Page 27: ... connected to the terminal with FRENO indication Before operating with the door check that engine plates are at 230V III position 1 1 4 Frequency converter set up Opening speed set up Press MENU button on the frequency converter and by turning and pressing in the middle of the wheel go to following parameter 1CV converters RDY CONF HSP 65 adjustable from 50 to 75 2 and 3CV converters RDY SET HSP 6...

Page 28: ...e dashboard that supply wires are in 230V and 0V terminal Engine and brake To connect engine with frequency converter you have to connect the engine 3 phases to U V and W terminals and the earthing cable to the corresponding terminal Brake rectifier cables must be connected to 5 and 6 terminals There is a yellow indicator on the terminal UPS supply UPS supply comes directly from a plug located in ...

Page 29: ...nd 3CV converters RDY FUN P55 SP2 30 adjustable from 15 to 45 Rest of frequency converter options must not be modified as they are adjustments for the proper door functioning 5 Errors To avoid to damage the door or to hurt to somebody during the door s repair it is very important to respect following points You have to rectify the error through authorised staff Firstly be sure that the door is pro...

Page 30: ...rrected please contact the After Sale service of the supplier or the manufacturer 5 3 Manual operation in case of power failure Manual operating opening and closing in case of power cut withoutU P S Unit Power Supplier 1 Be sure that there is no electrical supply to the electrical enclosure Move general Switch located in the electrical enclosure door to OFF position 2 Take allen key supplied toget...

Page 31: ...3 Cleaning Don t use detergent for the crystal because of its aggressive components Do never use abrasives scrappers razor blades putty knife etc Use heat water with a small quantity of soft cleaning agent for plastic and a clean duster flexible and not fluffy 6 3 1 Cleaning and maintenance of the protector blade Clean with hot water and detergent recommended for plastic surface Use a clean chamoi...

Page 32: ...ALUMINUM ROLLING UP DOOR ...

Reviews: