MACHINES AND
ACCESSORIES
Page 24 of 41
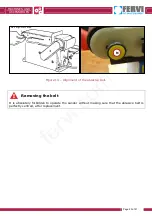
Figure 13 – Assembling the abrasive disc.
3. Move the lever (M) to the left (on the side of the electric motor) to apply tension to the
abrasive belt.
4. Insert the power plug and then turn on and turn off the machine immediately to check
if the belt slips on the rollers (see section 10 for instructions for switching the machine
on/off).
5. If the belt tends to slip off, moving towards the abrasive disc, turn the alignment knob
(N) clockwise with a ¼ turn (Figure 14), and then restart the machine for a few
seconds and see if the belt still slips.
6. Conversely, if the belt slips in the opposite direction to the abrasive disc, turn the
alignment knob (N) anti-clockwise with a ¼ turn (Figure 14), and then restart the
machine for a few seconds and see if the belt still slips.
Obviously, the belt is properly adjusted when it reaches a state of equilibrium, in which
it is stable in the centre during rotation.
Secondary roller
Belt
tensión
lever
Drive roller
Rotation
direction
Abrasive belt
Locking
screw
fervi.com


